Restoration of paintings on canvas do-it-yourself
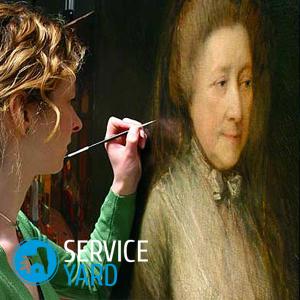
Canvas painting is a traditional interior decoration. True, it performs its function only if it is in perfect condition. Alas, various troubles happen with picturesque canvases. They darken, change color, tear. Do-it-yourself restoration of paintings on canvas - is this possible? In some cases, quite. About when and how to do this will be discussed in our article.
to contents ↑Important! Unfortunately, over time, not only art objects but also other parts of the interior that are dear to the heart need restoration. How to do it right, read in our other materials:
At home or in the workshop?
Restoration of the painting at home is a rather complicated process, requiring knowledge of the painting technology, the properties of materials, as well as accuracy and attention. Therefore, it is not always possible. If a canvas of artistic or historical value is damaged, it is better to contact the workshop, especially if not only the back, but also the front side is damaged.
This pleasure is not cheap, but you can be absolutely sure that specialists will do everything as they should. But a reproduction on canvas or a cheap copy that looks good on the wall, but does not have special value in itself, you can try to restore it yourself.
to contents ↑Most frequent damage
What is an amateur restorer most often dealing with? With the following issues:
- The canvas broke and a hole appeared in the picture.
- The lacquer darkened.
- Paints have changed their color.
- An aggressive chemical substance fell on the picture, and part of the image dissolved.
Breaks
Damage to the canvas is very different from each other in size and shape. The simplest option is a nail hole. It has a more or less regular shape and short length. Not too much trouble will bring a long straight cut. But much more often you have to deal with large holes of the most bizarre kind:
- angular;
- in the form of steps;
- in the form of a hole with rays.
As a rule, a canvas, unless it is specially cut, is torn in the direction of the threads. A lot depends on the quality of the material. Canvas happens:
- thin;
- medium thickness;
- thick and thick.
What to fight?
Of course, thin material breaks more often, but it is easier to restore it. If the fabric is thick, then it, before tearing, is strongly abraded and stretched. The most common causes are:
- mold;
- swipe.
Important! The appearance of such a gap most often does not inspire hope for a favorable outcome, because around the hole you will find that once a smooth surface became a curve. Bulges are formed not only on the canvas itself. They damage the soil layer, and in the most severe cases, they switch to the colorful one, which begins to crumble. The approach to the restoration of paintings on canvas with your own hands will be different in each of these cases.
Option 1
If the cause was a mechanical impact, the canvas will simply straighten out, close the hole, and only then restore the layer of soil, paint and varnish.
Option 2
When mold becomes the cause of a serious gap and the appearance of bulges, for a start you will have to get rid of the fungus, and only then do all other restoration work, otherwise there will be no sense from them.
to contents ↑Important! The fungus in the house is not only not pleasant from an aesthetic point of view, but also very dangerous to health. Fungi throw out spores that cause many respiratory diseases and more. For this reason, the destruction of this parasite is the number 1 task for any owners. How to do this efficiently and immediately, you will learn from the article: "How to get rid of mold in an apartment on the walls at home."
When to restore?
If you have to restore the painting yourself, the question immediately arises: when do you need to do this? The answer is simple. As soon as you notice that the canvas is damaged.
The fact is that a direct breakthrough is easy to close up, as they say, in hot pursuit. At the moment when it was formed, nothing else could happen to the canvas, the edges of the holes, which the restorers call the sides, easily converge. Therefore, it is not difficult to connect them. But over time, the edges stop connecting. The force of tension acts on the canvas, under its influence the picture gradually bends and takes the form of a boat.
to contents ↑Important! It is especially difficult to dock the sides if the hole is in the middle. Therefore, it is definitely not worth putting off the record.
Urgent conservation
So, if you accidentally dropped an iron or poked it with a chair leg when moving to your unhappy picture, you need to take action immediately. This, of course, is not a restoration, but the deformation of the canvas and the shedding of paint must be prevented. You will need:
- paper;
- scissors;
- PVA glue or fish. .
Further actions are elementary.
- Estimate by eye what shape the patch will be needed for you - it should protrude from the sides of the gap by at least 0.5 cm, but better - more.
- Cut the appropriate paper blank - thick but not particularly thick. Normal office is quite suitable.
- Lubricate it with glue.
- Align the edges of the hole well.
- Glue a patch on the front of the picture.
to contents ↑Important! This measure will not help restore the paint layer, but will allow the painting to wait until you have time and opportunity for this. For several days and even weeks, this is quite enough.
What should I refuse?
Restorers often have to deal with the consequences of amateur restoration of paintings. For example, canvases quite often come across in which a convexity is clearly visible on the front part. An experienced master will immediately determine that on the reverse side there is a patch on this very spot, and it was put by a not very qualified person.
Such a patch is put very simply - on the back side a piece of canvas is glued to the canvas, sometimes another layer of putty is applied. If you are going to restore the picture in this way - immediately abandon this idea. Even if you pull out several patches of filaments from the edges in order to somehow offset the difference in the thickness of the canvas, the patch will be perfectly visible from the image side.
Some other methods should not be used:
- stitch the edges and putty the gap:
- apply oil putty on the wrong side;
- use gauze and paper for permanent patches - they can be set only as temporary so that the edges do not sprawl.
What measures can be applied?
Despite the dislike of restorers for patches, they have to be installed quite often. But there are other repair methods:
- weaving and gluing;
- duplication of the canvas.
to contents ↑Important! The first method of restoration of a picture on canvas is applied if the gap is small.For example, in this way you can close a hole from a nail. The second option is for serious damage (for example, if the picture is small and the tear length is more than 40 cm).
Small breakthroughs
To seal a nail hole, you will need:
- an awl or a thick needle;
- fish glue;
- cigarette paper;
- thick paper;
- iron.
Important! In order not to solve later problems with torn, spoiled or simply looking “in any way” objects of art, it’s worth learning a few rules that will help to hang the pictures correctly:
Reception is not the easiest, but usually gives good results. If you are doing restoration for the first time, you will have to apply maximum patience and accuracy:
- Put the picture on the table with a colorful layer up.
- With a needle or awl, untwist the ends of the threads along the edges of the gap - you need to tear them as much as possible.
- Twist the fibers of threads located on opposite sides of the gap as densely and often as possible.
- Lubricate the gap and adjacent areas of paint with fish glue.
- Cover the gap with a piece of tissue paper.
- Wait for the glue to dry.
- Smooth the gap through a piece of thick paper.
- Let the iron cool.
- Put it back in place of the gap (or put another heavy object there as a press).
- Wait a day, then flip the picture.
- If there is a small dent left, plaster it.
- Let the putty dry.
- Flatten it with the tip of a knife.
- Remove the tissue paper.
- Carefully remove the glue, being careful not to soak it at the breakout site.
Important! Make sure that the picture does not stick to the table - when the glue begins to dry, it just needs to be moved.
Putty production
Do not use building and general store putty. It’s best to do it yourself. You need:
- pigment - chalk or ocher;
- fish glue.
Mix the ingredients so that you get a composition with the consistency of thick sour cream, and coat the dent with an even layer.
Important! However, such material is suitable not only for restoration, but something new can also be created from it. Read more about building materials suitable for creativity, read on our blogs:
Tar restoration
As an adhesive, you can use not only fish glue, but also a special resin:
- dammar mastic;
- rosin.
The technology will be a little different. As in the previous case, you need to maximize dishevele the threads and weave the fibers. Then you need to act like this:
- Put on the breakthrough place, cover with paper.
- Iron it and smooth out irregularities.
- Apply a piece of rosin or mastic to the fibers.
- Melt the tar with the tip of a warm iron.
- If you do everything carefully, you will not need to prime the area to restore the colors.
to contents ↑Important! Try not to touch the areas covered with paint with the iron.
Patches
Restoring paintings on canvas with your own hands using patches requires some preparation, which novice restorers usually do not even think about. For example, a new canvas should not be used for patches - it will certainly pull down the place on which it will be pasted, with all the sad consequences arising from this. Therefore, you need to remove the glued second canvas and use it for patches. For many years he was in the same picture, the same conditions acted on him, so that he had already managed to acquire the properties necessary in this case.
If for some reason it is impossible to use the old pasted canvas, then well, you have to be content with others. At the same time, it should correspond to the thickness of the material on which the picture is painted.And it must first be washed, and also a few more actions should be done with it:
- boil;
- degrease;
- boil sizing;
- to dry;
- iron well.
Glue a patch
If you have several paintings at home, there should be several types of material for patches. It is impossible to restore a canvas painted on a thick canvas with a thin patch, as well as vice versa. Therefore, at home there should be shreds of at least three types:
- thin;
- medium;
- thick ones.
If you have already selected the material and done with it everything that is required in such cases, you can proceed with the repair. You need:
- shreds;
- board;
- nails
- fish glue;
- honey;
- cigarette paper.
Here's how the restoration of paintings on canvas do it yourself in this case:
- Put prepared shreds on the board.
- Fix the edges with nails - the canvas should not curl.
- Prepare the composition by mixing fish glue and honey in a 1: 1 ratio.
- Soak the flap twice with the resulting composition.
- You should get a sticky glossy surface - honey is needed so that the picture after the restoration is not pulled together.
- Lay the painting face up on the table or floor.
- Align the edges of the gap as much as possible.
- Twist the fibers as far as possible.
- If the canvas is hard and cannot be smoothed out by hand, slightly moisten it, stretch it, align the edges and place a cold iron or other heavy object on them.
- When the sides align, stick tissue paper on the breakout spot.
- Cover it with thick paper.
- Place the press and do not remove it until the glue has dried (the tissue paper will again turn white, as it was before soaking it with glue).
- Flip the picture.
- Clean the patch area - on the back of the picture there may be all sorts of surprises, such as the accumulation of dust, oil, or some other substance that will prevent the patch from sticking well.
- Scrape off the dirt.
- If possible, remove the nodules, droplets of glue and everything else that may interfere with you - this is best done with a sharp knife.
- Cut the patch in the shape of the hole - it should not go beyond the gap more than a couple of centimeters.
- Spread the patch with the same adhesive that you glued it to.
- Let the glue dry a little.
- Apply a patch to the gap.
- Iron it without pressing the edges of the patch.
- When the flap dries, turn the picture over.
- Remove tissue paper and glue.
to contents ↑Important! All work is best done on a smooth marble or wooden board.
Special cases
If the damaged picture has lain for some time and it is not possible to combine the edges of the gap, one has to look for other ways out. There can be two situations:
- the canvas has sat down, and the edges do not converge;
- the canvas is stretched, and one edge lays on the other.
In the first case, the material needs to be stretched, in the second - to plant, for which a wooden lining with a convex surface is used, the shape of which corresponds to the curvature of the canvas. The picture is placed face up, under it is a lining, which is placed on another plank. But this is a complex procedure that is hardly to be applied to an amateur restorer.
to contents ↑If pieces of soil and paint have fallen out
Repair of the canvas is far from the only, besides, not the most difficult problem that an amateur restorer may encounter. Much worse if pieces of soil or paint have fallen out. Anyway, you will have to apply the paints separately, but if the soil is damaged and a recess has formed, it can be repaired with the same canvas, cutting out a small piece in shape. First, paste it, and only then attach the patch. Mastic should not be used.
to contents ↑If the picture is darkened
In fact, canvas repair is the only thing that an amateur restorer can cope without much damage to the picture. With other troubles it is better to go to the workshop right away.If, for example, varnish is cloudy and you certainly want to remove it, you must know exactly its composition and the possibilities of using certain solvents.
So it is with paints. Each master has his own secrets, and only an experienced restorer, who knows his job well, can figure it out. Before starting restoration, the master carefully examines the picture - determines the composition of varnish and paints, carefully examining even the smallest particles. Very often, the examination is carried out using special devices that give radiation of a particular spectrum.
to contents ↑Important! If you tried to restore the painting, you learned even more, you had a desire to open something, learn more about what improvable little things you can create something beautiful from:
Stock footage
Even if the picture was painted by your ancestor, who was an amateur artist, it is just a family memory for you, and, in your opinion, does not represent any value - do not rush to clean it yourself and paint over the dull places. It is entirely possible that this painting is of historical interest, too, and your inept actions will lead to the loss of an exhibit that could well have found a worthy place - if not in the Hermitage, then in the local history museum. Each item from the past opens the page of life of a certain era and needs a careful attitude.
- Paintings in the bedroom over the bed in feng shui
- DIY sand paintings
- How to hang pictures on the wall - options
- How to paint a frame for a picture?
- DIY coffee beans
- Volumetric paintings do-it-yourself from putty
- DIY plaster paintings
- DIY artificial flower paintings
- How to get rid of mold in the apartment on the walls at home?
- DIY mirror restoration
- Do-it-yourself furniture restoration
- DIY floor lamp restoration


