DIY heating radiators
Starting the construction of a house, a good owner provides for expenses not only on the actual construction, but also on communication. Costs can be slightly reduced if some of the heating equipment is done by ourselves, since the necessary materials can be found not only in construction stores, but even in your own barn or landfill. Do-it-yourself heating radiators are time-consuming, but quite affordable, which you will learn about from our article.
to contents ↑Where will he stand?
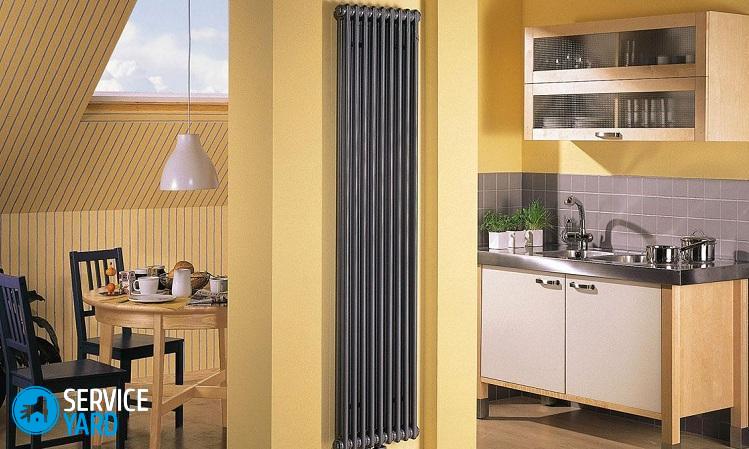
Before you make a heating radiator with your own hands, think about where it will be. Such a unit can very well heat the room, but it is quite difficult to make it an interior decoration. However, it all depends on the style, and it is possible that you can install your creation even in the living room.
However, most often, such products can be seen in the premises of workshops or warehouses, that is, where a particularly spectacular design is not needed.
to contents ↑Important! If you are going to make several batteries, start with those that will heat the basement or the corridor, see what you get, and only then decide if they are needed in other rooms.
Pros of homemade radiators
The main advantage of a homemade battery is the extremely low price, despite the fact that it is a full-fledged and highly efficient unit. They are made of wide pipes. They can:
- interconnected by jumpers;
- made from bent pipes.
If we talk about other advantages, they are as follows:
- you can use pipes that were already in use;
- the design allows such devices to work in systems with both natural and forced circulation;
- if you put a heater and a temperature controller, the unit will be able to work autonomously.
disadvantages
Before deciding to do something, you need to learn as much as possible about the shortcomings of your future creation:
- To make such a thing, you need to have a welding machine and be able to work with it.
- Particular attention must be paid to the quality of the welds - they must be very reliable, because the heat carrier is supplied under high pressure to the radiator.
- Compared to industrial-made radiators, the home-made heat transfer is rather low.
- Homemade radiators can only be used in a private house, they can not be placed in apartments.
Therefore, starting such a business makes sense only if the owners of the future home are very limited in funds. A good reason to start manufacturing batteries if you can get materials for free or at an extremely low price.
to contents ↑Important! Homemade batteries do not meet the safety requirements that heating devices must meet in urban high-rise buildings.
Heating register
The easiest option for a home-made battery is the heating register. The unit is made of several pipes welded together. The radiator works in the same way as the most ordinary central heating battery:
- The pipes are filled with coolant.
- The coolant heats the metal.
- From heated metal, heat spreads throughout the room.
Heating registers can be:
- single tube;
- from several pipes.
According to the installation method, they are divided into two types:
- wall mounted;
- outdoor.
to contents ↑Important! Similar constructions were installed in the bathrooms of old houses - once heated towel rails looked like that.
Bent and sectional
Do-it-yourself heating registers can be of two types:
- bent, or serpentine;
- sectional.
Sectional Radiators
From the name it follows that the unit consists of several sections. It is made of wide pipes that are arranged in parallel. Stubs are placed at the ends. Sections are connected by thinner tubes. The coolant enters and exits through the nozzles - they must be at the edges.
So that the structure does not fall apart at the slightest touch, the pipes are connected by jumpers. They are also needed for another purpose - to increase the area of the heated metal, and, accordingly, increase the heat transfer. First, the coolant enters the pipe located at the top, then through the pipe enters the compartment, which is at a lower level, then it fills all the pipes and goes to the next section.
Important! The system must withstand a pressure of 13 atmospheres.
Coils
Bent structures are arranged somewhat easier than sectional ones. You have seen them repeatedly - these are the most modern heated towel rails, which are mostly installed in bathrooms of new homes.
Serpentine radiators have a lot of advantages over sectional:
- simplicity and strength of construction;
- comparative ease of installation, if it is possible to get bent pipes;
- greater efficiency, since there is practically no hydraulic resistance.
to contents ↑Important! The coil is made of straight and bent pipes of the same diameter. Hot water moves through them without any obstacles. To increase the strength of the structure, put jumpers from the reinforcement.
We calculate the radiator
What size will your sectional heating radiator be? It depends, first of all, on the size of the room, as well as the length of the sections. In many industrial premises, you can see pipes along the entire length of the wall - there can be only two of them. If you want the battery to occupy a smaller area, you can make it out of more short pipes.
Jumpers are placed near the ends so that there is no interference with the free movement of the coolant.
to contents ↑Important! Do not use pipes of different diameters for sections - there will be hydraulic resistance, which will certainly affect the strength of the structure.
Make a radiator
Have you already decided on the design and weighed all the pros and cons? Sumptuously! With the coil, everything is quite simple, so let's try to make a sectional heating radiator with our own hands for a large room. For example, you can build a 3 m wide battery in a four-pipe design.
You will need:
- pipe 110-120 mm - 12 m (4 pieces of 3 m);
- stainless steel sheet for plugs;
- metal water pipe - jumpers will be made from it;
- building fittings;
- threaded fittings.
Of course, this design cannot be assembled with bare hands - you need tools. The set is small but serious:
- Bulgarian;
- angle grinder;
- welding machine (will it be gas or electric - it does not matter).
If everything is ready, you can start assembling a heating radiator with your own hands:
- Cut the pipe pieces to the desired length.
- Grind the ends with a grinder so that the slices are even.
- Cut the water pipe into pieces 5-10 mm longer than the diameter of the bridge section, also process.
- Cut round caps from a stainless steel sheet - there should be 8 of them.
- Mark the places for the jumpers on wide pipes - the more there are, the more durable and efficient the radiator will be, however, only on condition that the seams are of high quality.
- Cut holes.
- Weld the jumpers.
- Weld a few more jumpers from the fittings to make the structure more reliable.
- When the main part of the battery is assembled, weld the caps.
- Trim plugs by cutting off excess metal.
Fitting fitting
Insert fittings into the two end caps:
- Determine how coolant will flow into your battery.
- Select a fitting layout.
Depending on how hot water moves through your system, you can choose one of the following schemes:
- lateral;
- diagonal
- lower.
In the first case, the fittings crashed on one side into the upper and lower plugs, in the second - on the one hand into the uppermost, on the other - into the lowest. With the lower type of connection, the nodes cut into the two plugs of the section located below.
to contents ↑Appearance
After all the nodes are in place, clean your creation so that it looks worthy. It is very useful to paint - in this way you will kill three birds with one stone:
- give your product a spectacular look;
- improve the quality of heat transfer;
- protect from corrosion.
to contents ↑Important! It is most useful to use white paint.
Testing
No complex device can be connected to the system without preliminary tests. A homemade heating radiator is no exception. Testing is done simply - the containers are filled with water. You should carefully inspect all the seams and make sure that they do not leak.
to contents ↑Important! The best way is to fill the system with pressurized water. You can, for example, connect it to the water supply and open the tap at full power. If the system has passed the tests, it can be installed and connected to the heating system.
Installation
In old houses, installing a homemade radiator is quite simple if you have a welding machine. The pipes there are metal. Another thing is a modern house with modern systems that use narrow plastic pipes. The circulation is provided by the pump. There is nothing wrong with this, but your main task is to securely attach your product to the pipe outlets. Your structure should also be fixed to the wall firmly so that it does not fall and break the plastic:
- The most convenient thing is to attach it to the wall on metal pins. The pins should be thoroughly driven.
- There is a second option - installation on metal supports directly on the floor.
Stock footage
In a word, any master who has already mastered with a welding machine can provide non-residential premises with heat using a home-made unit. There is nothing prohibitively complicated in this process, but your main motto is reliability!
- How to make a warm floor in a private house?
- Heated floor from central heating in the apartment
- Do-it-yourself warm water baseboard
- Wall decoration with MDF panels
- Laminate wall decoration
- Do-it-yourself wall covering with plastic panels
- How to choose a wallpaper?
- Tile and laminate flooring design
- Designer floor
- Liquid glass for the floor


