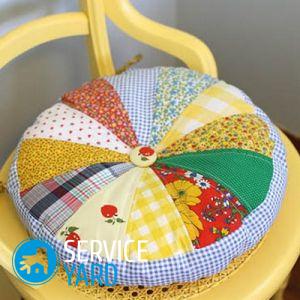
DIY pillows for chairs

Surely many in the house have a chair that has long since lost its pristine appearance, but for some reason throwing it away simply does not turn the hand, for example, because of the memories associated with this piece of furniture. However, you can do without such radical methods, and the pillow for the chair made by yourself will help you with this. Its use, firstly, will again make the chair attractive, and secondly, sitting on it will become much more convenient. Also, do not forget about such an important aspect today as cost savings. And a thing done independently will raise the mistress in the eyes of all family members. Let’s figure out how to make pillows on chairs with your own hands.
to contents ↑Handicraft Features
An old, well-known proverb rightly says that before cutting, it is worth measuring 7 times - all this is also true for sewing pillows on a chair. The first step here will be measurements, which must necessarily take into account the height of the future product.
Important! Do not make it too high, as in this case it will be uncomfortable to sit on it.
In addition, too much filler during use can be unevenly distributed over the pillow, as a result - the chair will again be ugly in appearance. From this we can conclude: that the product was convenient, practical and durable, the cover must be filled in moderation.
to contents ↑Important! In order for the result to be worthy, it will not be out of place to initially put the chair itself in order - those parts that will not be covered with fabric. To do this, we offer you ways to help you:
What is required?
In order to sew a pillow on a chair with your own hands, you will need such materials:
- Some kind of thick fabric. Here it is advisable to avoid light and bright shades - if there are children in the house, and indeed, with constant use, such a pillow will require frequent washing.
Important! Well, such a moment as harmony should not be overlooked - the material used should fit into the general style of the room.
- Filler. A synthetic winterizer, cotton wool, holofiber, micro-balls made of foam plastic and even buckwheat husk are perfect for this.
- The cord with which you will beat the edging.
- Lightning, which will make it possible to change or add filler.
- Tape for ties, as well as decorative clips for ribbons.
- Flat buttons.
In addition to materials, you will also need some tools:
- Sewing machine.
- Centimeter.
- Scissors.
- Threads.
- Needles.
to contents ↑Important! The patterns can be made from old newspapers, and the new fabric must be washed and ironed before starting work. If this is not done, then the finished “cover” may sit down after the first wash.
Cut
The next stage of work is cutting fabric. For this:
- Lay out a newspaper template on the fabric by attaching it with pins.
- Circle the stencil with a thin bar of soap or chalk.
Important! From all four sides, add 2 cm to the seams and a few centimeters to the height of the pillow, because the savings here are not entirely appropriate.
- After the marking is completed, proceed to the pattern of the material of the two main parts of the product - the front side and the back.
to contents ↑Important! For identical parts, you should immediately mark the sides - this will make it possible not to get confused in the future.
Sewing
It is time to move on to connecting the parts:
- First, process all the edges of the fabric elements so that they do not crumble later. This is best done with a zigzag or overlock.
- Make a backrest edging - fold the edging cord with the allowance line on the front side, and then sew on the sewing machine.
- Sew the tape to the edging - here it is better to walk at the seams several times.
Important! It is worth remembering that the pillow should be tied to the legs of the chair as tightly as possible so that it does not move during use.
- Fold the front sides of the two parts along the edge that is adjacent to the back of the chair: stitch 3 cm in the direction from the corners to the middle, and sew the zipper into the remaining space.
Important! So that the line on the finished pillow does not catch the eye, you should lay it as close as possible to the edging.
- Having previously unzipped, fold the 3 remaining sides to each other on the wrong side, and then sew them on a typewriter.
- Again, turn the pillow on the front side and cut the edging in the corners - this must be done so that the fabric does not wrinkle.
- Now it remains only to fill the inside with filler. In order for the packing not to stray, and the product itself to be stronger, you can quilted it with buttons. For this, the flat types of buttons that need to be sewn on the front side of the product, placing them in 2-3 rows and slightly “drowning” in the surface, are best suited.
to contents ↑Important! In order to successfully complete your creative experiment and update not one chair, but several pieces of furniture, give them a new design, use the following ideas:
Stock footage
As you can see, the process of creating pillows on chairs with your own hands completely uncomplicated. Even those who have minimal sewing skills will cope with this task. As a result, you will receive a convenient and practical product that can decorate a chair that has lost its attractive appearance.


