DIY wood chair repair

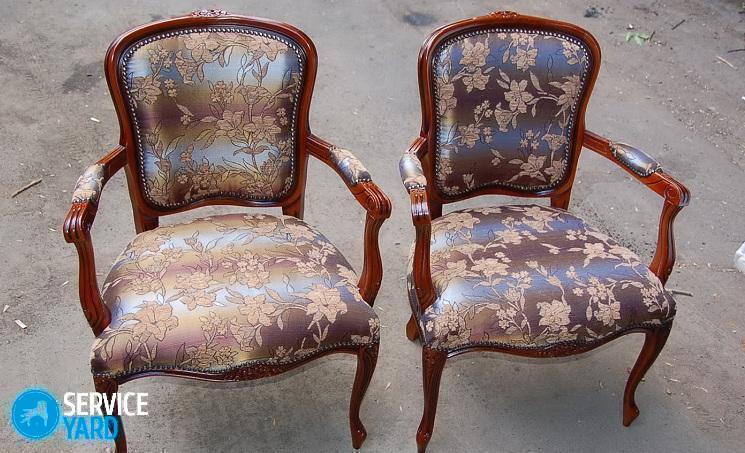
Skilfully carried out repair of wooden chairs with their own hands not only allows you to save some money, but also gives a completely solid thing a new life. Having spent a minimum of money, you can completely change the appearance of the furniture. It all depends on what materials you choose, and on your imagination. Before you get to work, it does not hurt to get acquainted with the technology of work. This will prevent serious mistakes and do everything right. We will talk about this in this article.
to contents ↑Upholstery Replacement
For restoration work to be successful, you will need:
- Pliers.
- Nail clipper.
- Upholstery fabric.
- Sackcloth.
- Furniture stapler.
- Hammer, small nails.
- Wide tight tape.
- Sintepon (it can be replaced with batting).
- Durable textiles: canvas or canvas.
- Coconut fiber.
If the chair looks pretty decent, only the upholstery is worn out, repair of chairs with your own hands consists in changing this upholstery. To get started, remove the seat, then remove the old nails, remove the upholstery, springs and upholstery.
Important! When replacing the upholstery, remember, or better yet, take a picture of the entire workflow. This will make it easier to assemble.
So, a do-it-yourself chair restoration workshop:
- Be sure to evaluate the available materials for strength. Perhaps some of them can be left, and worn items replaced.
Important! Do not leave old nails, as working with a stapler will be difficult.
- The first stage of repair is the fastening of a tight tape to the seat frame. This is best done using a furniture stapler. The tape is beaten with a “wicker”. The maximum spacing between the strips is 50 mm. The best option both horizontally and vertically is from 3 to 4 tapes.
Important! If there is no stapler, small cloves will do.
- Fill burlap over the resulting braid, arrange the springs, sew them with twine.
Important! Use a large "gypsy" needle - ordinary needles are not suitable for this. It is necessary to make sure that the springs are motionless.
- Drive a nail (not completely) in front of each of the springs. Tie a linen twine or linen rope on it, then drive in the nails to the end. Bind horizontally, vertically, and diagonally. At the end of each row, tie a rope to the nail.
Important! Choose a strong twine, as it depends on how much the updated product lasts for you.
- Fasten heavy textiles or canvas over springs. The next layer is coconut fiber. Cover it with a layer of synthetic winterizer, furniture foam rubber or batting, fix one more layer of fabric on top.
- Cut upholstery. The pattern can be made by wrapping the seat with ordinary wrapping paper or newspaper. First, nail the upholstery fabric in the center of one side, and then the opposite.
Important! Make sure that the threads of the fabric do not warp.
- Fix the corners last, you can collect the upholstery with folds. Trim the edges of the upholstery with tape or cord. Glue the decor with a special gun.
- After the seat is returned to its place, restoration work can be considered completed.
Removing old coating
If you need to repair an old wooden chair, which suffered a coating, you need to remove it. To get rid of the old varnish coating, you will come in handy:
- Cycle.
- Sandpaper.
- Putty knife.
- Hard putty on wood.
Here are some helpful tips for getting things done:
- An abrasive sponge or sandpaper with medium grit soaked in water works best with old varnish. In the process, do not forget to wash off the varnish particles with water from a sponge or sandpaper.
Important! Pay attention to the quality of the abrasive material. If he leaves a dark band during operation, then he should not use it.
- You can use nail polish remover and grinder. Set it to the minimum speed; otherwise, the wood may be damaged.
- It is possible to use a special solvent for varnishes and paints only when it is not possible to remove the old varnish in another way.
Important! Act strictly in accordance with the instructions so that the remnants of the product are not absorbed into the wood (this will complicate its processing).
- It helps to cope with an old cycle varnish or a broken glass fragment. At the end of the work, sand the product with fine-grained sandpaper, then remove the dust with a dry cloth.
- If the surface of the wood is corroded by a bug, it must be restored. Treat it with a special insect repellent, then putty on wood. After the putty has completely dried, sand it with fine-grained sandpaper.
Which method of removing the old coating to use is up to you. It all depends on how firmly the varnish is held, and on what tools you have available.
to contents ↑Staining, waxing, tinting
An important point of the master class on the restoration of Viennese chairs with your own hands is the application of paint, tinting or waxing. You will need:
- Special wax for furniture.
- Woolen fabric.
- Wide brush.
- Acrylic dye or stain.
Important! Familiar tinting or varnishing can be replaced with waxing. It is only necessary to choose the right furniture wax, which will give the wood a noble shade, emphasize the natural texture of wood.
Here are some points to consider here:
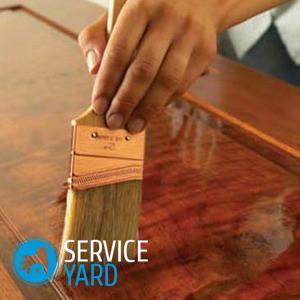
- Apply wax to a small surface with a woolen cloth. It is not necessary to return to the same place several times, since this creates stubborn stains. If you have to apply wax on a large surface, then first melt it in a water bath, and treat the surface with a wide brush.
- Well emphasizes the invoice of wood and wood stain. Compared to water, alcohol stain gives a more saturated shade. In addition, it is possible to mix several shades. After applying alcohol stain, remove excess (wash the product). To do this, brush over the surface of the product with a brush dipped in solvent. If the wood fibers come up, sand them with sandpaper. Fix the result with wax or cover with furniture varnish.
- It is desirable to color heavily worn wood. First prime the chair, and then cover with acrylic dye. Apply paint in thin layers, with intermediate sanding. You can use high-quality spray paints.
Stock footage
As you can see, the tips are pretty straightforward, but using them you can make worn chairs completely new. We hope that a master class on the restoration of an old chair with your own hands will be useful.


