How to weave baubles from ribbons?
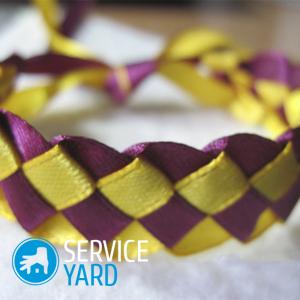
- The sources of baubles
- How to weave the simplest bauble? Workshop for beginners
- How to weave a round bauble?
- How to weave a spiral bauble?
- How to weave a square bauble of four ribbons?
- How to weave baubles from ribbons with names?
- How to weave a bracelet with a tourniquet?
- How to weave a bracelet from ribbon and beads?
- Bauble Weaving Tips
- Stock footage
Nowadays, the ability to create wonderful DIY jewelry models is very much appreciated. This is not only an interesting form of pastime, but also a way to save money on the purchase of bracelets. Today, jewelry made from bright satin ribbons is one of the main fashion trends. In this article we will look at how to weave baubles from ribbons.
to contents ↑Important! Any woman wants to have different jewelry for each set of clothes or image, but not everyone can afford to buy them. In such cases, it is worth trying to diversify your jewelry costume by creating some interesting gizmos with your own hands. How? Read, learn and try:
The sources of baubles
If we look at history, it is believed that the original sources of creating wicker jewelry are American Aborigines, the so-called Indians. Using ribbons and threads of various colors, the Indians developed the script “kipu”, which is so unique that it is not possible to decipher it to date. For modern followers of the Indians, who are hippies, the weaving of baubles is important, they put special meaning into this technique.
Important! It is known that using ribbons of various colors, hippies thus indicate their belonging to a particular group. In addition, the presence of a certain color helps to recognize the sexual orientation and age of the owner of the mascot. Very often, hippies use baubles instead of modern wedding rings.
But not all owners of baubles are hippies, in many cases it’s just a variant of fashionable jewelry, which is relatively quickly made with their own hands. To create such a product, it is not at all necessary to be an experienced needlewoman - even a novice craftswoman may well cope and master the technique of weaving baubles. You just need to make a little effort and work.
to contents ↑How to weave the simplest bauble? Workshop for beginners
Consider the option of weaving the simplest baubles, the technique of which can be mastered by any novice craftswoman. For the manufacture of such a product, it is necessary to prepare the following materials:
- Two satin ribbons that have a width of about 3-5 mm and a length of 50 cm to one meter. The choice of color does not matter - the ribbons can be used both monophonic and in different colors.
- Pin.
How to weave baubles from ribbons:
- In our case, we will use ribbons of two shades - yellow and green. We start the weaving technique with a green ribbon, the tip of which is folded into a loop.
- With one hand we hold the green ribbon, while with the other hand we take the yellow ribbon and in the same way we make a loop from it.
- We pass the yellow loop into the green.
- Tighten the green loop.
- Again we form a new green loop, we pass the tape with the green loop into yellow.
- Tighten the yellow loop.
- Again, fold the loop from the yellow ribbon, stretch it into the green loop and pull it up.
We repeat this weaving technique as many times as needed to form a bauble, or until the ribbon runs out.
to contents ↑How to weave a round bauble?
A round bauble is formed from lotus nodules, which are also called "Chinese nodules." It will take at least an hour to weave such an ornament. Before proceeding with the manufacture of a round bracelet from ribbons, it is necessary to prepare the following materials:
- two tapes with a corresponding length of about 2.5 meters or four tapes with a size of 1.2 meters;
- pin.
How to make round baubles from ribbons:
- For an example we take tapes of black and silver color. We place the ribbon crosswise.
Important! If two tapes are used, then for the initial position they need to be placed crosswise and connected with a pin. If there are four ribbons, they should be laid together, backing off about 10 cm for the ties, and tie a knot fixed with a pin from them. In order not to lose the original form of a bauble, it must be tied tighter.
- First, the upper section of the black ribbon, which is located vertically, wound up on the left side of the silver ribbon, located horizontally.
- We start the left part of the silver ribbon for both halves of the black ribbon, which is directed downward.
- We direct the right half of the black ribbon up.
- At the end of the decorated knot, we place the upper part of the silver ribbon under the half of the black ribbon located at the top.
- Tighten the knot.
Important! If you need to make an effort to tighten, then you should straighten the ribbon, after which it will be easier to tighten the knot.
- Starting from this point, we repeat all the steps, as a result of which we have a cord.
- At the end of the weaving process, we stretch half the ties under the work tape on the back of the cord. When this condition is met, it will be much more convenient to wear a bracelet.
The round bauble is ready!
to contents ↑How to weave a spiral bauble?
One of the options for woven jewelry is a spiral bracelet. In order to create such a product, it is necessary to prepare the following materials:
- two satin ribbons having a length of about one meter;
- pins.
How to weave spiral bracelets from ribbons:
- For example, take the tape in black and silver. First, we bend from the end of each material 10-15 cm, fold the ends onto the remainder of the tape.
- We lay out both tapes at an angle to each other, which should be slightly less than 90 degrees.
- We bend the black material under a silver ribbon so that an element similar to a knot is formed.
- We twist the tape to form a full circle, while a section of the black tape should stick out.
- Through a small black loop we pass a silver loop of large size.
- Now pull the portion of the black loop that protrudes slightly. As a result, a loose knot appears.
- We make a new loop, which we stretch through the rest of the loop.
- We tighten the end of one loop, while simultaneously fixing the second loop.
Important! The loops should not be too tight, but the same, otherwise the bracelet does not look very beautiful.
- We observe the formed square. To make the edges smooth, you need to adjust them in the process of work, pulling the hinges.
- From this point, we repeat all the actions until a bracelet of the desired length is formed.
The spiral bauble is ready!
to contents ↑Important! There are not many original accessories, and a new bracelet or bauble would like to have something else, for example, earrings. Buying something for an already prepared bracelet is difficult, and why stop there, when earrings can be made with your own hands. We have selected for you several interesting and unusual options:
How to weave a square bauble of four ribbons?
One of the varieties of weaving baubles is a square bracelet made of four ribbons. The decoration got its name because of the shape of the knitted accessory, which in the context resembles a square.
In order to create such a product, it is necessary to prepare the following materials:
- Pins
- Four work tapes that have a width of no more than 7 mm and a length of at least two meters. The dimensions of the finished product play a role in choosing the length and width of the tapes.
Important! Since both sides of the material will be equally visible during weaving, there is no need to pay attention to the front and back sides of the tape.
How to weave square baubles from satin ribbons:
- We connect all four ribbons into one knot, while 10-15 cm should remain free.
- We lay out the ribbons in the shape of a cross.
- We begin to weave from the upper ribbon, with which we form a loop from top to bottom.
- With the ribbon, which is on the right side, we go around the loop in the direction from right to left.
- With the ribbon at the bottom, we go around the previous side loop, doing the same thing from the bottom up.
- Transfer the left ribbon to the right side, threading it into the first loop.
- We tighten each ribbon one by one, as a result of which an even woven square is formed.
- We continue to weave, forming new loops in turn. When the required length is reached, the decoration is ready.
Such a product has a three-dimensional shape. A knitted bracelet can be worn either in direct form or in a twisted, resembling a spiral shape.
to contents ↑Important! It is necessary to wear jewelry very carefully, since the stretched ribbons lose their original shape and it is impossible to return to their previous appearance. There is an option to strengthen the square baubles. To do this, in the process, you can stretch a fishing line or a strong thread in its center.
How to weave baubles from ribbons with names?
A very interesting option is the ribbon weaving, which results in bracelets with names. For lovers of needlework, the following materials should be prepared in advance:
- Thin ribbons made of soft fabric - silk or chiffon. Narrow satin strips can also be used, but the material should not be strewed when cut. The fabric in this case can be both synthetic and natural. In our case, we select one ribbon in a pink tint, and seven stripes in orange.
- Pins for fastening.
How to weave bracelets from ribbons with names:
- Using pins, we fix all the ribbons on the surface of the table so that the pink strip is on the left side, and all the other ribbons of a different color are located on the right.
- Start weaving from the first row. We make pink knots around each orange ribbon.
- When all the knots are tied, the first row will be completed, now we proceed to the creation of the second row.
- We knit the knots in the opposite direction, that is, from right to left.
Important! All registered baubles require a scheme, which is very easily located on a special site with name schemes. Enter a specific name in the search bar, and the site will display the desired scheme. In the description of the scheme there are many small circles, which are indicated as a knot. Each circle has arrows:
- The direction of the arrow to the left corresponds to the left node.
- An arrow pointing to the right defines the left node.
- The down arrow corresponds to the third node made by pulling the tape up.
After the provided scheme, the site gives a detailed description of the used node, which greatly simplifies the weaving process.
- According to the scheme issued by the site, the nodes of the letters of the name are indicated in a different color.In the row in which the first nodules of letters are formed, we perform the first left knot, after which five knots denoting a letter are woven according to the scheme.
- We make knots for the letter with an orange ribbon. A distinctive feature of such a node is that it is directed upward, and not to the right or left.
- We wrap the orange tape around the pink working strip, and then tighten it up. This row consists of five knots, which are indicated on the diagram.
- The last nodule is formed by a pink ribbon around the orange strip and runs in the right direction, not up.
- Using all the icons of the scheme, we carry out personal weaving to the very end.
Named bauble is ready!
to contents ↑How to weave a bracelet with a tourniquet?
The bracelet looks very beautiful and original when braided. To create such an accessory you will need the following materials:
- two tapes;
- pin;
- pillow.
How to weave baubles from ribbons with a tourniquet for beginners:
- We put one tape on another so that a cross is formed that has equal sides.
- In the middle of the cross we fix with a pin.
- In order for the ribbons not to twist, we pin the ribbons to the pillow.
- For convenience, we conditionally designate each side of the cross with numbers, 1 and 3 sides - a blue ribbon, 2 and 4 corresponds to red.
- We bend 1 strip and shift it to 2 strip.
- We bend the 2 strip and move to the tape 1 and 3.
- Tape 3 is moved to the 2 strip on it, skipped under 4 ribbon.
- Tighten the loops, while slightly pulling on each section of the tape.
- As a result, four small squares are formed.
- We repeat the described steps until the design of the bracelet of the required length.
The bracelet made by braiding in the form of a tourniquet is ready!
to contents ↑Important! You can also use several braids to create this kind of bracelets. With your own hands you can weave beautiful and unusual jewelry, consisting of three, four or even five ribbons of various colors. In exactly the same way, you can make not only jewelry from satin ribbons, but also accessories made of leather strips.
How to weave a bracelet from ribbon and beads?
Consider the most common method of making jewelry from ribbons with beads. To create this accessory you will need the following materials:
- bright color tape;
- needle;
- thick thread or fishing line.
How to weave a bauble from ribbons with beads:
- We bend the tape, while departing from the edge about 10-15 cm, so that a loop forms.
- We fix the formed loop with a needle with fishing line.
- We string a large bead on this fishing line.
- Again we form a loop and pierce it with fishing line, after which we string the bead again.
- Repeat all the steps to the desired length of the bracelet.
- At the end of the work, we fix the decoration with any knot.
There are many creative options for designing this type of bracelet:
- A simple and affordable way is weaving from materials that are different in texture. By interweaving a delicate satin ribbon with a strip of exactly the same thickness, but from rough leather, you can create a very creative and stylish product.
- You can also use a metal chain for weaving, which will give the decoration a special charm.
- You can use the above method of creating a bracelet from beads and ribbons, but in this case, string the bead not one after another, but after three loops, or make loops from strips of different sizes. This decoration will look very original.
- You can also embroider the bracelet with shiny rhinestones or sequins. This way will add glamor to your product.
to contents ↑Important! You can invent beautiful jewelry using not only ribbons. You can decorate such accessories using almost any accessories - large beads, beads, bright buttons and even zippers. Such elements can add to the decoration of originality and elegance.
Bauble Weaving Tips
To make the weave look beautiful, it is necessary to adhere to some recommendations in the process of creating baubles:
- Based on the ideas of hippies and other various subcultures, the combination of some colors in the manufacture of baubles has a certain meaning. Therefore, you need to approach responsibly in choosing the color scheme of satin ribbons. First you need to get acquainted with the meaning and meaning of colors.
- In the weaving technique, when tightening the loops, try not to exert excessive force. Nodules should be in a somewhat free state, so they will look neat and have the same appearance, while their arrangement will be strictly symmetrical. Only in this case the wicker product will be attractive and beautiful.
- If the jewelry looks unpresentable and unsuccessful the first time, do not despair, you can unwind it and re-create a new accessory.
- In the process of weaving, do not rush, but be careful, then you will not have to redo the decoration, and the first time you will succeed.
- If in the process of weaving, the ribbons slip out and the loops fall apart, then you can use a pin, which fixes the ends of the loops. When you gain experience, everything will turn out on your weight, and the loops will be smooth and accurate.
- At the end of creating the decoration, we form a knot from the remaining end of the ribbon, or you can simply leave the unused area hanging.
- It is advisable to use ribbons of contrasting bright colors. When using ribbons of similar colors, difficulties will arise when weaving. Contrasting shades in the bracelet give brightness and catchiness to the decoration, in addition, the weaving procedure is much easier.
- The ribbons used should be neither narrow nor wide. The optimum width of the tapes should be 5 mm.
- You also need to choose the correct length of ribbons, which should be 2-3 times longer than the estimated length of the bracelet. The type of weaving also affects the choice of length. The most optimal length is a size of at least a meter.
to contents ↑Important! But jewelry from improvised materials will never replace jewelry, but in order for the latter to always please the hostess, you need to know a few simple rules for caring for "jewelry." Read more about cleaning precious jewelry on our website:
Stock footage
Now you have an idea of how to weave different baubles from ribbons. Start with simple patterns, perfecting and complicating patterns as you gain experience in such needlework. Then your casket will be replenished with unique jewelry that you can change every day to suit your mood!
- How to make jewelry with your own hands?
- DIY leather jewelry
- DIY jewelry from beads and beads - patterns
- Silk thread brush earrings - how to do?
- How to choose the right jewelry for the neckline of the dress?
- How to choose earrings according to the shape of the face?
- DIY lace earrings
- How to make polymer clay earrings?
- How to clean gold from someone else's energy?
- How to clean gold and silver at home?


