Installing a toilet installation

Installing a toilet installation with your own hands is quite an interesting question. Owners of apartments of old buildings with tiny bathrooms are unlikely to be interested in this. But in new buildings, bathrooms are usually spacious, there is where to place a bathroom, washing machine, toilet, bidet, all kinds of cabinets and shelves. For the owners of such apartments, information from this article will be especially useful.
to contents ↑Modern trends in the design of the bathroom
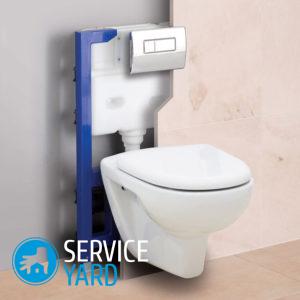
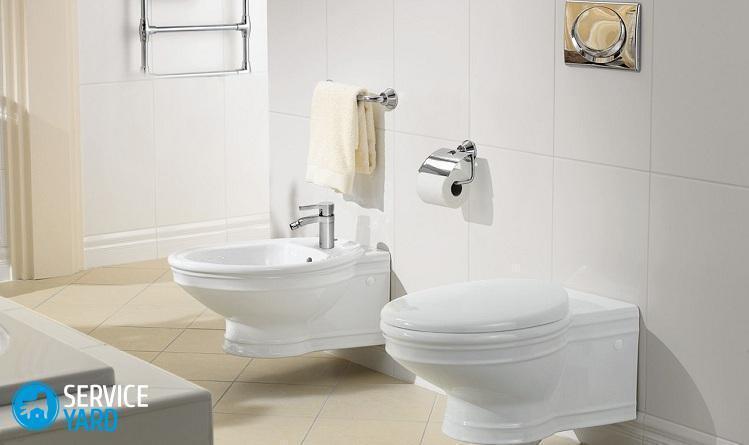
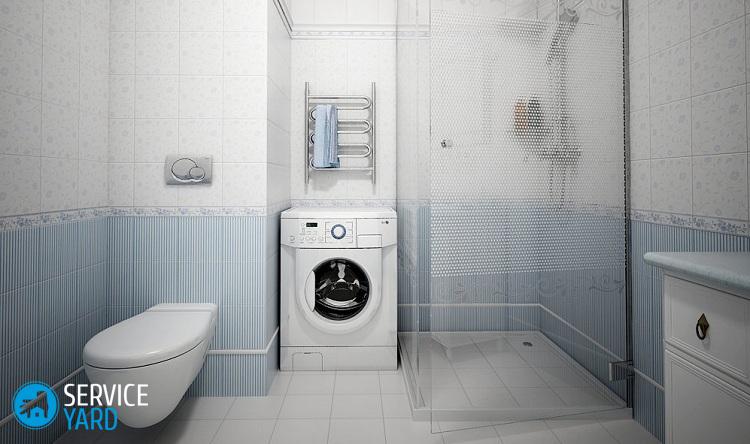
In an apartment with a modern interior, even such a simple thing as a toilet should also look “stylish, fashionable, youth”. Wall hung toilet with a beautiful button on the wall - concise and aesthetically pleasing. No more pipes, drain tanks and other nonsense. Of course, there is no magic - the tank and pipes still exist, but they are reliably disguised. Such a system is called “installation”. This term comes from the English word “installation”, which means “hide, embed”.
Device Features:
- A frame or block fixture allows you to hold the toilet and hide the rest of the plumbing modules from human eyes.
- Installation is much more expensive than a conventional toilet, and installation is not so simple. But the result will please you very much.
- The most high-quality and reliable installations of the brands Grohe, Geberit are considered. Although there are installations and the middle price segment from Cersanit, for example.
Important! Be that as it may, the suspension structure itself does not scare you. According to manufacturers, their products can withstand weight up to 400 kg.
Advantages of modern systems:
- There is a lot of free space left.
- It is very convenient to clean, because the toilet is not standing on the floor.
- The drain system is economical, efficient and not noisy.
- The height of the bowl can be adjusted to fit your height.
Disadvantages:
- These systems are quite expensive, the installation is much more complicated and troublesome.
- Another important point: if a breakdown occurs, this can lead to a violation of the decoration of the false wall, behind which all the plumbing is hidden.
Installation of a toilet bowl for installation - types
Before buying an installation, evaluate the size of your bathroom, and you also need to understand what wall it will be attached to. Installations can be of two types - frame and block.
Important! If the wall is capital, then you can choose any, but if not, then only the frame will do.
Let's look a bit at what they are and how they differ.
Block installation
It is cheaper for the price. It is a plastic tank with drain fittings and fasteners.
Since all this splendor, together with the toilet, is fastened with anchor bolts to the wall, this installation is suitable only for a main wall. Everything except the toilet bowl is hiding behind a drywall false wall.
Frame installation
The design consists of a frame that is attached to the floor and wall (the main load falls on the floor). And on this frame all the other elements are kept (toilet bowl, bends for sewers, fasteners, cistern, etc.) Such an installation will cost more than the first type.
Based on the features of the placement and fastening of different types of installations, you should choose the right one for your bathroom, according to the size, type of fastening, budget, design and other factors.
The installation of each type of installation has its own characteristics, so we will consider them separately. So how to install a toilet installation?
to contents ↑How to install a frame type toilet installation?
First, determine the place where you will install it.
Important! The frame installation is so good that it can be placed anywhere: near a wall, in a corner, under a window, anywhere, but more convenient, of course, if it is placed next to communications.
Prepare all the necessary tools in advance:
- Hammer or electric drill with nozzles;
- Ring spanners of the right size;
- Level, pencil;
- Ruler, tape measure;
- Tow for sealing joints;
- Silicone sealant.
Important! To install the installation, there are certain standards that are usually adhered to:
- The distance from the floor to the toilet seat is 40 cm.
- The distance from the floor to the drain button is 1 m.
- The distance from the floor to the sewer pipe is 22 cm.
- At least 1 cm must remain between the wall and the drain tank.
Follow this order:
- The design itself consists of a frame, a tank, a drain outlet and a pipe, a flush button, studs for attaching the frame to the wall, attaching the toilet bowl and attaching to the floor. Installation of a toilet bowl with installation begins with the most important thing - you need to assemble a metal frame on which everything will hold.
- Then you need to mark the areas on the wall and floor where the fasteners will be. Usually the frame is fixed in four places. A gap of about 2 cm remains between it and the surface.
- In place of the marks, you need to make holes with a puncher into which to insert the dowels (you can use anchor bolts for reliability), and attach the frame.
Important! Be sure to use a level and a plumb line to keep the frame level.
- Next, install a drain tank on the frame and connect it to the water supply using a flexible metal hose or plastic pipe (more practical and durable).
Important! It is desirable to insulate the tank with a material that prevents moisture condensation.
- The water supply can be lateral or lower. The tank is located on the brackets.
- Now connect to the sewer using a pipe or corrugation (drain diameter is usually 110 mm). Pipes from the drain tank and sewer are fixed with plastic clamps. Check for leaks.
- Before installing a false wall, you need to check the tightness of all elements, treat all joints with silicone sealant, put on PVC couplings, install a shock-absorbing gasket. All openings must be sealed with plugs to prevent debris from entering.
- Now you can proceed to the casing. For this, moisture-proof double drywall is most often used. Determine the size and cut out all the necessary technological holes, fix the panel on metal profiles.
Important! Typically, drywall pasted with ceramic tiles. Start the finish from the drain button.
- After a week and a half, you can install the toilet and flush button (insert the cables coming from the tank into the holes on the button).
Important! It would be wise to opt for a double button that controls the volume of water supply (large and small portions). There is a “stop flush” button and even a button on the remote control.
- Put the bowl of the toilet bowl on the pins, seal the joints, tighten the nuts and bolts, but to the best that the toilet bowl does not crack, then conduct a test flush. If everything is in order, you can use the system for your pleasure.
How to install a block-type do-it-yourself toilet installation?
As we already wrote, a block system is cheaper, but it is more difficult to install. This is explained by the fact that the main load of the structure falls on the wall, so the wall should be capital. Toilets can be suspended and floor.
Installation of a suspension system:
- As in the first case, start the installation with layout. The toilet to the wall should be oriented on the axis of the bathroom or on the axis of the sewer. Make notes for fasteners with a pencil.
Important! Different manufacturers have different installation parameters for installation elements. Therefore, proceed according to the instructions. Typically, the distance to the tank is 1 m.
- Mark dowels for fastening the tank equidistant from the central axis of the installation. Take measurements accurately.
Important! For example, if the width according to the instructions is 60 cm, then measure 30 cm from the axis in both directions.
- Punch holes in the marked areas and hammer in the dowel-nails.
- Now attach the drain tank on the wall, twist the drain hole, check the gaskets and connect to the water supply.
- Then drill a hole in the wall to secure the toilet. Fasteners are usually included. These pins protrude from the wall exactly the length and width of the bowl. The distance from the floor to the seat is usually 40-50 cm. The bowl itself is installed last.
- Make a false wall, which will then hide all communications.
- Process the toilet outlet with silicone sealant, attach the connecting cuffs to it. First, the mounting points are marked, and then the mounting corners are installed.
- Lastly, push the drain button and check for leaks in the system.
- After finishing the wall, install the toilet bowl.
DIY installation for a floor-mounted toilet:
- You should start by fixing the metal position of the knee.
- The outlet of the bowl must be treated with technical ointment and installed in the proper place.
- Mark it with a marker and mark the places of fastenings. Next, set the bowl aside for the time being and in the marked places set the mounting corners that come with the kit.
- Now install the toilet by pushing the outlet into the pipe.
- At the outlet, put the connecting cuff.
- Cover the bolted bolts with special plugs.
- Next, proceed with installing the tank according to the instructions.
- Then install the drain button in the pre-made technological hole and check the system for leaks.
Useful recommendations:
- When creating a false wall, provide a technological hatch above the buttons. This will allow you to get to the problem areas (drain system, tank) without destroying the wall.
- When choosing a system, give preference to the option with a double button. This will save water.
- When installing the installation, pay special attention to the joints. Do not spare the tow, silicone. Carefully check gaskets and gaskets.
- When installing, be sure to adhere to the correct drain angle - 45 degrees. If you break, the water in the toilet will stagnate.
- If the bowl sways, gently tighten the mounts.
Stock footage
Installation of a toilet bowl with installation is today a popular solution for designing a bathroom. It is beautiful, convenient and allows you to implement more design ideas. Thinking about installing such a system, first of all, it is necessary to evaluate the toilet room, determine the type of wall, take into account the shape of the room, and on the basis of this determine the type of installation. If you have some skills in working with plumbing, then you can install the system yourself. The instructions and recommendations from this article will help you in this matter.
- How to choose a vacuum cleaner taking into account the characteristics of the house and coatings?
- What to look for when choosing a water delivery
- How to quickly create comfort at home - tips for housewives
- How to choose the perfect TV - useful tips
- What to look for when choosing blinds
- What should be running shoes?
- What useful things can you buy in a hardware store
- Iphone 11 pro max review
- Than iPhone is better than Android smartphones


