DIY screed in the bathroom

“Repair is worse than fire,” the popular wisdom says, and for many it is. When the tenants of an apartment or private house take up such a complex process for the first time, quite often there may be offensive mistakes, which will take even more time and effort to correct. One of these important points is the repair of the bathroom. It must begin with the installation of the floor. The functionality of the entire room will depend on how well waterproofing, screed and finishing coating are laid. Therefore, we suggest phased consider such a question as a screed in the bathroom with your own hands
to contents ↑What is a screed?
Those who have never encountered repairs and are far from the topic of construction are probably wondering: why is this needed? To this, experts can answer that the screed in the bathroom with your own hands serves as the basis for any coating in the premises. It is most often done directly on floors or on an insulation layer. And this stage of construction work is necessary to perform the following tasks:
- The screed makes the floor surface rigid and even, which avoids problems with installing furniture at the final stages of repair;
- Without this preparation it is impossible to imagine high-quality hydro and thermal insulation;
- Often a screed is made in order to create the necessary slope for draining water;
- This stage allows you to hide communications in the floor, such as pipes, wires, wiring.
To understand how to make a screed in the bathroom, it is worth knowing that this is only part of the work, then what they lay on tiles, laminate, linoleum, parquet. But in general, the flooring is a kind of layer cake and may look like this:
- concrete and iron floor slab;
- waterproofing, for which roll materials or bitumen mastic are used;
- screed;
- waterproofing again;
- screed from special mixtures, which gives a flat surface;
- finish flooring, which can be ceramic tiles, linoleum, bulk floor and other types of materials.
In the process of how you will do a screed in the bathroom with your own hands, do not rush. Most of the work takes place with wet materials, and they need time for hardening and a natural set of strength. Take this into account without fail, even at the planning stage.
to contents ↑Work sequence
In order to get a good final result and according to all the rules and regulations to fill the floor in the bathroom with your own hands, you need to know in what order the work is carried out. Experienced craftsmen recommend sticking to the following plan:
- First of all, you will need to remove the old base. To do this, you need to stock up with tools such as a chisel or chisel, a hammer and get to the bottom of the floor - floor slabs.
- In order for a tile that has become unusable to be removed quickly and without problems, first you just need to split it. But at this stage of the work, it is worth taking care of protecting your hands and eyes, so it is better to carry it with gloves and glasses. Small fragments will scatter in different directions and may result in personal injury.
- Sometimes after removing the tiles, dismantling and old screed in the bathroom do-it-yourself is required. Do not skip this step, even if the traces of time are insignificant. As a result, this can affect the adhesive properties of the coating.
Important! Removing the old layer will be easier if you tap the floor and determine the voids. In such places, cement is removed quite quickly and the dismantling of the remaining sections is simplified.
- After this, it is time to proceed with the removal of the old waterproofing. If it was produced using tar or bitumen, the process will be complicated. In this case, it is better to arm with a tool with a wide blade, for example, a chisel. It will facilitate the removal of the waterproofing layer, which has become unusable.
- Then you need to do a spring cleaning. It is better to use a construction vacuum cleaner or a brush with a short hard bristle for this. An ordinary broom with heavy cement particles can not cope.
to contents ↑Important! If you are going to fill the floor in the bathroom with your own hands, and the surface is quite large and uneven, then experts advise to add clay expanded clay or sand. Layer thickness - at least 10 cm after careful tamping. The result of this work is to reduce the weight of the screed on the floor slab, which is very important for private housing construction.
Waterproofing
Fairly waterproofing in the process of doing floor screed in the bathroom with your own hands, consider a separate paragraph. For a room where there will be constant humidity and dampness, reliable protection is vital.
Important! Waterproofing will protect both your floor from destruction, and the ceiling of the neighbors from below from leaks.
This stage of the wizard is performed in two ways:
- Coating insulation with bitumen or polymer compounds;
- Nakleechnaya waterproofing roll materials.
Construction stores offer customers a huge selection of materials in order to protect surfaces from moisture. The most popular today are:
- bitumen mastic;
- bitumen-impregnated material, which is produced in the form of sheets or rolls;
- cement-based compositions with polymer additives;
- penetrating hydroprotection;
- moisture protection with rubber compounds.
to contents ↑Important! It is better not to consider materials based on plastic film. Their vapor permeability is not high enough for screed in the bathroom with your own hands. For independent work, the ideal choice would be bitumen-impregnated materials or any roll material. They are easy to use and provide reliable, long-lasting protection.
Screed device
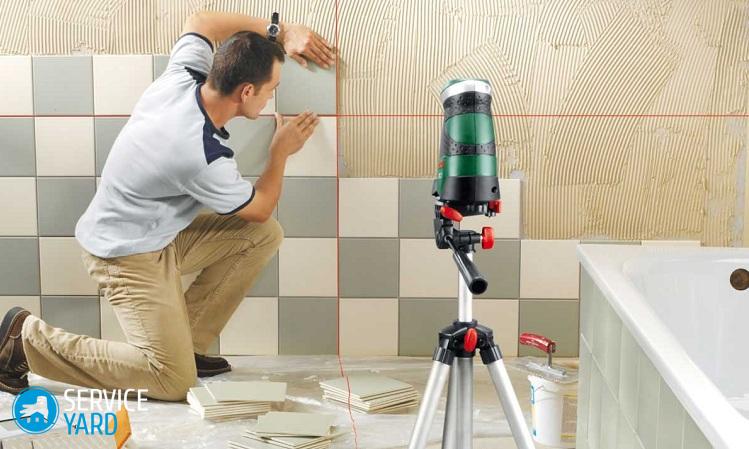
Before pouring the floor in the bathroom with your own hands, it is worth deciding on its height. Prepare a pencil and a laser level - it is better not to do such calculations by eye. Using the tool, we determine the lines that will intersect the entire room:
- We look where there are failures, where - on the contrary, the existing level is slightly higher than necessary. This will allow you to understand how much material is needed to fill.
- It is also necessary in order to put the beacons in one plane. As beacons, you can use either wooden bars or profiles.
Important! So that the beacons do not cause mold or other unpleasant phenomena, they require pre-treatment when pouring screeds in the bathroom with your own hands. For metal, choose an anti-corrosion agent, treat the wood with a water-repellent composition.
When they are dry, follow these instructions:
- Before you begin, outline the locations for the beacons.
- Put some cement on these places - it will serve as the basis for lighthouses.
- Set the first point at a distance of 20-25 centimeters from the wall.
- The step between the beacons should not exceed 40 centimeters.
Important! If the installation point of the landmark did not coincide with the marks, it is easy to correct it until the cement composition has completely solidified.
Now you need to wait until the solution under the beacons hardens. Only after that you can go directly to the fill:
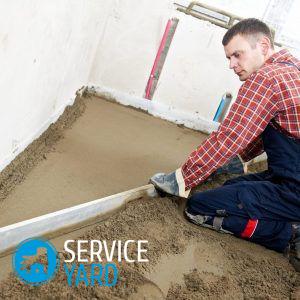
- The finished mixture is poured with stripes that formed after the installation of beacons. As the cement dries, the beacons are removed.
- All work is recommended to start from the corner farthest from the door.Then - evenly in stripes, move to the exit.
- The solution for screeding the floor in the bathroom with your own hands should be poured not flush with the beacons, but above this mark by a maximum of a centimeter.
- Excess cement must be removed using the rule. In this case, the tool rests against the guide with its edges, it is necessary to move it with small wavy movements, evenly distributing the mixture over the surface. If the mixture is not enough and dips remain, the solution is added and smoothed again.
- To release excess air, which leads to the formation of holes, it is necessary in several places to make punctures with ordinary wire.
- It is advisable to pour the floor in the bathroom with your own hands in one go, because the cement hardening time is a maximum of half an hour if there are no polymer additives in it. After the composition has frozen, it will not be possible to smooth out the surface qualitatively.
- After the entire surface of the room is flooded, the solution needs to settle for 10-14 hours. To step on the screed during this period is not recommended.
- While the solution hardens, it is necessary to maintain the temperature in the bathroom within 25 degrees. Humidity should not exceed 80 percent. There should not be drafts or additional heating in the room, all this will not affect the final result in the best way.
to contents ↑Important! The final solidification of the mixture occurs one month after pouring. All this time, the masters recommend moistening the fill with a conventional spray gun, then the composition will dry evenly. If insulation or insulation remains on the surface, then the material can simply be cut off, flush with the screed in the bathroom with your own hands.
Types of screed
Surely, in the process of work, you will ask the question: how to make a floor screed in the bathroom? Before you stop your choice on the material, it is worth studying the pouring technology, and there are only three of them. Regardless of which one you choose, with proper work, the result should be the same - an even base for the finish. The difference lies in some nuances and in the cost of the materials used.
Classic or wet screed
The floor screed in the bathroom with your own hands in the classic version involves the use of the most ordinary cement mortar:
- The mixture for leveling the surface is prepared in advance. Then, after the installation of the pendulums, the cement-sand mortar is evenly distributed and the necessary time is maintained for it to solidify.
- To prevent cracks or other flaws on the surface, manufacturers usually add plasticizers to such formulations. You just have to use the most ordinary metal mesh as a reinforcing material.
- The classic floor screed in the bathroom with your own hands requires not only careful pouring, but also a long exposure. Such a base cannot be used for at least 28 days.
- Also, a wet screed requires high-quality waterproofing. Since cement is diluted with water, it is likely that excess moisture can seep to neighbors from the lower floor until it has completely hardened.
Important! This technology has been used for a long time in the construction of houses, as it has proven itself well. But at the same time, the process of such a screed is very laborious, so now experts are increasingly using other methods of filling the floor.
Semi-dry screed
An alternative to the classic method of screeding the floor in the bathroom with your own hands was invented in Germany. At that time, he made a real revolution among builders, because the composition was applied and distributed not by hand, but with the help of
special equipment:
- In order to make a composition for screed, manual kneading is not needed. The air blower itself kneads the composition in the required proportions and feeds it through the hose to the place of filling.
- Such mechanization saves not only time, but also strength. Heavy cement does not need to be dragged by hand - the mortar pump will do everything.An additional plus is the flow through the hose to avoid unnecessary dirt that unwittingly appears during manual work.
- Another important advantage in the operation of the equipment when pouring screeds in the bathroom with your own hands - water is required three times less than with the classical method. If a wet screed requires the consistency of sour cream, then in a semi-dry method, the material used is more like wet sand. And this means the absence of leaks to the neighbors from below and the less thorough stage of waterproofing.
- When using mechanics, the reinforcing mesh can be safely replaced with fiber, which reduces the load on the supporting beams. This argument became fundamental in the rejection of steel in European building codes.
- Semi-dry screed is also good because the final leveling of the surface can also be done using the technique - trowels. Another opportunity to save time and effort.
Important! Due to the mechanization of the process, a semi-dry screed in the bathroom with your own hands is performed quickly and accurately. For example, in the most ordinary apartment, filling will take only one day. True, the cost of the equipment itself is far from low, so small construction companies prefer a longer, but more economical, classic option.
Dry screed
A dry screed in the bathroom with your own hands, as the name implies, does not involve the use of liquid at all. It’s difficult to call it even filling. But this layer retains its functionality. It also reliably protects the surface from exposure to noise, moisture and heat:
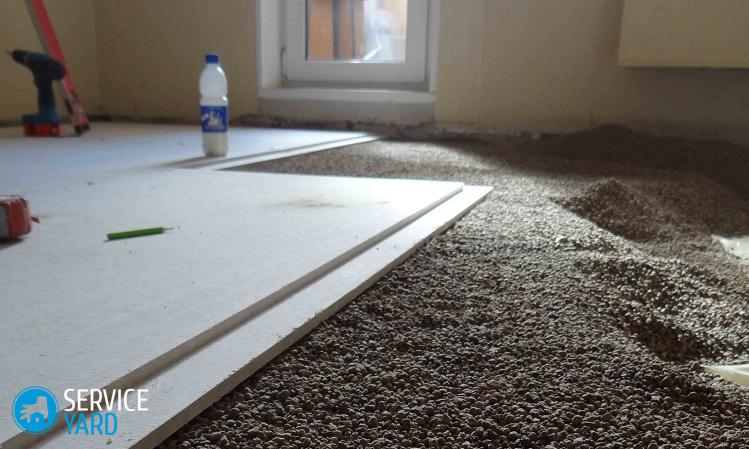
- Expanded clay is used instead of the leveling layer for dry screed. The filling is carried out on the base, and on top it is closed with sheets of drywall.
- A huge advantage of the dry method is its temperature independence. Since water is not used, this method is suitable even when working in cold weather. Despite the fact that a semi-dry screed can be made at a temperature not lower than -10 ° C, and wet - not lower than + 5 ° C.
- Another plus for which builders are so fond of this method is the ability to level the surface in a short time. It is not necessary to wait almost a month until the surface hardens. The only condition is that humidity is not allowed in the room in which this method is applied.
Important! Such a screed in the bathroom with your own hands, although it is considered less durable than its counterparts, is definitely suitable for an apartment and even a country house, because it gives a fairly good strength. But you need to take into account that its maximum height can reach only 8 centimeters, which is slightly less than the previous screed versions in the bathroom with your own hands.
Semi-dry screed with expanded clay
If using the floor screed in the bathroom with your own hands you need to raise the floor level by more than 7 centimeters, then you should choose this option. It is based on semi-dry technology, which is laid on a layer of expanded clay:
- Expanded clay is the basis of such a coating - a material that raises the floor covering to the required level, creating a “pillow” for the top layer.
- The top layer is laid on the principle of a semi-dry method, while its thickness should be no more than 5 centimeters.
to contents ↑Important! As everyone knows, expanded clay is a very light material, but at the same time voluminous. Its use kills two birds with one stone: it reduces the weight of the screed and reduces the cost of its manufacture. In addition, expanded clay has excellent sound and heat insulation properties.
Stock footage
Concluding this topic, it is worth adding the following: the floor screed in the bathroom with your own hands, or rather its level, should be lower than the floor in all other rooms. This is done so that in the event of a flood, water could not get into other rooms. This drop is usually between 30 and 50 mm. This also needs to be taken into account in the process of placing beacons.
- How to choose a vacuum cleaner taking into account the characteristics of the house and coatings?
- What to look for when choosing a water delivery
- How to quickly create comfort at home - tips for housewives
- How to choose the perfect TV - useful tips
- What to look for when choosing blinds
- What should be running shoes?
- What useful things can you buy in a hardware store
- Iphone 11 pro max review
- Than iPhone is better than Android smartphones


