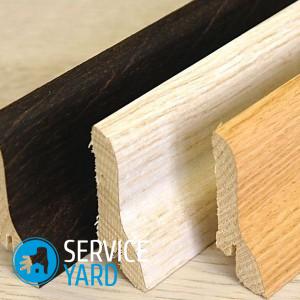
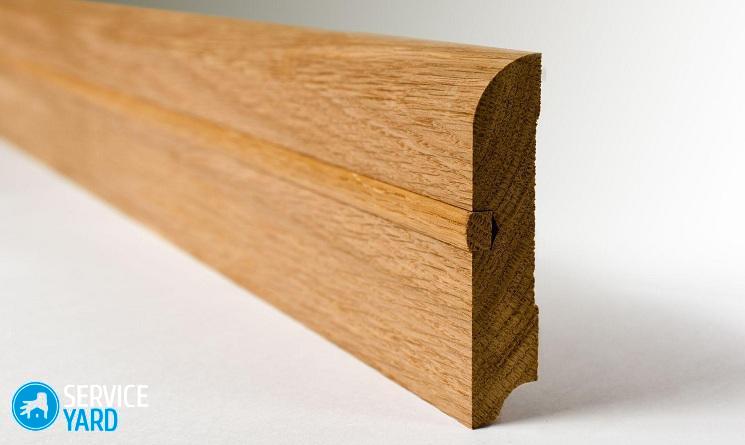
Installation of a wooden plinth

The floor skirting outlines a peculiar line between wall decoration and flooring. Even if the finishing materials are perfectly laid and there is no need to mask flaws, the strips still need to be laid: firstly, in order to cover the technical gaps between the planes of the walls and the floor, secondly, to complement the interior and give it a finish view. Therefore, it is extremely important to know how to install a wooden skirting board.
to contents ↑Why exactly a tree?
Wooden is considered a traditional and old type of floor skirting. This is a great option for framing a natural wood floor: wooden boards, parquet and so on. Without a doubt, the interior is much more attractive than in the case of plastic counterparts.
However, you can get a similar result only if the installation process is performed, taking into account the features of the product. For wooden skirting boards, there are no connection plugs, neither internal nor external corners, so you need to ensure the most even walls. Otherwise, all the cracks that are formed between the walls and skirting boards will significantly spoil the appearance of the entire floor.
to contents ↑Installation start
Installation of a wooden skirting board begins with measurements and counting the required number of planks. It is better to purchase products that are made of dry wood, because wet material is difficult to grind, and the surface of the planks is quite sloppy with fibers sticking out. Moreover, over time, they will begin to deform and dry out, which will certainly lead to their curvature.
Important! In any case, the baseboard brought from the store must be kept for a day inside the room in which it is supposed to be installed. As a rule, this time is quite enough for the planks to get used to the temperature and humidity level in this room.
The process of work begins from the inside:
- Walk along the wall, say, from right to left. Saw the first bar on the right side under the inner corner, well, on the left - for the connection.
Important! The gash for the connection is done at 45⁰, only in this case the junction of the strips will not be visible.
- Attach the sawn plank directly to the wall, measure the distance under the second. Saw it in the same way as the first, but swapping the gaps in places.
Important! It is recommended that the skirting boards be washed simultaneously, but only for one wall, especially if you are not a professional.
- If during the connection of the corner cuts, an angle is formed that differs from the straight one, then a gap will inevitably form between the two planks.
Important! If the deviation is insignificant enough, you can putty the appropriate composition for the tree. A more significant deviation will have to be removed by fitting the faces of both planks with a grinder with emery nozzles, until there is a perfect match of the cuts.
- After preparing the planks for the first wall, fix them.
to contents ↑Important! Some difficulties are caused by the installation of a wooden skirting board from the inner corner of one side and the outer corner from the other. The most important thing here is to understand where to start and how to measure it. Masters advise starting the gash from the inner corner, then attaching it to the installation site, and make precise marking of the gash for the outer corner.
Mounting Methods
There are several methods for attaching massive profiles.
Using self-tapping screws
For work, prepare:
- drill or perforator;
- corks with a large diameter or plastic dowels, if the surface of the wall is loose.
The process of installing a wooden skirting board:
- Attach the panel to the installation site, outline the holes for the dowels in increments of half a meter, and even more often with a curved wall.
- Remove the baseboard and drill the wall under the notes.
- When installing wooden planks, use dowels of various lengths, depending on the strength and material of the wall.
Important! In any case, you can’t drill too much - for this, put a metal stop on the punch with a depth slightly greater than the length of the dowel itself. Instead of a special limiter, a self-made from a thin tube, which is fixed with adhesive tape or electrical tape, is quite suitable.
- Immediately before installing the profile, cut out small recesses on it, into which the caps of dowels or screws will be sunk. It is made using a drill with a diameter somewhat larger than a hat, and with such a depth that provides a head deepening of about a few millimeters. This should be enough to putty in the future had something to grab.
- Next, put two slats to the corner. After making sure of the quality of their connection, remove one of them and proceed to fasten the remaining one.
- We recommend using a Phillips screwdriver during fastening through the holes made. You can, of course, tighten using a screwdriver, but you must do this very carefully so as not to break the thread and twist the screws, otherwise - the bar will be weakly held.
The development of telecommunication technology has led to the need to lay wires under floor skirtings. It is for this that the skirting board with a cable channel is made. However, it must be borne in mind that you will not succeed in placing a huge number of cables under this baseboard.
Important! Consider additional recommendations when installing a wooden plinth in this way:
- During work with concrete, the diameter of the drill exactly matches the diameter of the dowel, usually 6 mm.
- On a wall made of a porous, non-strong material, the holes made can be about 0.5 mm smaller than the diameter of the dowel, and drilling is necessary without using a percussion mechanism.
- For walls made of drywall, MDF, wood or lining, use self-tapping screws for wood instead of dowels, and for metal in the profile of the frame.
Stacking with liquid nails
This type of fastening requires the most even walls. The fixing process is incredibly simple: select super-strong “liquid nails” in the store, and then use a special gun to apply them on the back of the baseboard and press.
to contents ↑Putty and varnish:
- Once you have finished installing the skirting boards, clean them with a damp cloth or sponge from dust and various stains, such as greasy and oily. Carefully and carefully treat the selection of the putty tone, so that it does not differ from the general color of the planks.
- Do not forget that raw putty is usually slightly different in shade from dried. It is for this reason that it is better to experiment in the beginning on the remaining segments from the planks.
- The puttying procedure is repeated 2-3 times, and each subsequent time it is necessary to wait for the previous to dry completely, thoroughly sand it and dust it off with a damp cloth.
- Before varnishing of the baseboard, the floor and walls must be protected by gluing with masking tape. It is preferable to choose a small stickiness, so as not to damage the wall decoration in the future.
- You can apply one coat of varnish to the strips at the very beginning - by the way, this way you can somewhat speed up the varnishing process.
- Further, at least 2 layers are applied after the putty is applied.In order to get a high-quality varnish, it is necessary to exclude all possible temperature differences, as well as drafts, in the room. If this is not done, the varnish will set unevenly, and the specks or particles that will be drafted onto the varnish will completely ruin its appearance.
Stock footage
Thanks to this article, you were convinced that the installation of a wooden skirting board is not particularly difficult. Therefore, choose the appropriate fastening technology, carefully finish the finish, then the room will look luxurious and complete, because not a single modern material gives this kind of interior like natural wood.
- How to choose a vacuum cleaner taking into account the characteristics of the house and coatings?
- What to look for when choosing a water delivery
- How to quickly create comfort at home - tips for housewives
- How to choose the perfect TV - useful tips
- What to look for when choosing blinds
- What should be running shoes?
- What useful things can you buy in a hardware store
- Iphone 11 pro max review
- Than iPhone is better than Android smartphones


