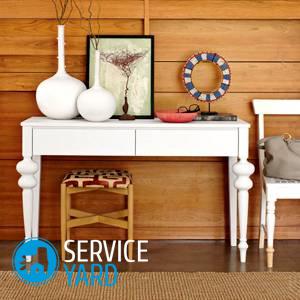
DIY dressing table

Any girl needs to take care of herself. It is sometimes very difficult to find a particular makeup, mirror or comb. A dressing table will help you cope with this small problem. It can be made in the form of a dressing table with or without a mirror, and even with backlight. Such furniture can be made not only multifunctional, but also beautiful, which will significantly transform the interior of your apartment. Most often, such a product is installed in the bedroom, corridor or bathroom. This is a very convenient thing due to the fact that all the necessary items will be at your fingertips. Making a dressing table with your own hands is not easy, but it is quite possible if you start work with building a simpler design. Today we will tell you how to do it.
to contents ↑DIY dressing table - preparation and materials
Before starting the manufacture of the product, you need to fulfill a certain action plan: carry out preparatory work and purchase the necessary material and other components. Let's look at each of these steps in order.
Preparatory work
Without carrying out preparatory work, you are unlikely to be able to build a beautiful, stable and durable construction. Below is an instruction that is suitable for absolutely any dressing table. So, let's get acquainted with it:
- We carefully consider the location of the structure and its compliance with the overall picture of the interior.
Important! It is advisable that the table was made in soothing colors that the immediate hostess would like.
- Create a drawing of a dressing table with dimensions. We indicate on the sketch the desired length, width, depth, height, size and number of shelves. In the case of furniture with a built-in mirror, we write on paper and its parameters. If the table will have additional lighting, then mark the location of future fixtures with a description of how they are mounted. Such drawings can be made independently or take ready-made schemes from the Internet.
Important! We pay special attention to the cabinets and shelves, because their size and quantity directly depend on the dimensions of the product and on your wishes. It is important to consider all the nuances: where you put cosmetics, first-aid kit, books and other necessary things. If you have a lot of things, then add open side shelves to the design.
- Choose a mirror, if available. According to its parameters, we will select the fastenings that will hold it.
Important! It is advisable to stay on a mirror with thick walls so that you do not worry about its integrity and safety.
- The material that you select for the manufacture of the frame of the pier glass must be well sanded, the edges must be finished with high quality, and then covered with plastic corners.
Materials and Tools
Structurally, it is not so difficult to make a simple dressing table. For example, you can make a small chest of drawers, and attach the mirror in parallel to the wall. The only thing needed is accessory drawers.
The list of materials to choose for the manufacture of the frame, side walls, bottom and shelves of this product:
- Chipboard or chipboard sheets 16 mm thick. These are the most common materials in furniture manufacturing. They have several advantages: they are inexpensive, light in weight and easy to process at home.
- MDF sheets. It is considered expensive due to its high quality, efficiency and durability.
- Wood. Only craftsmen who have experience in the carpentry undertake such material. Wood is easy to process, but a milling machine is needed to cut parts.
- Plywood or fiberboard. Used to make the bottom of drawers and the back wall of furniture.
Required Fasteners:
- Confirmates 5x70 mm in size.
- Self-tapping screws 4x16 mm and 4x25 mm in size.
- Metal furniture corners.
- Roller guides for free movement of drawers.
- Accessories for doors and drawers.
- Adhesive plastic edge.
Instruments:
- Drill or screwdriver with a set of nozzles.
- Electric fretsaw for cutting sheets of chipboard, chipboard, MDF.
- Drills with a diameter of 5 and 8 mm.
- Building corner.
- Roulette.
- Confirmation screwdriver.
- Sandpaper of varying degrees of graininess.
Optional accessories and parts:
- Mirror the right size.
- Plastic inserts for sashes (glass for glass).
- LED Strip Light.
- Decorative panels.
DIY makeup table without mirror
This is the easiest option, which is ideal for a beginner. So, a detailed master class on manufacturing such a small chest of drawers for accessories is presented to your attention:
- We put on the chipboard sheets ready-made sketches of the details of our future product.
Important! You can easily cut sheets in almost any hardware store for a small fee. So you will be confident in the quality of the work of specialists. If nevertheless you do not have such an opportunity, then cut the material into parts using an electric jigsaw.
- We clean the ends of each part with sandpaper: first, coarse grain, and then fine.
Important! Do not get upset when you see chips on the edge of the sheets, since at the end of all work any flaws will be hidden by the end tape.
- We ground the ends twice to give the edge more strength. The Moment glue is well suited for this. We put a soft edging on the countertop, and then glue the ends with a special melamine edge, which we attach to the edge and iron it with an iron.
- We assemble the frame of our table: countertop, side walls, legs, back wall. We drill holes for fixing all the elements together. We fix the details with confirmations, check the angles using the building level. After we are convinced of the correct assembly of the structure, we tighten the confirm with a suitable key.
- We duplicate the side walls and support legs of our product with metal corners.
- Now collect the boxes. We drill into the plane all the side parts, and at the end - the front and back parts. We assemble the table for confirmations, check the build quality, and then tighten the fasteners with a screwdriver. We fix the plywood bottom with small nails.
- We fix one roller guide to the side screws, and its second counterpart to the walls of the cabinet. We put a drawer into the installed guides.
- Since our table is with doors, for installing the hinges we need a Forstner drill with a diameter of 35 mm. We make holes under the loops 12.5 mm deep. We fix the hinges with strong screws. We fix the hinges to the sash with ordinary screws.
- We drill holes for handles on the front part of the drawers and doors of the product, and then tightly fix the accessories.
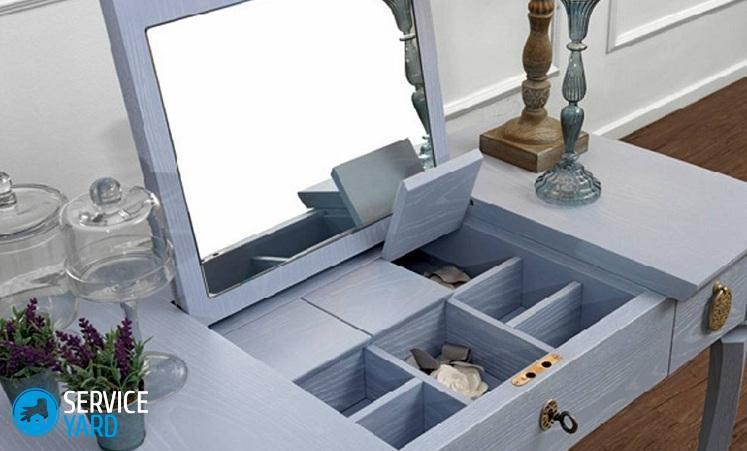
Assembling a dressing table with a mirror
This method is a little more complicated than the previous chest of drawers without a mirror, but it is also quite possible to make it. Let's look at two main ways to make it.
First method:
- We cut out the back wall not from the fiberboard sheet, but from the chipboard with a prepared base for the future mirror. It can be as a functional device or represent a decorative frame of various shapes.
- We fix the purchased mirror in the frame using plastic holders. For these purposes, you can use “liquid nails” or double-sided tape.
Second method:
- From the sheets of plywood we cut the desired shape under the mirror. It can be rectangular, square, round or curly.
- Fasten the mirror with “liquid nails” to the cut canvas.
- We fasten a separate piece so far to the back wall of the base of the previously made dressing table. We carry out this work with screws, screwing them as much as possible to the upper part with a mirror.
DIY dressing table with a mirror and backlight
In the dresser for accessories, the built-in lighting can perform one of two functions - practical or decorative. For the latter option, you will need an LED strip, preferably colored. It is placed along the edge of the table, along the supporting legs or at the bottom of the furniture.
Important! It is very simple to install such lighting: places of its possible cutting and joining are marked on the tape. Do not forget that the tape works from the mains, the voltage of which must be at least 12 watts. So you create a slightly subdued light in the coffee table.
Technique for making a cabinet with backlight:
- We assemble from wooden boards 20 mm thick and 90 mm wide the main frame for the size of our mirror. We connect all the details with joiner glue. We saw the ends at an angle of 45 degrees. We fix the structure in the corners with metal corners.
- We drill holes in the frame that are needed to install bullet cartridges. We glue the outer frame of the thinnest rails. It is she who will hide the wires of our backlight.
- We fix the furniture corners to the base, then we put a mirror on them. We connect cartridges in parallel to each other.
- We paint the product in the desired color. We are waiting for complete drying.
- We output the power cord through one hole made.
- Now we screw the bulbs into the cartridges and check the lighting.
- We cover the back of the mirror with a sheet of plywood using “liquid nails”.
to contents ↑Important! Instead of incandescent bulbs, it is better to use LED or fluorescent. Their color is close to daytime, which will affect the quality of the applied makeup.
Stock footage
Now you know how to make a dressing table with your own hands. According to the above instructions, this is not so difficult to accomplish, especially since for a start you can take on a simpler model, and then improve it.
- How to choose a vacuum cleaner taking into account the characteristics of the house and coatings?
- What to look for when choosing a water delivery
- How to quickly create comfort at home - tips for housewives
- How to choose the perfect TV - useful tips
- What to look for when choosing blinds
- What should be running shoes?
- What useful things can you buy in a hardware store
- Iphone 11 pro max review
- Than iPhone is better than Android smartphones


