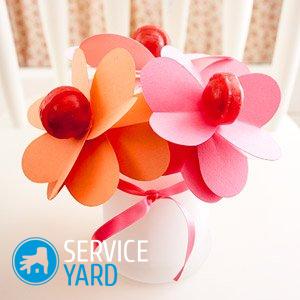
DIY flowers from napkins

Napkins are an indispensable attribute of a kitchen table. Especially this rule applies to a festive event. However, paper thin products of different colors can be used not only for its intended purpose. From them you can make a variety of decorative gizmos, for example, flowers. Floral decorations made of thin paper are becoming more popular every day. Moreover, hand-made jewelry is always popular and appreciated. Let’s and we will figure out how to make flowers from napkins with our own hands.
to contents ↑Making a rose from napkins
Despite the fact that making flowers from do-it-yourself napkins for beginners seems an impossible task, making them is very simple. For the first time, be patient, and you will succeed!
Preparation of materials
On sale there are various paper products intended for the festive table and in various price categories. In order to make crafts from these paper items, you need to buy square three-layer napkins.
However, they still need to be divided into parts, since the rose is made from a single layer of material. For roses, we need a red and green paper blank. For making a flower and a stem, respectively.
Stage production of roses:
- We take a red napkin, unfold it and separate one layer.
- We outline one third of the workpiece, cut it off.
- Horizontally fold the paper product in half.
- It is necessary to wrap the folded blank around your index finger. This will be the beginning of the flower, namely the bud.
- Now take the bottom edge and start wrapping around its axis. This should be done fairly tightly so that there is a thin spiral.
- When twisting, it is necessary to expand the layer to the top. So that your middle was thin, and then the petals went voluminous.
- Carefully spread the petals so that the paper product looks like a rose.
Important! Performing this operation requires certain skills, and the first time you may not be able to do it. However, try, and literally a couple of times, you will have an incomparable rose.
- A rose is put on a wire or any other similar workpiece.
- To make the stem, you need single-layer green paper. It must be wrapped around a metal “stem”.
- In the middle of the metal frame, it is necessary to extend one corner of the napkin. so you form a leaflet.
- We twist the green tissue paper to the beginning of the flower.
Rose is ready!
We told you how to make flowers from napkins, namely roses. If you make several of these flowers, you will have a great bouquet that will become a table decoration or an original budget gift.
to contents ↑Make dandelion
Another original decision on how to make a flower from a napkin with your own hands is the manufacture of dandelions.
Important! This product is intended to a greater extent not for the manufacture of bouquets, but for applications and DIY crafts that are decorated with voluminous flowers.
Using a dandelion from tissue paper, you can make a card, gift, crafts for the birthday of the child, in the form of numbers or stick to us a cardboard blank in the form of a name.
Materials for work
For the manufacture of dandelions, we need three-layer yellow paper products.Depending on the intended purpose, the amount of materials required may vary.
Important! If you want to make a voluminous craft, make one flower, focus on the required amount, and then purchase the material.
Stage production of dandelions:
- We take two two-layer blanks.
- Fold two times in half - horizontally and vertically. That is, four times, each of them.
- We put the folded blanks on top of each other.
- Divide the blanks into four equal squares by eye, fasten each square in the middle with a stapler.
- From a small square blank we cut a circle, then rounding the corners with scissors, we make a small flower.
- Now each layer of paper needs to be lifted up and slightly crushed with your fingers. Thus, you raise the petals and give volume to the future dandelion.
The dandelion is ready!
to contents ↑Important! Please note that the dandelion technique is very popular. Using this technology, flowers are made in different shades, combine colors and create incredible, beautiful paintings and crafts. Show your imagination and make a charming composition!
We make cloves from paper napkins
When deciding on how to make a flower from a napkin with your own hands, you can give your preference not only to roses and dandelions, but also to make a clove. This flower is also quite easy to make. Much lighter than a rose. By learning to make cloves from paper, you can create unusual ikebans, which will become an indispensable attribute of a festive table.
To make red cloves, you will need a three-layer paper blank of the corresponding shade.
Phased production of paper cloves:
- From the very edge we tear off a horizontal strip, about one centimeter wide. You don’t need to cut, because the uneven edge will give a natural effect to the artificial flower. It is worth tearing from the “free” edge without catching the fold of three-layer paper.
- Expand the napkin in half. That is, from the workpiece, it should become twice as large.
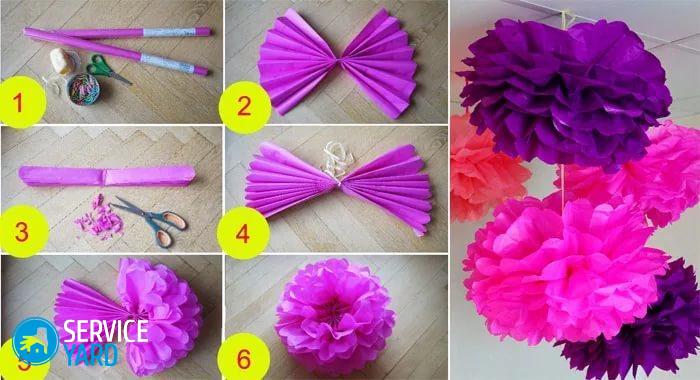
- On the vertical side, we fold the entire workpiece with an accordion.
- We make a bow. In the middle of the blank we tie a strip of paper torn off at the first stage.
- At this stage, it is necessary to very carefully divide the napkin into several layers. This must be done very carefully so as not to tear the paper. For convenience, the middle can be fixed with a stapler. However, be careful not to see it later.
Carnation is ready!
to contents ↑Important! Using this technology, you can make a large number of flowers of different colors. The most popular are pink, white, red and pink with a red edge. In this regard, you can buy the necessary materials with a printed pattern. It can be, for example, a monogram. In the finished flower, they will not be visible, and the color change will look original.
Making topiary of paper napkins
If you no longer think about how to make flowers from napkins and have learned how to make paper products very well, then you can make topiary - this is a European home interior tree. It can be made from different materials.
Important! The main goal is to decorate the interior, festive table or event. In addition, the topiary can serve as a great gift.
Let's see how to make a tree of happiness out of improvised holiday material.
For the topiary, we need:
- multi-colored three-layer napkins;
- stationery stapler;
- glue gun;
- blank from mother’s papier or polystyrene;
- plastic pot;
- beads, ribbons and other decorative elements found in the bins of any needlewoman.
Step-by-step instructions for the manufacture of topiary:
- Using the “dandelion” or “carnation” technique, we make flowers. You choose the hue yourself, based on personal preferences.
- The basis may be different. A foam ball is best used. In the store for goods for needlework such blanks of different diameters are sold.
- We fix the flowers on the base.This must be done with a glue gun.
- At this stage, the “bouquet” is decorated with rhinestones, beads, ribbons, butterflies and other decor. An excellent solution would be a thread with beads of different diameters, which will decorate your product.
- We attach a foam base with flowers to the pot.
- Decorate the pot with ribbons.
Enjoy the beautiful product!
to contents ↑Stock footage
Today you learned how to make a flower from a napkin with your own hands. There are many techniques. However, the simplest ones are “rose”, “dandelion” and “cloves”. Decorate your holiday with the help of such paper products, believe me, they, despite the simplicity of the idea, will delight all invited guests!
- How to choose a vacuum cleaner taking into account the characteristics of the house and coatings?
- What to look for when choosing a water delivery
- How to quickly create comfort at home - tips for housewives
- How to choose the perfect TV - useful tips
- What to look for when choosing blinds
- What should be running shoes?
- What useful things can you buy in a hardware store
- Iphone 11 pro max review
- Than iPhone is better than Android smartphones


