DIY floor lamp

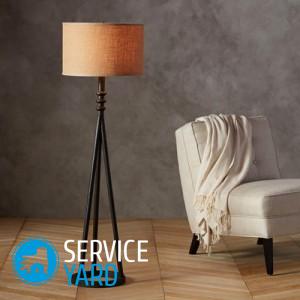
Many designers in their work when creating interiors use a floor lamp - a lamp that is mounted on a long leg. It makes the room more comfortable and creates that very homely atmosphere in it. Also, in order for a person to be more comfortable in the room, there should be high-quality lighting. Nowadays, you can easily purchase any lamp model you like. But what could be better than a do-it-yourself floor lamp? With it, you can divide the room into zones, emphasize the elements of decor, and for this it is only necessary to show imagination, and your house will turn into a fairy-tale world, “play with” new colors. How to make a floor lamp with your own hands? We will talk about this in this article.
to contents ↑Step-by-step instruction
To make a floor lamp yourself, you need to prepare all the necessary tools and materials.
Tools and materials:
- Wooden board and glue for wood.
- Hacksaw and pliers.
- Drill.
- Screwdriver and knife.
- Fasteners and tape measure.
- Copper elbow.
- Wooden rack for the frame (about 1.5 m).
- Copper pipe (about 1.5 m).
- Extension cord and marker.
- Cartridge and electrical cord.
- Switch and plug.
- Light.
- Openwork plastic trash bin.
First you need to make the foundation of the entire structure.
Base fabrication:
- First, cut two planks from a wooden board measuring 35 * 5 * 20 cm and 30 * 2.5 * 15 cm (length, thickness and width).
Important! You can use any size of your choice, but do not forget that the entire structure must be stable.
- Next, connect these boards with glue. To get started, grease a smaller log and attach to a larger one. Make it so that the smaller board is centered. Use the clamps to fix the structure and let it dry completely.
- Then measure on a smaller bar 5 cm from the edge and drill a hole with a diameter of 3 cm. Sand the edges after you make a through hole.
Important! Remove wooden particles periodically during drilling.
The base is ready! We proceed to the next stage - the manufacture of the frame.
Frame manufacturing
We have chosen a stand about 1.5 m so that you can put your own handmade floor lamp, for example, near the sofa. Light will fall from above. You can independently choose any desired height.
Stage production of the frame:
- To begin, drill a hole in the wooden stand for the copper pipe at an angle of 60 degrees.
- Insert the copper pipe into the hole so that one edge looks 25 cm. Mark the place where the copper pipe intersects with a wooden stand with a marker.
Important! Use grease to remove grease from the copper pipe.
- Use a drill to drill about 6 mm on one side of the pipe in place of the mark above. A cord will pass through this hole.
Next, we collect our homemade floor lamp.
Assembly of the lamp:
- First, using wood glue, glue the edge of the wooden stand to the base.
- Let the structure dry well.
- Next, insert the copper pipe, install in the desired position for you, fix and fasten with glue.
Important! Expand the hole you previously prepared in the tube to the floor.
- After that, attach the elbow to the edge of the copper tube, to which you will later attach the floor lamp along with the lampshade.
- Then pull the power cord with the switch and plug attached to it into the hole you made earlier in the copper pipe.The end of the cord should peek out from the elbow.
We move on to creating a lampshade, which is very easy and simple to do using the simplest office paper bin.
> Creating a lampshade:
- Trim, using a clerical knife, the top edge of the trash can.
- Make a hole in the center of the bottom of the basket. It is intended for the cartridge.
- Paint your future lampshade using acrylic or spray paint to your desired color. Wait for the paint to dry, and apply another coat of paint to make the desired color more saturated.
- Attach the cartridge to the lampshade, attach this design to the wire.
- Screw in the light bulb.
Do-it-yourself floor lamp is ready to use! It remains only to put it in the right place and turn it on.
to contents ↑Interesting options for creating a floor lamp
The secret of a successful master class when creating a floor lamp with your own hands at home is the use of many improvised materials, which sometimes seem completely unnecessary.
Decorative clay lampshade
Clay is a flexible and easy to process material, it dries well and lends itself perfectly to decoration. To create a clay element for a future floor lamp, you need a frame - it can be made of thick paper or cardboard. After applying clay to the workpiece, we wait for complete drying. Next, we carefully pull out the cardboard or paper, and we decorate the clay lampshade, which you got, with any decoupage technique, hand-painted, applique, at your discretion.
Floor lamp from a vase
A vase lamp has a very attractive appearance, but its implementation is more complicated. To make such a floor lamp with your own hands, you need to install a metal cover on the neck of the vase with a pin mounted in it, which will serve as the base. To make your design stable, secure the cover with stops.
Important! The emphasis should be the same size as the largest space on your vase.
Wood and fabric floor lamp
To make such a lamp, cut the wooden slats into blanks of the desired length. Then cover them with varnish and fasten together using a stapler. Assemble the lampshade fabric and secure with a stapler. It should be slightly larger than the frame itself. Next, with the help of wooden corners, decorate the ribs on the lampshade, hide the staples from the stapler under the decorative slats.
to contents ↑Important! When choosing a material for a lampshade, it is worth remembering that paper, wallpaper and fabric can steal light. Create floor lamps that will better illuminate the room.
Stock footage
Making a floor lamp with your own hands is easy, having all the materials and tools that will be needed in the manufacturing process. And you will also need your desire and desire to independently make an original thing that will decorate your home. Independently choose the type of fabric, the color of the base, the shape and decoration elements, combine them at your discretion, bring all your fantasies to life, create and enjoy original interior items.


