The technique of weaving baskets of willow with their own hands

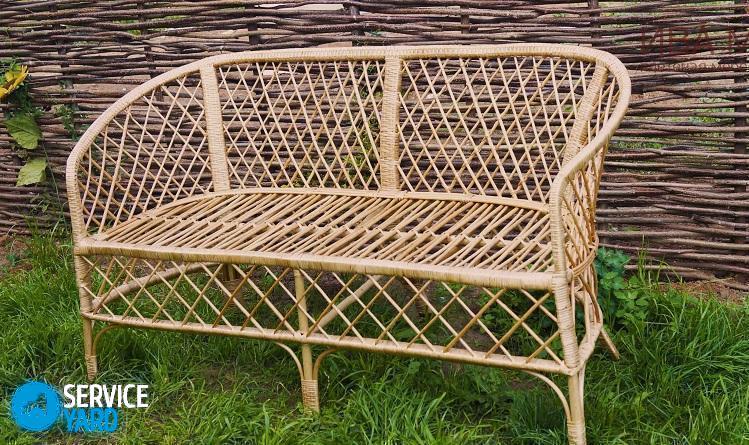
Wicker willow products were used by our ancestors in ancient times. Today, not only willow baskets are popular, but also all kinds of chests, candy boxes, trays, decorative items, and even furniture. There are whole vine factories for the production of vine products. All items made from natural raw materials are environmentally friendly, which is so relevant in our time.
Since the vine products are made by hand, their cost is significantly different from non-living plastic products. And since weaving vine products is more of a manual production, why not try to make such a product yourself, thereby saving money. Moreover, the technique of weaving baskets of willow with their own hands has a centuries-old history, is passed down from generation to generation and can be mastered by anyone.
to contents ↑Features of the weaving
Weaving has an incredibly long history. However, little has changed in the technique of weaving and the basic principles of work. The most popular material in wickerwork is willow. The technology is incredibly simple, the prepared rods are intertwined in a certain way, thereby creating the necessary subject.
To master this craft, it is important to know the main aspects:
- What material is best to weave vines and how to prepare it for work?
- What tools are useful in the process of creating a woven product?
- What are the main weaving techniques and which one is best suited to a particular type of product?
In the process of studying this topic, you will find answers to all these questions and make sure that you are able to master this type of craft. It is important to remember that, as in any other craft, practice is important here. Therefore, before starting work, it is worth a little practice in various weaving techniques, see the lessons on manufacturing the items you need, learn about the tricks and subtleties that are used by masters.
to contents ↑Important! Until the creation of a full-fledged product, it will not be superfluous to weave several blanks, try to work with willow twigs, feel how they lend themselves to weaving, and learn to distinguish between the flexibility of the vine. Perhaps at this stage you will feel some features of working with the material, make certain adjustments to the stage of preparation of raw materials.
Preparation of necessary materials and tools
For the whole process to go quickly and without complications, you need to prepare in advance. This applies to both basic raw materials and tools.
Willow twigs
In order to weave a basket of willow with your own hands, you need to familiarize yourself with what material is best used for these purposes. As you can already guess, the main raw material for weaving baskets are willow twigs.
There are two options where you can get them:
- Purchase in a specialized online store.
- Collect them yourself or prepare them.
If in the first version everything is very clear, then the second is worth dwelling in more detail. It is important to know which rods are most suitable for weaving. Here are the basic requirements that they must meet:
- if you try to bend the willow rod 180 degrees, it should not crack and break;
- it is best to use those rods that are orange or red;
- willow shoots must be cut off either before the flowering begins, which occurs in May, or already in August, because fresh twigs will noticeably grow by that period;
- the most suitable rods for weaving are best cut off from a willow growing on sandy soil;
- the rods should have a small core.
When you have collected a sufficient amount of quality raw materials, it is worth starting to process it for further successful work:
- Experienced craftsmen advise you to first remove the bark from the vine, since not all products look good with it.
- If the bark is removed quite difficult, then the masters advise boiling the rods. They must be placed in a container of the right size and boiled for 2 hours. The container should be large so that the rods are minimally twisted. Next, cool them and remove the bark from them. Do this while the branches are still wet.
Important! If you have a large number of blanks, it is better to leave them in the water and gradually remove the bark from them. It needs to be removed, moving from a thick edge.
- After removing the bark, it is worth starting the drying process. It is best to dry the branches outdoors, avoiding direct sunlight. The drying process usually takes about 5 days. Masters advise at this stage to sort the branches according to their length and size - this way you will facilitate the weaving process.
On this, the process of preparing willow vines can be considered completed.
Tools for work
It’s worth starting the weaving of a basket of willow with your own hands for beginners, having prepared the following tools necessary for work:
- a sharp knife, large scissors or a garden pruner, with which you will cut the excess length of the rods, make cuts;
- pliers in order to make it more convenient to twist and stretch the vine;
- an awl for threading the vine;
- clamps or clothespins with which you can fix part of the vine;
- a long comfortable ruler - best of metal, and a simple pencil;
- large capacity, for pre-steaming rods, before starting work.
As you can see, the preparation process is quite simple, and the weaving itself does not require any special and intricate devices.
to contents ↑Progress when weaving a simple basket of willow
If you decide to get started, then you should know that it is best to work with pre-soaked rods. To do this, they need to be placed in a large container and pour hot water. After 15-20 minutes they will be suitable for work, will become more flexible and pliable.
Important! Another important point: during the weaving process, periodically spray the rods with water, not allowing them to dry.
Weaving the bottom
The very first thing that starts the weaving process is the creation of the bottom of the product. For this:
- Prepare 8 rods of medium thickness - this amount is most optimal for the classic and most popular weaving. In four of the rods, make incisions and insert the four remaining through all of them.
- Next, take two thin vines and insert one of them under the four rods located in the slot, and stick the other over the four rods in the slot.
- Then braid them with 4 rods, letting them alternately from below, then from above, towards each other.
- When you have braided one row, begin to bend along one main rod and braid them with a thin vine so that one of them goes above and the other below the rod. Before you should be a wheel of 16 branches, in the form of rays. At this stage, it is worth adding another twig, just insert it between the two sticking out rays under the braid, sharpening the end.
- Continue weaving in the same technique. Thus, the bottom braids until it reaches the desired diameter.
Important! If during the process of weaving a basket of willow with your own hands you end up with a thin vine, you should take a new one, insert it under the previous row and cut off the unnecessary remaining piece.
Creating a transition to the walls and forming the walls themselves
When you have the bottom of the right size ready, it’s worth starting the creation of the transition to the sidewalls of the basket. For this:
- Take 17 new branches of the vine and is inserted under the braid, close to the already protruding rays.
- In order for them to fit well under the braid, sharpen them with a knife and push them in with an awl.
- Bend the newly inserted 16 rods up, forming the sidewalls of the basket.
- We cut off old unnecessary sticking out ends so that they do not stick out, and thread 17 rods under two new racks and bring them up.
- Do the same with subsequent new rays until you go around in a circle.
- Next, braid the sidewalls of the basket in your chosen technique. Weave is necessary until you reach the desired basket height.
Weaving edges and handles
In order to make the edge of the basket, you need to take one edge and go around the second and third, removing so that its edge is hidden inside, between the upper rows. An unnecessary piece is worth trimming. So do with all the rays.
When the edges of the basket are formed, it is worth making a handle. For this, the thickest rod of the desired length is taken and inserted between the rows as deep as possible. It is necessary to sharpen its edges well first and help promote it with an awl. Next, the handle is braided with five thin branches of vines and fixed in a familiar manner.
to contents ↑Stock footage
As you can see, weaving a basket of willow with your own hands is not so difficult. The technique is akin to the usual weaving of wreaths. Following the recommendations, you can definitely create such a useful product yourself.


