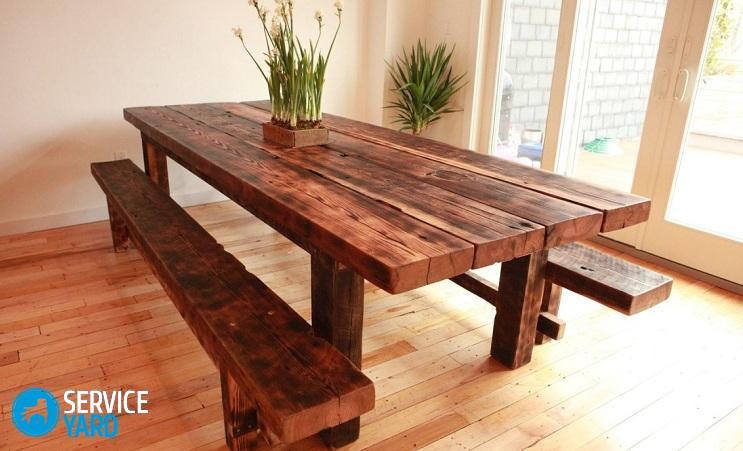
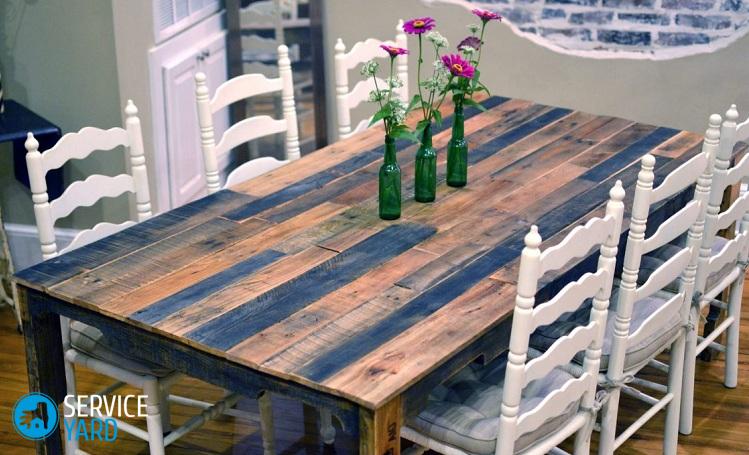
DIY table
A kitchen table is a piece of furniture that no kitchen or dining room can do without. This is the place that the whole family gathers on weekdays, and especially on holidays. That is why the table should be comfortable, functional and beautiful. There is a huge selection of them on the market today, but it is much more pleasant to make a dining table with your own hands. Moreover, this will save your family budget. For this work, you will need not only desire, skill and time. It is worth preparing certain tools and materials so that the do-it-yourself dining table comes out no worse, or even better than the factory one. So, first things first.
to contents ↑Types of tables
Before deciding how to make a kitchen table with your own hands made of wood, it is worth knowing that choosing even a finished piece of furniture is not an easy task. It should be functional, convenient, durable, while being distinguished by high aesthetics and design. Given the fact that in such a functional area as the dining room, furniture is the main element of the interior, its appearance is of particular importance.
Design
Before buying or independently developing a drawing, you should decide on the type of table, and they are completely different:
- A simple dining table with your own hands is a countertop with four legs.
- Transformer furniture today is one of the most common options. Compact in daily use, it looks more like a coffee table. But at the guests' visit, this modest part of the interior turns into a huge one in an instant, thanks to additional worktops and a special transformation system.
- A folding kitchen table will be the best solution for a small kitchen, due to significant space savings. The tabletop is attached to the wall with hinges; when unfolding, a support in the form of one leg is added.
- Folding design is familiar to many since childhood, because a table-book was in almost every Soviet apartment. It is based on a narrow countertop, which takes up very little space against the wall. The side parts are laid out in case of a visit of guests.
The form
It is also worth deciding on the shape of a beautiful kitchen table with your own hands. Each has its pros and cons. Consider them:
- A do-it-yourself round table is good in that its smooth lines unite all those sitting, not distinguishing anyone and not leaving aside. For the kitchen, this option seems ideal, if not for one “but” - it is difficult to arrange such a design in space. You can’t move it to the wall, but in order to put it in the center of the kitchen, you need to have at least 1 meter left on each side.
- The oval shape in this regard is considered more practical, and at the same time more elegant and safe. Such a table can accommodate up to 8 people around itself, the absence of sharp corners allows you to avoid bumps and bruises in children. In addition, furniture of this form successfully fits into any interior and can be located against the wall.
- The rectangular shape is a classic, always relevant. He will find a place both against the wall, and at the window, and even in the center. The disadvantages include sharp corners and the lack of a sense of individuality, because this form is very much strengthened in the minds of anyone.
- Do-it-yourself square table - strict, but functional, more suitable for a small family.Around himself, he will be able to gather 4 people, and if standing against the wall, then even less.
- The most impractical option is a triangular shape. But if you adore futuristic interiors, then without such an option it is impossible to imagine them.
Important! If you decide to stop at this option, then do not take a large design. Give preference to a coffee or coffee triangular table.
- The choice of a non-standard form may seem a dubious whim. But, even at the stage of drawing up the drawing of the kitchen table, you take care of ergonomics and give it a bending shape that adapts to your kitchen, then this option may be the most suitable.
Variations on the theme of the shape of the table there is a huge variety. We suggest taking a square as a basis, and in detail to understand the question of how to make a kitchen table with your own hands from wood.
to contents ↑Material selection
A table in the kitchen with your own hands is not only an item that is successfully inscribed in the overall interior. Its functions are diverse, and the material should be not only beautiful, but also durable. The furniture in this room must withstand various loads, namely:
- mechanical factors, since different foods are regularly cut on the countertops or heavy dishes are placed;
- temperature effects - often on the hostess's tables they put hot pans or pans directly from the stove;
- chemical factors that furniture is exposed to during cooking, such as bites or sauces, and when cleaning a room.
Thus, a high-quality table with your own hands should be made of a material resistant to various influences. The best option is wood, which successfully fits into any interior and lasts quite a while:
- A wooden table in the kitchen with your own hands should not be made from soft rocks. It is better to immediately abandon acacia and poplar.
- For countertops, pine or oak will be an excellent option.
- Birch wood will look good in the form of the legs of your future table in the kitchen with your own hands.
to contents ↑Important! For pine countertops, illiquid, cheap planks are best suited - succulent, in the form of a propeller. But, of course, without falling knots, cracks, wormholes. Traces of rot in the form of spots of black, gray, green colors should also be avoided:
- Producers do not like such a tree. Its processing delays the production cycle, and the amount of waste increases. Therefore, such raw materials can be purchased for a penny.
- But with an individual approach to the breed and after skillful processing, you can get layers of amazing beauty with an unusual natural pattern. For a DIY table for a family, this is a great way to apply your skills.
Sizing and drawing
The first thing to think about is the size of the furniture. For proper planning and execution of work, it is better to make a drawing of the kitchen table with your own hands, indicating all the parameters and taking into account some nuances.
Usually, when they make a table in the kitchen with their own hands, they count on a specific number of people. Typically, three to eight. But it is better to take into account several additional places in the calculations, in case guests visit. If you are a hospitable host, most likely you will need a large table that can accommodate up to fifteen people or more. In order not to deprive anyone, we take the following standards as a basis:
- A comfortable dining place for one person is 60 cm. This number is multiplied by the number of prospective vacationers around it. The resulting number will be the perimeter of the table with your own hands.
- How you place the furniture - in the middle of the room or dining room, near the wall, or maybe in the corner, also matters. In the first version, the table can accommodate a larger number of people, when it is located against the wall, subtract a certain number of places.
- If the table will have any drawers or swing doors, it is also worth considering on the drawing of the kitchen table with your own hands.
- It is necessary to determine the acceptable shape of the table so that it looks harmonious. If the table is too narrow, then you will constantly experience problems when serving it.
- Height is also one of the most important factors. The standard value is 800 mm from the floor to the countertop, taking into account its thickness. For people of average height, the optimum height is 740-760 mm.
to contents ↑Important! Also on the drawing of the kitchen table, it is mandatory to indicate the dimensions of the legs, other elements, the location of the fasteners. This stage of work needs to be given special attention, carefully thought out everything to the smallest detail, down to the holes, their number, diameter and distance between each other.
Tools and materials
In order to make a beautiful kitchen table with your own hands, you will need not only a drawing, but also tools and materials, the preparation of which should be considered in advance. A sample list is as follows:
- edged board 1.8 m by 0.1 m - 8 pieces;
- transverse jumpers 60 m by 2.5 cm - 2 pieces;
- longitudinal jumpers 160 × 2.5 cm - 2 pieces;
- table legs with a height of 75 cm - 4 pieces;
- dowels;
- hammer;
- saw;
- plane;
- nails and screws;
- stain;
- varnish;
- PVA glue.
Countertop Making
The table top is the most important part of any table with your own hands. If you want to simplify the task, then you can buy a ready-made version from postforming.
Important! Postforming is a profiled laminated chipboard with rounded ribs. Its main advantage is a variety of finishes, even wood-like, and the ability to choose any color scheme.
But, if you don’t like easy tasks, then we’ll analyze an example of creating countertops from boards to create a furniture board:
- The process of making a table with your own hands begins with cutting all the boards to the required length and width. After that, use a planer to process all the surfaces of the workpieces. Walk along the boards that will make up the surface of the countertop, and along the edges. In the end - you should get perfectly smooth billets, without any pits, cracks or slivers.
- Now fold the boards together. If all the previous steps are performed correctly, then the boards will fit snugly and form a single surface.
- Using a pencil, apply risks on the edges of the boards, while stepping back 12-15 cm.
- Next, make holes and fill in them with carpentry glue. Plaster the edges.
- Drive the dowels into the holes last and connect the boards.
- Remove glue residue, if it is on the front side, remove with sandpaper.
to contents ↑Important! After the future table is completely dry with your own hands, once again process it with a planer both from the outside and from the inside. Do not forget to walk around the edges. The following processing should be done with sandpaper.
Foot assembly
If in your opinion a beautiful kitchen table with your own hands must certainly be with curly legs, then it is better to order these details in the nearest furniture workshop. Save time and nerves.
If the furniture will have standard supports in the form of processed bars, then further work should be performed in the following order:
- We fix the legs of the future table with our own hands in pairs. To do this, connect one of the transverse jumpers to the first leg. From the inside, we drill 2 holes, which should go strictly perpendicular to the leg.
Important! We make sure that the drill does not come out on the other side. The hole must be formed so that it is 1.5-2 cm from the edge of the leg.
- We screw a self-tapping screw into the drilled socket. To do this, first grind the place under the mount and slightly round the edges. In this case, the details will look much neater.
- Before tightening the screw, coat the holes with special wood glue.This will make the mounts much more reliable.
- In the same way, we connect all the legs of the future table with our own hands, we fasten the resulting pairs with longitudinal jumpers, and you get a frame.
- In order to make this frame more stable, we install screeds in the corners of the frame diagonally. But, as a rule, such a measure of reinforcement is considered superfluous - a large table is quite reliable and without additional fasteners.
- The final step - we assemble the countertop and legs in a single design. The surface is fixed in the same way as the transverse ribs. But the grooves for fastenings should not be longitudinal, but transverse.
to contents ↑Important! When installing the mounts, be extremely careful. Make sure that the screw does not penetrate the countertop.
Painting
Now that you have a beautiful kitchen table with your own hands, the logical question arises: how to increase its service life? Here, experts advise following a few simple recommendations:
- A newly made wooden table cannot be left as it is. It must be painted, otherwise - the furniture will quickly lose its original appearance or even worse - it will rot.
- Prior to painting, the table needs to be well treated with sandpaper to level the surface. A better processing option is with a grinder.
- The best and free way to protect wood from decay is waste engine oil, but for the kitchen table this option is not the best because of the pungent odor.
- Optimal would be a double, with a break of 2-3 days, impregnation with a water-polymer emulsion. She will not only protect the wood, but also give the table a finished look with her own hands. Even birch plywood with this treatment will be suitable for the front panels of furniture.
Important! Also, for finishing, you can use any water-based acrylic varnish or stain.
Regardless of the paint material you choose, the painting process should be carried out as carefully as possible, following simple tips:
- In order to get a beautiful kitchen table with your own hands at the final stage, carefully remove all wood dust residues from the furniture. This can be done even with a conventional household vacuum cleaner.
- In order for the paint layer to lie on the surface evenly, it is recommended to use a spray gun, since when using a brush, the likelihood of smudges and smears increases greatly.
- A do-it-yourself table or any of its elements is best painted in a certain order. To do this, you need to choose any point convenient for you on the surface. From it, start the circular movements of the spray gun or brush, and finish painting on it. This will ensure uniform distribution of paint over the entire surface of the table.
Stock footage
A brand new beautiful table with your own hands is ready for its immediate application and decoration of the room. We congratulate you and wish you not to stop at these heights. Try to expand your knowledge and skills, master the technique, practice. Now you know from start to finish how to make a table with your own hands, and you can open new horizons in such an interesting carpentry art.


