Do-it-yourself table-book - drawings and diagrams
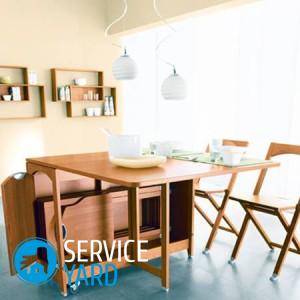
For many years, a truly universal piece of furniture is considered a table-book. It takes up a minimum of space when folded, but when needed, it turns into a huge, spacious, stable table. In stores, such products are sold in very different designs, for every taste, but they are not cheap. But, in fact, there is nothing complicated in carpentry, and if you want, you will get a wonderful table-book with your own hands. Drawings and schemes for work are easy to find, and we will give all other useful information below in today's article.
to contents ↑Varieties of book tables
At the moment, there are a large number of types of such furniture, so before you assemble a table-book, get acquainted with all the positive and negative qualities of possible options. Only after studying this information you can make the right decision.
Most popular options:
- Table book with shelves. Such furniture has been remembered by many since Soviet times, today it is also produced in large volumes. It consists of a narrow tabletop, playing the role of a frame, framed by large elements on both sides, which are laid out. Outwardly, it resembles a bedside table, which can be opened only in one direction.
- Model with chairs. Its interior is not occupied by shelves or drawers, so folding chairs are placed there.
Important! This is the best option for small-sized apartments, because one small bedside table contains a full dining room set.
- Table-book with a bar. This is a great option for a living room or kitchen, because a minibar is always at hand. When necessary, drinks leave the table through a special basket.
- Coffee folding table. It has the functions of standard furniture, only its dimensions are more compact, corresponding to the characteristics of magazine models. This is an incredibly stylish, comfortable thing that can fit into any interior.
- Mini book. This is a good option with small dimensions for the kitchen or living room. Thanks to the use of a variety of materials, a variety of colors, such a table can be matched to any interior.
- Table book with a bedside table. When folded, it resembles a bedside table with shelves and drawers. As a rule, he is given preference by housewives, who have accumulated a large number of things.
to contents ↑Important! Models with shelves and drawers filled with things are quite heavy, so moving them yourself is not recommended. Or you can equip the wheels for ease of movement.
Do-it-yourself table-making
Now we will take a closer look at how a table-stand is made with our own hands.
Important! This is an indispensable furniture for women engaged in needlework, because you can equip it for your own workplace.
The chrome or wooden legs can become supports - only you can decide, because they do not differ much in quality, strength, resistance. Now more about each stage of creating a folding table.
Preparation of tools and materials
Before you make a table book with your own hands, purchase laminated sheets of chipboard and fiberboard, then cut the following blanks from them:
- One main countertop.
- Extra worktop.
- Two sidewalls of the table.
- Two retractable sidewalls.
- Two retractable side rail mounting plates.
- Tsargu table.
- Bottom for the table.
- One shelf.
- Two doors.
- Two facades for boxes.
- Four side walls for drawers.
- Two rear walls for drawers.
- From fiberboard two parts of the bottom of the boxes.
Also for work you will need:
- Screw ties.
- Eccentrics.
- Eccentric stocks.
- Double-sided eccentric rods.
- Card loops.
- Four-hinge hinges.
- Roller guides.
- Dowels.
- Tips.
- Pens.
- Holders for shelves.
- Plugs for screw ties.
- Caps for eccentrics.
- Screws 4 and 3.5 to 16.
- Screws.
- Nails
- Key for a screw coupler.
From the tools you will need:
- Roulette.
- Pencil.
- Hammer.
- Crosshead screwdriver.
- Screwdriver.
- Hex wrench.
- Electric jigsaw.
Important! It’s difficult to independently cut chipboard at home, so it’s better to contact the workshop with a ready-made cutting scheme, where you can do everything quickly and, most importantly, they’ll do it right.
Table assembly
After all the preparatory work, miscalculation of all sizes, cutting parts, a do-it-yourself desk table is assembled. Drawings should always be in front of your eyes in order to connect all the elements correctly.
Build according to the instructions:
- Attach the tips to the sides of the table with nails. Screw the roller guides to them with screws. Then connect the sides of the table with the drawer and the bottom using a screw tie and dowels. Make holes in the king and sides, then insert eccentrics in them.
Important! The arrow on the eccentric should always be located towards the end of the part.
- Screw the eccentric rods into the holes on the countertop. Then fasten the card loops with screws. Lower the countertop onto the sidewalls so that the eccentric rods clearly fall into the holes in the side and ends of the sidewalls. Rotate the eccentric 180 degrees on the drawer and sidewalls.
- Use the nails to attach the tips to the retractable sidewalls. Then insert the cam in them. Do the same with the mounting rails. Insert double-sided eccentrics at the ends of the mounting rails. Then rotate them 180 degrees. Drill holes on the slats, insert dowels into them. Attach the extendable support to them. Then fasten the card loops with screws. Screw the already fixed hinges on the slats to the sides of the table.
- Insert the shelf holders into the holes on the optional worktop. Screw it to the card loops fixed at the base of the countertop. Close the screw and eccentric couplers with plugs. Then attach the mating parts of the hinges with four hinges to the side of the table. Attach these hinges to the door with the same screws. Screw the handle, then install the door. Fasten the hinges to the counter sections with screws. Install the shelf holders in the holes on the sidewalls, then place the shelf on them.
- Connect the back wall of the box with a screw tie to the side walls. Screw the eccentric rods into the holes on the front side, insert dowels. Connect the front of the drawer to the side walls. Insert the bottom of the box into the groove, secure it with nails. Fix the counterparts of the roller guides on the sides of the box close to the facade with screws.
- Screw the handles. Insert the drawers by tilting them slightly so that the roller guides clearly fall into the guides on the side of the cabinet. Lower the drawer, then slide it in.
to contents ↑Important! Boxes should move smoothly, without rubbing, creaking, and without any special effort to move out.
Stock footage
After studying this article, you will be able to assemble a wonderful, convenient, practical folding table with a cabinet on your own. It is guaranteed to fit all your belongings, which you have not yet found a place in the closet or living room wall.


