DIY box for rings
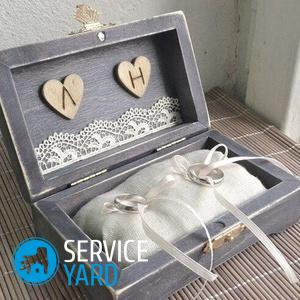
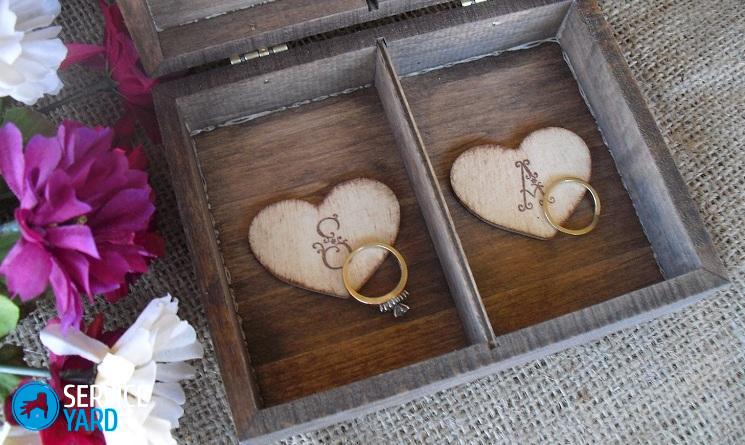
A jewelry box is simply necessary for a true lady, because each time the selection of earrings, chains and rings takes a lot of time, and they, as luck would have it, always get confused and lie in different places. A variety of caskets are presented in stores, exclusive, with amazing finishes, but their cost is quite high. Therefore, we propose to consider the option of how the box for rings will look like with your own hands. It can be created from improvised items that are still gathering dust on your shelves and cabinets.
to contents ↑Storage rules
The picture from the movies, when the chest opens, and there are mixed beads, necklaces, rings, it looks beautiful, but not true in principle. You can’t treat jewelry like that. Each type of jewelry has its own immutable rules:
- The jewelry storage area should be cool, dark and dry.
- It is desirable to store different types separately from each other, only in this case precious stones will not be able to scratch gold, the softness of which depends on the sample.
- It is worth knowing that silver is afraid of moisture. Therefore, in an organizer or a box for rings do-it-yourself put a tablet of activated carbon. It absorbs excess moisture and maintain the original shine of the metal.
- Gold and platinum jewelry cannot be stored in cardboard boxes, because they contain sulfur. And on such a neighborhood, precious metals react with spots and darkening. Store gold and platinum items only in your own wooden casket for rings.
- Necklaces, chains and necklaces are best stored in a straightened state, hanging on special stands.
- Leather cords with pendants or pendants can be kept folded into a ring, thereby the cord is not deformed or twisted. Jewelers advise to keep each such jewelry separately in zip packages. Then the metal does not oxidize, is not scratched by stones and does not get confused in a bunch of chains.
- Gilded jewelry requires special attention. They must be removed for the night, stored in separate bags from velvet.
Criterias of choice
Before you learn how to make a jewelry box for rings with your own hands, let's find out what criteria jewelers show. The size of the box for your own rings and earrings should correspond to the amount of content:
- The multi-tiered design is suitable if you want to place a large number of small products in different compartments. For example, give one tier under the rings, on the second - place the earrings, on the third - a necklace.
- If in your arsenal there are few jewelry that require special storage conditions, then it is worth stopping on a small box.
- In order for small objects to not accidentally crumble, or for small children not to use jewelry as toys, it is better to give preference to models with locks. By the way, in the old days such caskets were made with a secret device, only the hostess knew how to open it.
to contents ↑Important! Another nuance. When choosing material for a jewelry box with your own hands, consider the style of its design. It is worth considering that it will become not only a convenient storage place, but also an interesting element of the decor of your room. It will be great if her style decision will harmoniously fit into your interior.
The basis of the box - preparatory work
In search of an answer to the question of how to make a box for rings with your own hands, it is worth knowing that the basis of most products is the most ordinary wooden or paper structure with divisions of various sizes. Therefore, first of all, we will learn how to create it from thick cardboard, with a thickness of at least 2 mm.
We will also need the following materials:
- PVA glue. You can opt for Lacra or Henkel products. They can be found in the most ordinary hardware store. Their main advantage is that they have a thick consistency and do not turn yellow over time.
- Also, do not forget to purchase masking tape in a hardware store. It is better to take a width of 4 cm.
- It is also worthwhile to purchase Moment-Crystal glue.
- Normal Whatman.
- A fabric that consists of 100 percent cotton.
- Tape 15 cm in the amount of two pieces. They will serve as a stopper for the do-it-yourself jewelry box cover.
Prepare tools in advance, so that in the process of work you are not distracted by their searches:
- A wide knife with segmented blades, it is better to take a construction one.
- Scissors.
- Waste piece of linoleum.
- Ruler.
- Synthetic glue brush.
- Pencil, sharpener, eraser
- Stack to smooth all surfaces and corners.
- A cloth to wipe off immediately the glue on the work surface.
Drawing and cutting parts
In order to create a box for rings with your own hands, you will need cardboard blanks. When laying out, try to place parts of the same width side by side. The framework will consist of the following elements:
- The bottom of the box is 1 piece. A rectangle measuring 9 x 16 cm.
- The wall is long - 2 pieces. Rectangles 6 by 16 cm.
- Cover - 1 piece. Size 9.7 by 17.5 cm.
- Bottom - 1 part. Size 9.7 by 17.5 cm.
- Spine - 1 part. Size 6.4 by 17.5 cm.
- A backup - 2 pieces. Size 2.8 by 8.6 cm.
- The platform is a detail. Size 5.6 by 8.6 cm.
- Partition - 1 part. Size 5.5 by 8.6 cm.
- Short wall - 2 pieces. Size 6 by 8.6 cm.
to contents ↑Important! Before you start cutting out the details of the box for the rings with your own hands, you should know one nuance: the edge of the cardboard that is produced from the factory is not even. Therefore, you need to either trim the edge or process already cut parts using fine sandpaper.
Base assembly:
- We glue the walls of the future casket for rings with our own hands from top to bottom. We apply glue to the detail of the long wall from the bottom to a piece of cardboard, like toothpaste, quite generously.
Important! Then remove the excess easily, but if there is little glue, the box will be shaky.
- Now move on to the short walls. We apply glue already on two sides to connect the part with the bottom and with long parts.
- Next, we note the location of the partition and glue it, we apply glue to the sections from three sides.
- After the glue dries, we strengthen the edges of the ring box with our own hands using masking tape.
- Glue a small segment of masking tape to the junction of the wall and the bottom. And immediately gently smooth this place with a stack. This is important, otherwise, the tape simply disappears.
- Thus, we gradually strengthen all joints from the outside, and then from the inside.
to contents ↑Important! Do not forget about the platform for the rings. In order for these jewelry to be conveniently removed from the casket, the bottom of this compartment should be higher than the main part. To do this, glues to the walls of the support and fix the second bottom on top.
Cover Creation:
- We glue the blank for the cover of our casket for rings with the fabric on the front and back sides.
- During operation, do not forget to glue the tab so that the box for the rings with your own hands can be conveniently opened by pulling on it.
- In the middle of the short wall and in the middle of the sides of the roof we put marks. We attach tapes for the stopper to these places.
to contents ↑Important! Make sure that the base of these parts is well fixed so that the next time you open the box, the lid does not fall off, since the stoppers were weakly glued.
Rollers for rings
Now let's move on to an equally interesting task - how to make rollers for rings in a casket. To do this, you need 6 parts of felt 20 cm long and 5.5 cm wide:
- We turn the sheets of felt into tight rolls and fix them with glue-moment.
- Wrap the rolls on top with fabric - either in the main color of the ring box with your own hands, or in contrast.
- We fix the fabric from the bottom with the same glue-moment.
Important! It is not necessary to glue over the entire area, otherwise, the fabric will become stiff.
- Now apply a narrow strip of PVA to each roll and glue it in place. These parts must fit snugly together so that the ring or earrings inserted into them are tightly fixed.
to contents ↑Important! The question of how to make rollers for rings in a casket can also be solved with the help of foam rubber. The scheme of work with this material is similar.
Dressing
Now that the base is ready and the task of making rollers for the rings in the casket has been solved, it's time to turn on your imagination and start decorating our creation. Next, we will only talk about the most common ways to decorate jewelry boxes for rings with your own hands:
- In order to decorate the finished product in the decoupage style, you need to choose a napkin with a beautiful pattern. The element of the pattern that you want to see as decoration should be cut along the contour and glued to the lid using PVA glue. When it dries, coat the box with varnish on top to fix the paper.
- To create a box in the style of Shabby Chic you will need lace, fabric in a delicate flower, decorative beads and beads. The walls of the box can be pasted over with one type of fabric, the lid with another. From above, create a composition of lace and beads, and glue a long string of beads along the perimeter of the side walls.
- Do-it-yourself jewelry boxing for rings can be done in the kanzashi style. To do this, you will need many meters of tape, preferably two colors. Work begins with the formation of the kansashi petals. To do this, they are bent at the right angle, the edges above the candle are melted. They must stick together to make the flower flat. Such details will need about a dozen. Then string on the thread, alternating colors. Next, the ends of the thread are connected, and the petals are straightened. In the center of the future box you need to spread glue to firmly press the flower. Then, put glue in the center of the flower. This is necessary for attaching rhinestones or beads.
- A surprisingly simple quilling technique involves twisting paper strips to create a decor. Spirals are conveniently twisted with a toothpick. Having made several blanks from different colors, we glue them into strips. Then long columns are formed, to which the aforementioned strips are glued, and these blanks are used to make a jewelry box for rings with their own hands. The upper part should be decorated with flowers. For this, multi-colored strips of twisted spirals are connected in a special way.
- Another way that will require careful preparation is to design the box with polymer clay in a mosaic style. To begin with, you will need to prepare the details of the mosaic from clay so that they fit snugly on the box. Then the elements need to be tinted in different shades and baked in an ordinary oven. After - glue the blanks over the entire surface of the ring box with your own hands.
to contents ↑Important! If these methods seem too complicated for you, then for a start you can try to glue the parts of the product with a beautiful cloth or wrapping paper, being careful and immediately removing excess glue. Lace, beads, large stones and rhinestones will help to give a special chic.
Stock footage
Now you know how to create a jewelry box with your own hands. Decoration methods allow creating author's things in a wide variety of variations on the basis of a single pattern. By the way, such creativity can be a great gift for any occasion to a close friend or mother.Just remember, the box itself, donated “alone”, may look out of place. It must be invested in decoration.
- How to clean silver at home from black 🥝 how to clean rings, earrings
- Gold and silver - properties, signs
- How to clean gold from black at home?
- How to clean jewelry?
- How to choose the right jewelry for the neckline of the dress?
- How to choose earrings according to the shape of the face?
- How to wear rings on women’s hands?
- DIY leather jewelry
- DIY jewelry from beads and beads - patterns
- DIY lace earrings
- How to make polymer clay earrings?


