Daylight lamp connection diagram
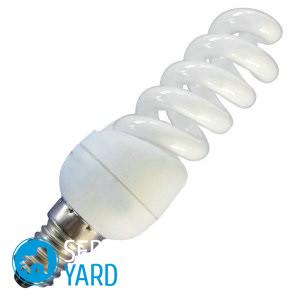
Daylight lamps are very common in human life and are gaining more and more popularity as the price per kilowatt of energy rises all the time. The operation of components of the usual type has become an extremely expensive pleasure, and the modern alternative is not only affordable for everyone, but is also required for many modern chandelier models. All this is very cool, but, unfortunately, not everyone knows what the connection scheme of a fluorescent lamp looks like, so we will devote a little time to considering this matter.
to contents ↑How are fluorescent lamps arranged?
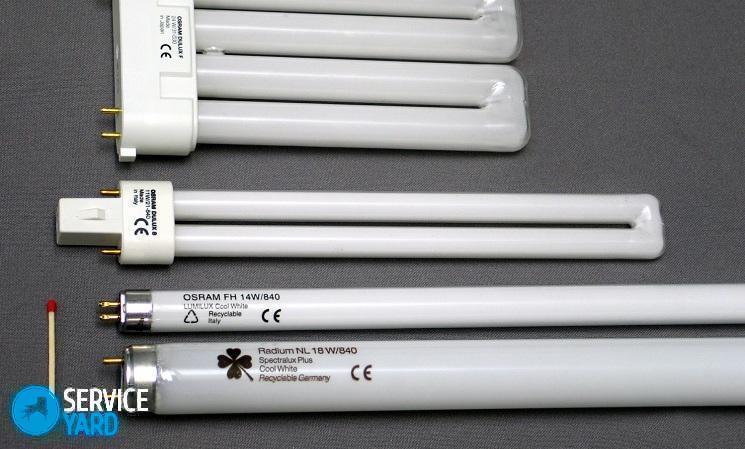
In order to understand the principles of work, you should take a closer look at the device itself. The lamp is a thin cylinder made of glass, which can have a different size and shape. Typically, the components are classified into the following types:
- Direct.
- In the form of a ring.
- U-shaped.
- Devices with a socle E14 and E27.
In fact, each species is not much different from each other, since all of them are equipped with electrodes, a special coating and an inert gas injected containing mercury vapor. The electrodes play the role of spirals that ignite this gas, which causes the phosphor to glow.
Important! Since the spirals are small, the standard mains voltage is unlikely to work. For this reason, special devices are used - chokes, which provide a current limitation to a certain (nominal) value.
A special role is played by inductive resistance. In order for the spiral to heat up only for a short period of time and not burn out, a special component called the “starter” has been created. This part removes the glow of the electrodes after ignition of the gas.
What does the daylight bulb connection diagram with a starter look like? In order to answer this question, you should understand the principles of work.
to contents ↑What is the job?
A potential difference of 220 volts is supplied to the terminals of the existing circuit. The voltage passes through the inductor and falls on the first spiral of the lamp. Then it goes to the starter, which, in turn, passes current to the second spiral. The latter is connected to a network terminal.
Often they put a capacitor at the output, which serves as a kind of line filter. Thanks to its function, part of the reactive component of the power is smoothed out, which is produced by the inductor, and the lamp receives less energy.
How to assemble a fluorescent lamp so that it works? Now I’ll have to figure out a bit about connecting the component.
to contents ↑Connection
All devices require simple circuits because they are designed to “activate” only one lamp. But to carry out the same manipulations with two different components, you will need to make some changes to the circuit, guided only by the rules of serial connection.
For such cases, you will need two starters at once, one for each lamp. When connecting two elements to one inductor, it is necessary to take into account its rated power value, which is usually indicated on the surface of its housing.
Important! In other words, if this component has an allowable power of 40 watts, it will be possible to connect only elements with a load of up to 20 watts.
You can also abandon the scheme for connecting a fluorescent lamp with a starter, giving preference to special ballast devices. They help to instantly ignite the elements, without any characteristic blinks for cases with starters. It is extremely simple to connect to such components: on the case of the latter there is detailed information with schematic instructions that demonstrate the sequence of connections of the contacts and the corresponding terminals.
In order to get a complete understanding, it is recommended to download the simplest scheme from the Internet.
The advantages of such a connection:
- You will not need any additional elements that are needed to connect in starter circuits.
- A simplified scheme for connecting a fluorescent lamp provides greater reliability, since in this case unnecessary connections to the aforementioned starters, which are rather unreliable, are eliminated.
to contents ↑Important! Usually in the delivery package you can find all the necessary parts for assembly, so you do not need to think up anything and purchase additional equipment.
Health Check
If the device ceases to please you with its work, the tungsten filament, which ignites an inert gas, may have broken. During operation, tungsten constantly evaporates and condenses on the surface of the walls of the elements. With all this, a dark coating also appears on the edges, which makes us think about an early replacement.
How to evaluate the performance? You just need to get a simple multimeter that can measure the load resistance. If the device shows a value of 9.9 ohms, then tungsten is intact. When checking the second pair of electrodes, the tester can give a zero value, which is typical for a rupture of the thread on one side only.
The spiral breaks due to the gradual thinning and growth of tension that passes through it. It is thanks to the growth of this value that the starter is becoming increasingly unusable faster and faster, and incomprehensible “blinks” may testify to this. After replacing the elements, the lamp should work correctly.
Important! If during shutdown extraneous sounds and noises are heard, as well as a burning smell is felt, it is urgent to de-energize the component and check the operation of all parts.
At the terminal connections, slack can always form, which very quickly heats the space around it. Also, one should not forget about the throttle, which is often made poorly. A poor component can cause a short circuit, which can damage the lamp.
to contents ↑Stock footage
How to assemble a fluorescent lamp? Only you can choose the connection method, since each of them has its own advantages and disadvantages, and is also applicable only for certain cases.


