Do-it-yourself potholders from fabric with patterns
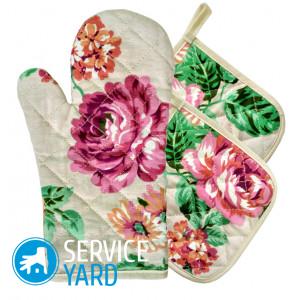
Modern kitchens are equipped with the most technologically advanced and multi-functional devices, but still there are still objects that housewives have been using for many decades. We are talking about tacks, because without them it is difficult to imagine at least one kitchen where food is constantly being prepared, which is certainly accompanied by high temperatures. They are always in a conspicuous place and attract the attention of guests. It is important that they are always neat and clean, consistent with the style and color design of the room. In this article, you will learn how to make do-it-yourself tacks from fabric with patterns.
to contents ↑Features of self-made kitchen tack
It is very easy to sew fabric potholders with your own hands, for this you do not need to own any special techniques and skills. If you can sew the most ordinary buttons, then you can also sew such a product. It is very important to understand what tacks can be made from, what materials to fill with, what shape to give, what techniques to use.
External material
To create such accessories, it is better to choose only natural fabrics, which include the following:
- Linen.
- Cotton.
- Chintz.
Remember that such home-made things will somehow come into contact with food, which is why there is no place for synthetic fibers. In addition, synthetics can not withstand the effects of high temperature, which tacks constantly experience on themselves.
Important! Synthetic materials instantly smolder and melt upon contact with hot objects and fire.
Internal filling
Any master class devoted to how to sew a do-it-yourself oven mitten assumes the volume of products, since there is always a filler between the details of the pattern. Like the base material, it must be natural and wear resistant.
As a filler, it is better to choose:
- Felt.
- Drap.
- Batting.
Important! If you plan to decorate the product with knitted needles or crochet elements, it is better to choose natural wool, because such an accessory will look great in any kitchen in combination with a variety of curtains.
Shape tack
Practicality and functionality are paramount properties of any kitchen accessory, that is, the goals of each master class, which describes how to sew a tack. Therefore, before starting work, it is necessary to determine what shape the product will have, since each of them varies in terms of convenience in terms of operation.
Popular forms of tacks:
- Squares.
- Mittens.
- Long rectangles.
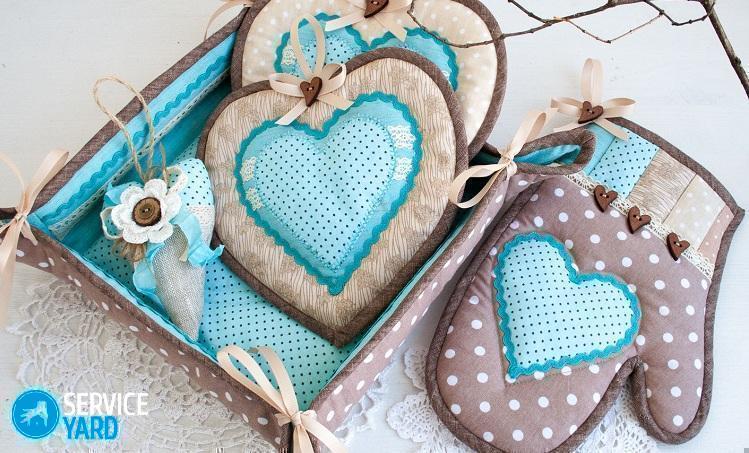
- Leaflets, hearts, fruits, berries.
We get the greatest scope for creative manifestations when it comes to decorating such products with our own hands.
Decor Options:
- Application.
- Crochet.
- Making a decorative seam or using special patterns for crocheting embroidery.
In principle, you can use everything you want for sewing, the main thing is that this choice does not negatively affect the convenience and practicality in everyday use.
to contents ↑Homemade Tack Making Ideas
As you have already seen, these accessories can be the most diverse, but the following are considered the most popular variations in their implementation:
- Quilted. Quilted household items are in greatest demand, thanks to them the kitchen becomes more comfortable and homely.
- Patchwork. They look no less advantageous in the kitchen, but the manufacturing process itself is more complex, requires more time than in the previous version, and use a clear scheme. In addition, in order to stitch such a product, it is necessary to be able to cut details.
- Crochet or eyelet. If desired, you can experiment in every way with hooks and eyelets for fixing accessories.
to contents ↑Important! Knitting tacks allows you to fill your kitchen with a special touch. If you are a beginner, then the best option for you would be to perform crocheted, non-voluminous, dense patterns. All kinds of knitting, sewing and weaving techniques allow you to decorate your home with useful products of a non-standard shape, fancy and ornate.
DIY kitchen gloves
Believe me, it’s not difficult to make beautiful potholders from fabric with your own hands, the main thing is to follow a certain sequence, and you will get an excellent result.
Sew the mitten-shaped mitts as follows:
- First of all, you need to create a pattern. Just attach your own palm to a sheet of A4 paper, then fold it in such a way as if you intend to put on a mittens, circle the resulting silhouette, 2.5-4 cm away from it. You will get a pattern.
- According to the finished template, cut out two elements of the front and inner material. As the front part, it is better to choose a beautiful, bright fabric that can decorate your kitchen. The inner filling should be pleasant and soft to the touch.
- Process the filling of the mittens. Cut out two flaps from a dense non-synthetic material.
- Fold the two parts together correctly. On a flat surface, first put two pieces of colored fabric face to face, which are designed to face the product. Then attach filler cuttings on top and bottom to the finished elements. On both sides, reapply a flap for the inner lining.
- Fasten all parts with pins so that they do not fidget during sewing.
- Sew the edges of the tack, retreating from the edge of 5-7 mm.
- When you get an inverted mitten, cut off the excess fabric at the edges, not reaching a seam of 3 mm.
- Make small cuts in all rounding sections so that you can turn the mitt out later.
- Turn the glove outward, decorate it with braid or decorative tape.
to contents ↑Important! This is the easiest way to create a tack, but if you are confident in yourself, you can complicate your work a little and make a quilted accessory. Just all the elements of the fabric for the front trim are sewn before being cut into flaps with a cage, rhombus or other method. Then all the flaps are folded and stitched according to the above instructions.
DIY square tack
You already know how to make oven mitts for the kitchen with your own hands, so it's time to expand your horizons a bit and learn a more complex master class.
Sew a square tack according to this pattern:
- First of all, prepare two shreds of beautiful fabric for the front side and the same amount of detail for the inside. You can use batting.
- Make a pattern that will be a square with sides 20 by 25 cm.
- Cut four pieces of fabric along the pattern.
- Lay the filler with the first layer, a piece of decorative material facing up on top of it, then the same fabric again, only face down, and at the end, cover the pattern with a layer of batting.
- Sew the blank from three sides without changing the sequence of the flaps.
- Make a loop of a beautiful fabric of size 8 by 15 cm.
- Attach a buttonhole to the fourth side, which remains un sewn, process it on a sewing machine.
- Turn the product out.
- Sew the fourth side of the tack.
to contents ↑Important! If you wish, you can decorate the accessory from the outside with an additional pocket. In principle, in such a scheme, you can sew an object of any shape, for example, a circle, a rectangle, and even a star.
Patchwork Round Potholder
Accessories made in this style look incredibly beautiful and original. Therefore, one cannot ignore the idea of creating a tack in such an interesting way.
You must do the following:
- Create a special pattern with a circle, the diameter of which can be arbitrary.
- Make a blank from the material for internal filling according to the pattern made. Then the same part for the outside.
- Cut out several pieces of fabric with an arbitrary pattern.
- On a sewing machine, combine all the prepared flaps together to make a single fabric.
- Flatten all the seams well.
- Connect a circle of multi-colored flaps with the corresponding element from the inner filler. Then put another layer of filler, on top of it a piece of decorative material.
- Sew the entire product in a circle, cut the remaining threads.
Stock footage
Now you know for sure how to sew do-it-yourself oven mitts. Patterns complex configurations are completely unnecessary for this, and it is precisely the work of many beginner craftsmen who are afraid of working with them. Everything can be done independently, with your own hands, cutting out each necessary element. Thanks to the given master classes, you will bring a special chic to the interior of your kitchen.


