DIY bedspread

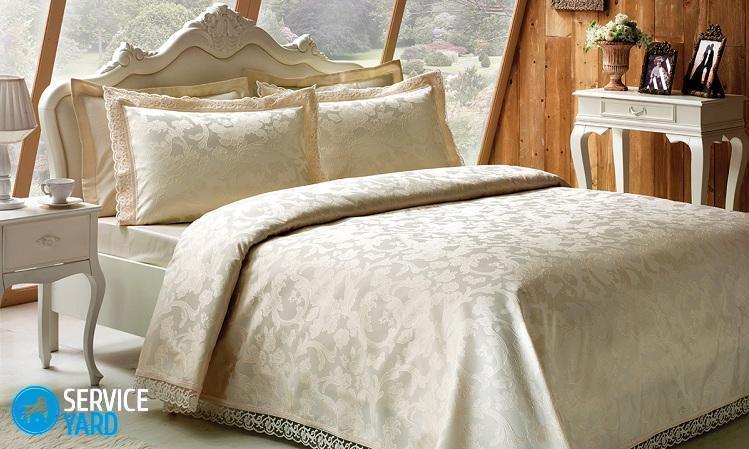
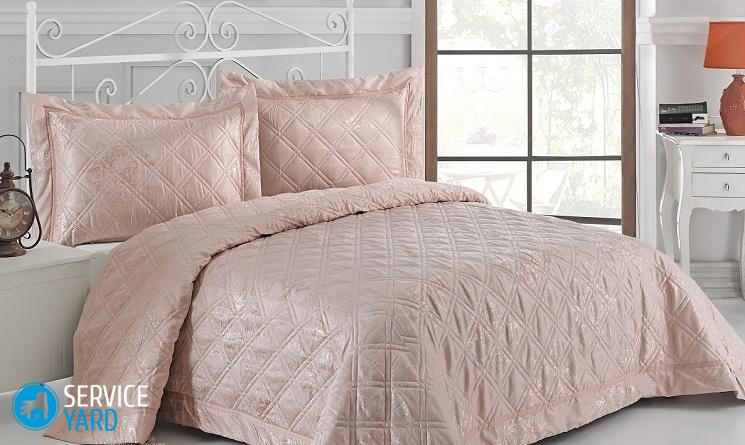
The bedroom is not just a place for a night's rest, but also a cozy, stylish, elegant “nest” for privacy. And such a piece of decor as a beautiful bedspread makes the room even more attractive. With the right choice of color and texture of the fabric, this piece of furniture will be a great addition to the design of the bedroom. There are a lot of options, you can, of course, purchase a decorative piece of furniture in the store, but a sewn bedspread with your own hands will create a warmer and more cozy atmosphere in your bedroom. Today we will focus on several variations of the bedspreads and help you choose the most suitable decor item for the bedroom interior.
to contents ↑What to sew a bedspread on a bed for?
The main criteria for choosing a material should be compatibility with curtains and the main color of the bedroom interior. The combination of curtain patterns with the pattern of the bedspreads is optional, but the texture of these fabrics should match. For example, a light silk or openwork bedspread does not look quite harmonious with heavy and dense curtains. In addition, the fabric for the bedspread should match the style of the decor. You can opt for a dense fabric with an interesting texture, or you can give preference to a light silk bedspread with shine.
The most popular materials for bedspreads:
- Silk. Silk bedspreads look great in a classic interior. The fabric is distinguished by its brilliance and beauty.
- Wool. Woolen products have different textures and weaving, so wool bedspreads can be thin and dense. They are not subject to wear, perfectly retain heat, but easily absorb moisture. They make products from sheep and camel wool.
- Cotton or satin. Natural material is perfect for the summer version of the product. The fabric retains bright colors and shine for a long time.
- Fleece. The material is perfect for sheltering a baby bed.
- Linen. Flax products smooth out all the bumps on the bed, but they have one drawback - they are difficult to perfectly smooth.
- Velvet. The product from velvet looks noble and festive. The fabric can be either printed or non-printed.
- Velours. The soft velvety velor fabric looks beautiful, is easily washed and dries quickly, unlike the capricious velvet.
- Bamboo cloth. Eco-friendly fabric made from thin bamboo fibers is very elastic and does not require special care.
- Jacquard. The fabric has a tight weave, which gives the bedspread sufficient rigidity. Jacquard product perfectly complements the interior, made in a single color.
- Fur. For the manufacture of bedspreads, both natural and artificial fur is used. Products must not be washed. It is better to clean woolen blankets in a dry-cleaner. In addition, fur products are not suitable for every interior.
Product color tips
If you follow the rules of designers, then the bedspread should be the color of the walls, furniture and one picture with curtains. However, there are more interesting solutions:
- For the interior in a classic style, the color of the curtains and bedspreads should match.If the interior is stylistically less strict, then you can make a blanket, the pattern on which will be in harmony with the shade of the curtains. Or add a plain decorative track to the color of the curtains and put it on top of the bedspread.
- Looks harmoniously plaid in the color of the walls. If there are patterns or flowers on the walls, then you can choose a bedspread of the same style. For example, against the walls of a pale green color, you can make a bedspread on your bed with your own hands from a bright mint fleece.
- If the bed from the furniture set has a high headboard, then a plaid to match the tone of furniture will be appropriate.
- The color for the product can be matched to the tone of the main color scheme of the interior. For example, if the bedroom is decorated in delicate turquoise colors, then blue or blue plaid on the bed is suitable for decoration.
to contents ↑Important! The modern design uses the bed as a bright spot and the main emphasis in the room, made in pastel, neutral colors. In this case, the color of the bedspread can be associated with a bright accessory, carpet or lampshade of a chandelier (floor lamp).
Do-it-yourself bedspread from shreds (patchwork technique)
Needlework classes allow craftswomen to do beautiful, exclusive and useful things for their own home. Sewing a bedspread with your own hands for such needlewomen is not difficult, the only question is which option to choose. Below we will tell you how to sew a quilt using the patchwork technique.
If you are constantly engaged in needlework, then enough pieces of fabric have accumulated in the house to use them for making a bright and original plaid.
Pattern Techniques
A patchwork-style technique will help in the work, which has several options:
- Traditional technique. An entire canvas is created from individual pieces of fabric, selected according to the texture, pattern and color. When sewing, you need to make neat lines and harmoniously select shreds, and everything else depends on the imagination of the craftswoman.
- Technique "Watercolor". A popular technique that is based on squares, but it is much more complicated than traditional sewing. The work involves a long selection of shreds, since this technique is based on the transition of shades from light to dark. Only in this case the resulting effect will resemble watercolor.
We sew a patchwork blanket
Step-by-step instructions for making bedspreads in the style of patchwork:
- Determine the size of the product. Measure the length and width of the bed. The blanket should cover the mattress and the walls of the bed, so add 60 cm in width and 30 cm in length to the dimensions obtained.
- Select a color scheme for the product.
- Prepare the material: stripes, shreds, squares of fabric. Before using the fabric, prepare it for work: soak in hot water for 10 minutes, and then rinse in clean, warm water. Iron a clean cloth to make it easier to work with.
- Select the fabric for the back of the product. As a purl fabric, chintz or cambric is perfect.
- Prepare the following tools: scissors, threads, needles, pins, a sewing machine, pencil or chalk, a square ruler or square pattern.
Important! You can choose another pattern, for example, a rhombus or flowers made of fabric, but a square is the simplest figure for beginners.
- After you decide on the pattern and distribute all the details, you can start stitching the squares. First, sew the longitudinal strips and iron the seams. Then sew the strips into one fabric and again iron all the seams. You should have a finished front side.
- Lay the piece of the wrong fabric on the table (floor) face down.
- On top of the wrong fabric, put a synthetic winterizer, if the bale will act as a blanket. In another case, this is not necessary.
- Place the patchwork of squares on top of the workpiece.
- Sweep the structure or pin it with pins.
- Quilting the product on a sewing machine. The easiest way to quilting a blanket is in the squares, since it will be difficult for beginners to make stitches some other pattern.
- Border the product. To do this, use a strip of fabric about 8 cm wide and slightly longer than the side of the product. Fold the fabric in half, attach to the front of the product and sew.
Advice:
- If you do not have enough pieces of fabric, then purchase the material in the store. A double bed measuring 220x240 cm will require 10 m of plain fabric and 50-80 cm of fabric of different colors (maximum 8).
- If you want your sewn bedspread to have a three-dimensional shape, use sealing material in the form of a synthetic winterizer.
- If you buy specially quilted fabric, you can create a masterpiece in the style of patchwork from silk, satin or cotton.
Quilted bedspread
Next, we will introduce you to a new option, how to sew a bedspread on the bed with your own hands.
Materials
For the manufacture of bedspreads, you will need the following materials:
- Fabric with a beautiful pattern (cotton or satin) 280 cm wide for the top.
- Lining fabric (linen or cotton).
- A synthetic winterizer with a density above 150 g / m2 and a thickness of 3-4 mm.
- Fabric for edging.
- Threads in fabric color.
- Sewing machine.
- Long ruler.
- Chalk or marker on the fabric.
- Scotch.
- Pattern for stitches.
Step-by-step instruction:
- Before starting work, wash all fabrics for a future product or steam them well with an iron. This is necessary to prevent shrinkage and skew of the finished product.
- Spread the fabric on a clean, flat surface (on the floor). It is better to take fabric for the top (top) of sufficient width to exclude seams and bumps.
- From the fabric, cut a square measuring 230x230 cm. Process the edges of the material with an overlock.
- From the lining fabric, collect a slightly larger square of 240x240 cm. Treat the edges of the back (lining) with an overlock, iron the seam allowances.
- Take a square stitch pattern (23x23 cm) and a long ruler. With a marker or chalk, line the stitches on the wrong side of the front fabric, starting from its edge.
Important! To make it convenient to work, but the fabric does not shrink and does not move, fasten it with tape.
- Take the lined top to the side.
- Spread the lining fabric on the floor with the wrong side up, and fix it with tape.
- Lay the synthetic winterizer on the lining with cloths, fix the details with rare, not tight stitches.
- Lay the top on the workpiece with the ruler up.
Important! Make sure that the fabric lies evenly without creases or creases.
- Connect all the details of the bedspreads with a needle and light threads. Start stitches from the center. Go basting first in one direction, and then in the other.
- Try to basting without knots so that after removing the threads do not disturb the fabric structure and stitch.
- Sew a machine stitch from the center to the edges of the product. First, lay horizontal stitches, and then vertical ones, gradually filling them with all the free space of the product. For the convenience of work, fold the edges of the bedspread to the center, put the product along its entire length on an extra place near the machine.
Important! Sew stitches evenly on the lined line, pulling the fabric slightly behind the sewing foot.
- Align the sides of the product with a ruler and marker on the fabric, and the corners with a square. Lay the line as close to these lines as possible. Cut off excess tissue.
- Sew a 3-centimeter edging around the entire perimeter of the product.
- Iron the bedspread.
to contents ↑Important! Use specially bent quilting pins for basting. These pins do not move or move during sewing.
How to make a do-it-yourself blanket with a frill? Master Class
A beautiful blanket with frills will hide all the bumps on the edges of the product:
- For a frill it is better to choose a satin plain fabric.
- To calculate the amount of fabric, consider the shape of the corners of the mattress, allowances and the depth of the folds, however, do not forget that the finished product should not hang on the floor.
Important! Ruffles do not have to be cut out from a single piece of fabric, you can use pieces of fabric, but the joints and seams should be hidden in the depth of the fold.
To make a frill, proceed as follows:
- Take the finished quilted fabric for the bedspread, cut out the bedspread to the size of a double bed.
- Calculate the frill pattern. Take the ribbon of the future frill, fold it in folds. Fasten folds to 1 m of tape length. Then straighten the material, measure the length of fabric that was needed for one meter of frill. Multiply the result by the required length to get the amount of material for the whole frill.
- Cut the required amount of fabric into four ribbons, sew them together.
- Fold the bottom edge of the tape, treat with an overlock.
- Fold the desired width, stitch.
- Sew the frill to the finished product.
to contents ↑Important! If the bed has a back, then calculate the material for the frill for three sides.
How to make a do-it-yourself blanket from pompons for a baby bed?
Acrylic yarn of bright colors is best suited for a plaid of pompons. It is very soft to the touch, does not cause allergies, so it is perfect for a baby bed.
To make a blanket you will need:
- Frame corresponding to the dimensions of the future product.
- Self-tapping screws that need to be screwed in at a distance of 5 cm.
- Yarn.
- Scissors.
To make the product fluffy, you need to make many layers:
- Fasten the yarn vertically first, starting with the first stud, and then gradually switch to horizontal yarn mounting.
- The middle of the product is better marked with yarn of a brighter color.
- After the final formation of the layers of yarn, tighten them in places of intersection.
- Carefully cut the top 30 rows of yarn. The remaining rows of yarn will be the basis of the bedspread.
- Spread the resulting pompons.
- Remove the yarn from the studs by carefully cutting the threads between the studs.
Stock footage
The bedspread is a powerful design technique that allows you to change the whole look of the interior of the room. Choose any variant of a plaid that you like, turn on your imagination and create for the joy of everyone!


