DIY desk

On the Internet you can find a lot of video lessons and master classes that will allow you to make any piece of furniture yourself. In this article, we will present several options for how to make a desk with your own hands - from simple to the most complex models. We tried to systematize all the data so that this material becomes really useful for you, and you can realize any of your ideas.
to contents ↑What is needed to make a desk?
Before you make a desk with your own hands, prepare in advance from the list below all the necessary materials, fasteners, tools.
Moreover, it does not matter which option you stop at, because the list of everything that can come in handy is almost the same:
- Drill.
- Electric jigsaw.
- Screwdriver.
- Hacksaw.
- Chisels.
- Drill.
- Hammer.
- Grinder machine.
- Milling machine.
- Clamps.
Materials can be used very different, but more often this tree and all its derivatives:
- Chipboard or chipboard, furniture board, plywood, boards.
- Nuts with washers, bolts.
- Self-tapping screws.
- Dowels, dowels.
- Joiner's glue.
- "Liquid Nails".
- Paint brushes.
- Lacquer.
- Pencil, tape measure, square.
- Building level.
How to make your own wooden desk?
As soon as you have purchased all the materials on the list, prepared the tools, the next step will be the choice of model, it is important to decide which particular do-it-yourself wooden desk you want to make. Better to start with the simplest model.
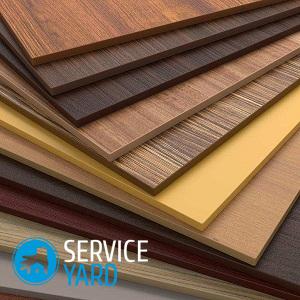
Important! You can make an object from wood or wood-based materials. Naturally, natural products look more beautiful and noble, but only for their manufacture special skills are needed. Yes, and such work will cost a lot. Tables made of chipboard, MDF, furniture board are much easier to process, cheaper, do not require professional knowledge.
Perform the manufacture of a simple table according to this scheme:
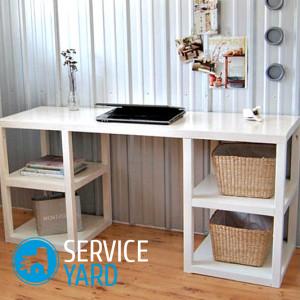
- Find a drawing of a desk made up of four rectangular elements. It will be two sidewalls, a cover, cross-pieces.
- If you did not find all the necessary tools, then order a cut according to your size to get ready-made parts.
- If you decide to do all the work yourself, then apply dimensions to the chipboard, use an electric jigsaw to cut out all the details.
- Glue the edge to the ends.
- Drill holes for future table legs in the end elements.
- Make shallow grooves for hats of confirmations over the holes with a drill.
- Attach a transverse partition to the side legs so that the holes in them and their upper parts coincide.
- Connect the structure with furniture screws.
- Put the countertop on top of the base, twist it with confirmations, after making holes.
- Use special plastic plugs to close recessed screw caps.
As a result, you will get a wonderful table, for the manufacture of which you will spend a minimum of time and effort, and you will not need any special skills. Next, consider more complex ideas.
to contents ↑How to make a table for a student at home?
If a child grows up in your house, then this master class will also be useful to you, because in it we will describe how to make a desk with your own hands from a chipboard for a student. Almost anyone can implement this venture.
You will need to perform the following series of actions:
- If you have an old wooden pallet lying around, then disassemble it on separate boards.
- Perhaps you will find a hollow unnecessary door - it can be used as a countertop. If this is not the case, then simply cut out two sheets of thick plywood in size, connect them in thickness with glue and screws.
- Saw boards for supports. The legs look perfect in shape resembling a construction goat.
Important! The height of the support should be at least 80 cm. Make sure that the upper horizontal of the goat in width coincides with the working surface.
- To attach the legs, step back from the edge of the countertop 6 cm, while the angle of their inclination should coincide with the height of the supports.
- Between the upper parts of the legs, install a horizontal block, having previously drilled holes in it. Screw it with special drywall bolts. The diameter of the holes should be slightly larger than the screw itself, because it is important that the legs are at an angle.
- Measure 3 cm from the floor, screw a wide block of about 20 cm at this level to strengthen the supporting legs, thereby equipping the shelf platform.
- Attach the boards remaining from the pallet to the bar, as a result - you will get shelves.
- Take the door, use the piping to process its sidewalls - it is sold in furniture stores.
- From the bottom to the countertop, nail on each side two parallel strips. This is necessary so that the working surface is securely fixed.
- From wine corks and scotch tape, make leg caps.
How to make a pull-out table with your own hands?
Now we will consider the most interesting model, tell you how to make a desk with drawers. The presented modification is the best example of a high-quality, expensive natural wood product.
Do everything clearly in accordance with the instructions:
- Buy glued furniture panels, preferably from hardwood.
- Take the drawing to make markings on it.
Important! Be sure to make a small tolerance on the dimensions of the workpieces.
- Saw eight blanks from the shield as table supports. They should have the following dimensions: 18 by 36 by 570 mm.
- Glue each leg from two parts, then fasten them with a clamp.
- From the inside of all the crossbars of the frame, cut the recesses.
- Along the inside of the cross member, select a long groove. Use a hacksaw and a chisel on the upper side of the supports to make a step across the cross to the height of the recess.
- Drill two holes for the dowels in the lateral parts of the drawer, and they should have a diameter of 8 mm.
- Insert pencils into the holes, carefully attach to the legs to mark the places for inserting dowels.
- Using carpentry glue and dowels, connect the supports and the base.
- Cut out the top cover and countertop while the base dries.
- To attach the upper right part, select the grooves using the router - their width should be 10 mm.
- According to the template, cut out the side walls of the superstructure with a jigsaw. Then sand all slices. In them also select grooves.
- From 10 mm plywood, cut out parts for making drawers. Then glue them together and tighten the mount with small nails.
- Saw the cladding board from the tree, then fasten it with screws to the front of the product.
- Assemble a do-it-yourself desk for a student with drawers and add-ons from prepared parts. Coat all workpieces with carpentry glue in the places of attachment, leave them to dry completely.
- Attach the worktop to the base with glue and dowels in pre-cut folds.
- Pick up accessories for the drawers and cover the product with varnish. It is better to apply it in several layers.
Stock footage
Such a wooden table will definitely not be left without attention, you will delight your household and guests with beautiful, high-quality furniture. In addition, you will save significantly, because buying such a product in a store will cost you several times more. Drawings of desks with sizes can be found on the Internet without difficulty, the main thing is to carefully study them, determine the model, prepare everything you need. We hope this article helped you save time and get real pleasure from the work done.


