Plastering the walls without a frame

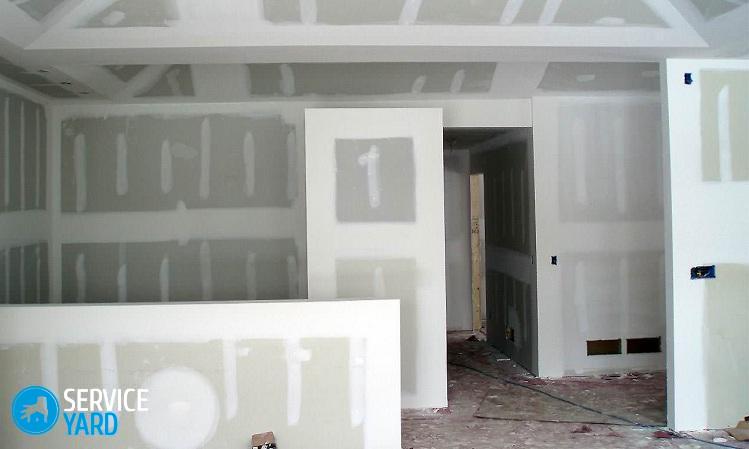
Drywall is one of the most popular finishing materials, due to its many advantages: ease of installation, safety, the ability to use in a variety of rooms and a relatively low price. Let's talk about whether it is possible to wall the walls with drywall without a frame.
to contents ↑Features of the application of GCR
Drywall is used to mask wall irregularities and the construction of partitions. At the same time, not only an experienced builder can work with this material, but also not a very experienced craftsman. Installation is possible on various adhesive compositions and base surfaces.
to contents ↑Important! The advantage of this method over the frame is that the useful volume of the room is “eaten up” to a much lesser extent. At the same time, the complexity of finishing works is small and can be done independently.
Wireframe VS frameless way - which is preferable?
In fairness, it must be said that sometimes the installation of drywall sheets on the frame is the only way to finish. We will try to compare these two fundamentally different methods and determine the scope of their application.
Wireframe method
For the manufacture of frames, a metal profile or a wooden beam is used. This method is used if additional thermal and sound insulation of the room is needed. They use the installation of sheets on the frame even if the walls are uneven, and it is impossible to level them with plaster.
Frameless Method
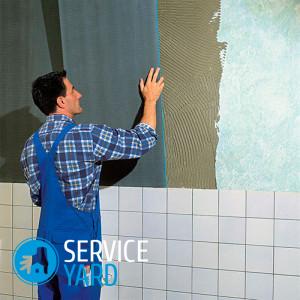
Installation of drywall on walls without a frame is carried out on a gluing composition with gypsum or on construction foam and screws:
- Gypsum bonding agent is preferred for concrete and brick walls.
- Fixing plasterboard sheets with self-tapping screws is used for wooden walls.
to contents ↑Important! There is a limit on the height of the walls (it should not exceed 3.0 m).
Necessary tools
To align the walls without first making the frame, use the following set of tools:
- The building level is 1.5 m long - for the control of vertical planes.
- Jigsaw - for the preparation of drywall sheets.
- A set of devices for marking: pencil, rulers, squares.
- Spatulas of different widths for applying the mortar.
- Building grater.
- Paint roller and brush - for applying soil.
- Rubber mallet.
- Electric drill with mixer nozzle.
- Screwdriver - if you need to fasten the sheet also on self-tapping screws.
From the materials you will need:
- Primer with an antiseptic.
- Basic and finishing plaster based putty.
- Construction foam or special adhesive for drywall.
- Tape made of serpentine mesh to hide the joints between the sheets.
- Self-tapping screws of great length. Their length depends on how smooth the surface is. The penetration depth of the screws into the wall is from 50 to 60 mm.
- Foam rubber (optional).
Types of Drywall
One of the best is Knauf products. The company is engaged not only in the production of building and finishing mixtures, but also in drywall with various applications:
- Normal - used for rooms with low humidity.
- Moisture resistant - used for bathrooms and toilets. Tile is perfectly mounted on such a surface.
- Fire resistant. Great for the fireplace area, near the stove and / or chimney.
- Flame retardant. Suitable for wall decoration in attics, in attics or a boiler room of a private house.
to contents ↑Important! Cutting a drywall sheet is a pleasure. No special devices are needed. A fairly well-ground clerical knife.
Cutting order
In any case, this process will have to be performed, regardless of whether it is planned to cover the walls with drywall without a frame or with it. Drywall sheet is cut in the following order:
- Lay the sheet on a flat, horizontal base.
- Mark the sheet using a ruler or tape measure, draw the necessary lines with a pencil.
- Using a ruler, draw a knife along the outlined line.
- Slide the sheet along the surface, lay along the cut line.
- Click on the edge of the sheet and break it.
- Cut cardboard on the other side of the sheet.
Mix for installing drywall on a wall without a frame
This composition is produced on a gypsum basis with plasticizers, which provide strength and good adhesion of the solution. Any adhesive mixture for frameless installation must meet the following requirements:
- Minimum setting time.
- Slight shrinkage during solidification.
- Homogeneity and plasticity.
- Easy to apply.
Important! Please note that the gypsum mixture is not expired, since it has a short shelf life - usually no more than six months. It is undesirable to purchase the mixture in bulk.
The time for using the finished solution is about half an hour, so it is better to cook it in small portions. If the mixture begins to set, you can’t dilute it in any way.
to contents ↑Important! Experts advise buying all materials for wall sheathing with gypsum board for glue from one manufacturer (the same “Knauf”), since they interact perfectly with each other.
Polyurethane foam
This is a fairly popular material, and its different types have different characteristics. Different foams have different expansion coefficients, so be sure to ask their characteristics in advance. There are 2 types of mounting foams:
- One-component, ready-to-use polyurethane compounds. They are sold in spray cans.
- Two-component. These mixtures are used by professionals, because their preparation requires special equipment and accurate proportions.
The benefits of using mounting foams are as follows:
- Good adhesion with a wide variety of materials.
- Resistance to temperature changes.
- Foam is a dielectric - does not have electrical conductivity.
- Good soundproof properties.
- Easy installation, quick setting.
- Lack of toxic substances.
- Fire safety.
- Moisture resistance.
- Small (not more than 5%) shrinkage.
- High rates of strength.
- Good thermal insulation effect.
- Plasticity, elasticity, filling gaps and crevices.
How to sheathe walls with drywall without a frame - installation work
The entire cycle of work when walling with drywall is divided into several stages.
Training
The first step is the quality preparation of surfaces:
- If the wall is painted with oil paint or enamel, which “do not tear off with teeth”, make over the entire surface of the notch to ensure better adhesion. For this, a hammer drill with an attachment or an ax is suitable.
- Be sure to close the cracks and cracks on the walls. Fill them with mounting foam, and after it hardens, remove excess with a sharp knife.
Important! For small defects, a cement-sand mortar is also suitable.
- Clean the wall surface from dust using a wide brush or vacuum cleaner.
- Primer the wall with an antiseptic. This not only significantly improves adhesion, but also is the prevention of the development of fungus, mold, the appearance of harmful insects.Leave the exhausted wall to dry completely.
- After the wall has dried, check its verticality using a building level or plumb. If there are significant distortions, the wall will have to be aligned.
Alignment
There are several ways to align walls.
Method 1
For its implementation, you will need a gypsum adhesive composition and pieces of drywall (peculiar beacons):
- The pieces may be square or strip-shaped.
- Their number depends on the degree of unevenness of the wall.
- Having determined the highest and lowest points on the wall, bring the latter to the same level with the first.
- Now it remains to accurately withdraw the remaining surface.
Important! Sometimes plasterboard linings are made in 2 layers. The lighthouses fixed to the mortar after the mortar hardens serve as a support for the finishing sheets.
Method 2
As in the first method, begin the alignment by finding the “maximum and minimum” points. Next, start screwing screws into the wall with an interval of 20-30 cm so that their hats are at the same level.
Important! In this case, the support for drywall sheets are self-tapping screws. Mount the sheets on a bonding agent, and you get a perfectly vertical wall.
Installation of drywall on construction foam
This method is suitable for uneven walls. In addition, it makes it possible not to delay the finishing work too much.
First ground and dry the wall well, and then:
- Mark on the sheet 8-9 points along which it will be attached to the wall.
- Drill holes for self-tapping screws in them.
- Attach the sheet to the wall and make marks on it through the cuts.
- Remove the sheet, and according to the marks in the wall, drill holes 5-6 cm deep under the dowels.
- Drive plugs into the wall holes.
- Stick on the opposite side of the sheet 12-15 pcs. square pieces of foam rubber 15x15 cm. The thickness of the foam rubber is 1.5-2.0 cm. With significant distortions, it is advisable to stick the foam rubber on the wall. The distance from the foam from the dowels is from 10 to 12 cm. The foam pieces in this case serve as shock absorbers.
- Attach the sheet to the wall, twisting the screws through pre-prepared holes. Constantly check the correctness of fastening, applying the building level.
- Do the same with all sheets.
- At the end of the installation, drill a hole of 7-8 mm at a distance of 2-3 cm from each of the screws. Through the holes, pump foam into the space between the wall and the drywall.
Important! The curing time of the foam in this case is at least 24 hours, since the process takes place without air.
- Carefully cut off excess construction foam that comes out through the holes with a knife.
- After the foam has frozen, unscrew the screws. They are no longer needed.
- Reinforce the joints between the sheets with a serpentine tape, and then process with putty. After the putty dries, treat the joints with sandpaper or a mesh of abrasive material.
- Smudge, putty and dry the wall, then strip to make the surface smooth.
The wall is ready for decoration!
to contents ↑Stock footage
As you can see, mounting the GCR to the wall is not so difficult. And you don’t have to call a master at all to change the geometry of the room or recreate the intricate idea of decor in it.
- How to choose a vacuum cleaner taking into account the characteristics of the house and coatings?
- What to look for when choosing a water delivery
- How to quickly create comfort at home - tips for housewives
- How to choose the perfect TV - useful tips
- What to look for when choosing blinds
- What should be running shoes?
- What useful things can you buy in a hardware store
- Iphone 11 pro max review
- Than iPhone is better than Android smartphones


