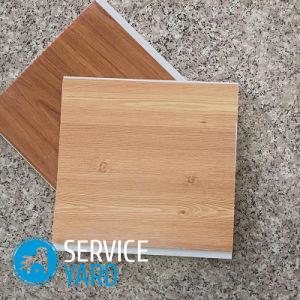
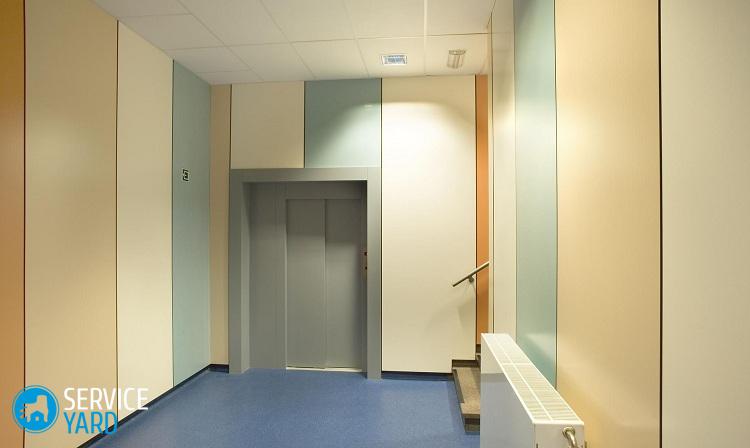
Mounting PVC panels on the wall

For the decoration of residential and commercial buildings often use plastic panels. This is an inexpensive material for upholstery, which, in addition, has good decorative qualities. Another advantage is that the installation of PVC panels on the wall is simple and affordable even for a beginner, if he knows how to use a screwdriver, a hammer and a building level. Before starting the installation, study the basic methods of fastening, material options and the operation algorithm described in this article, and then get down to realizing your idea.
to contents ↑Panel Views
There are ceiling and wall panels:
- The first has a thickness of 5 mm and thin partitions.
- The second - 8-10 mm and thicker partitions.
Important! Plastic lining is also allocated, which have a width of 10 mm and shaped edges. When working with this finishing material, a relief surface imitating a wooden lining is obtained.
How to choose the right one?
Having decided on the pattern and color of the panels, it is worth paying attention to a number of subtleties that you need to know when buying this finishing material:
- Pay attention to the polymer cut - the thicker the lintels and the heavier, the stronger the panels will be.
- The thickness of the product should be uniform, there should be no thickenings, nor thin spots.
- The edges of the purchased product must be clear, and the cells must not be damaged.
- The pattern should be uniform and clear.
- When choosing panels from different packs, pay attention to color - shades may vary.
- Check the quality by taking the bar so that it bends and straightens. Assess if there is damage or everything is normal.
Tool and preparation
For work, you need ordinary tools that can be found in any practical owner, namely:
- drill with a crown and with drills (drill holes and install dowels);
- stapler, screwdriver, screwdriver or glue - depending on the type of fastener;
- saw for metal;
- level;
- sharp knife.
This material is enough for work.
to contents ↑General principles of preparation
Next, you can proceed to the preparatory stage:
- Measure the work surface with a tape measure to determine the amount of material required.
- Free the walls from wallpaper. If the PVC panels will be fixed to the wall with glue, clean the surface from dirt and dust.
- Soak the panels at room temperature for about 1 hour.
to contents ↑Important! Leave the protective film until the end of work to preserve the appearance of the panels.
Crate mount
Before installing the plastic panels on the wall, you need to understand how to install them correctly. The panels can be mounted on a prepared crate or immediately on a perfectly flat wall.
General features of work:
- The crate is a slats or wooden bars attached to the surface at a certain distance. It should not exceed 40 cm for walls and 30 cm for the ceiling.
- The bars are fixed perpendicular to the direction of the panels.
- In the case of a wooden wall, it is better to use self-tapping screws for fastening the battens.
- If the surface is brick or concrete, fastening can be carried out using self-tapping screws or dowels, nails.
Important! The best way to fasten using kleimers, however, if you decide to use nails, remember that reusing this material will no longer be possible.Other mounting options include staples and screws.
Choose the material for the crate
According to the technology, the wall sheathing with PVC panels can be made on the crate, which is made of:
- Wooden blocks with a suitable section of 40 * 20 mm.
- Metal profiles 20 mm wide. When installed in a damp environment, galvanized metal is recommended.
Important! The disadvantage of this material is that it “eats” a lot of space - about 5 cm on each wall.
- Plastic strips and mounting plates (kleimers) are designed specifically for PVC panels. This mount is quick, as the plastic simply snaps into the grooves with the clip profiles. When dismantling, such a design is easily disassembled, it is enough to pry the Kleimer with a screwdriver.
Important! If you install panels in the bathroom, choose plastic that does not react to humidity and temperature changes, and also does not crack or rot. In this case, galvanization, which must be of excellent quality, can be used. Not the best material is wood. However, with high-quality processing, it can stand for years.
Wall marking
In order to do the job efficiently and avoid distortions, it is necessary to fasten the grill clearly in level, for this you need to make markings on the walls:
- The distance from the floor to the bottom edge should be 1-2 cm, therefore, a line is marked on the wall at this distance parallel to the floor surface.
- A similar line is drawn from above at the height of the intended finish.
- Then, measuring from the bottom line about 50 cm up, set the beacon. This procedure is repeated to the top line.
- At the end, parallel lines are drawn through all the beacons.
We proceed to the installation of the lathing:
- When using wood, it is necessary to pre-prime all rails with an antiseptic.
- Drill holes for dowels at a distance of 50 cm along the marking line.
- Attach evenly the slats and secure them.
Important! Roughnesses on the wall can be beaten with wooden wedges, placing them under the crate. In the case of electrical wiring, it will need to be hidden under the finish.
Lamels
The installation of the lamella begins from the most noticeable angle, which is located in the farthest corner from the entrance:
- Measurements are made and, if necessary, the excess length of the panels is cut off with a hacksaw.
- Insert one edge of the panel into the side molding.
- Fasten the lamella from the back to the crate.
- The second panel is inserted into the groove of the first panel, firmly pressing the docking place and fixing it to the frame rails.
- For maximum joining, it is recommended to slightly grease the edges with silicone.
- The remaining elements are attached in a similar way.
- In places where sockets and switches are located, holes must be cut out in the panels.
- When installing the latest lamella, you need to trim it in width. To do this, try it on the wall and mark the cut line.
Moldings
In order for the surface to have a smooth, neat and monolithic appearance, it is necessary to close the joints and joints with plastic moldings. Their design allows you to insert the edges of the lamellas on both sides. As a result, the corners look a lot neater.
At the end of the work, a decorative molding is installed around the entire perimeter of the ceiling, and a plinth is attached to the floor. At this stage, the installation process ends and the work is considered completed. With proper operation of the panel for a long time pleasing to the eye and do not require repair.
to contents ↑Other mounting methods
Usually, the crate is used when it is necessary to level the wall. Otherwise, you can use an alternative way to install panels. If you want to know how to fix plastic panels to a wall without a crate, read the article further. This installation method consists in gluing the panels immediately to the wall.
For work, you need PVC panels, glue (“Titanium” or “Moment-installation”, but in no case hot melt adhesive) and profiles. The wall surface is pre-cleaned and degreased, as in the frame case of the installation.
After drying the wall, you can proceed to sticking.For this:
- Apply glue on the surface with a point so that the distance between the points is 30 cm.
- Apply glue to the surface of the panels and wait 1 minute to absorb the glue.
- Attach the panel to the wall, press and hold for a few seconds. For this method, always use a profile for fastening PVC panels.
- Repeat the same steps with other panels.
- It makes no sense to form corners with this installation method - just facing them with corners with missing grooves for inserting panels is enough. These corners must be glued with transparent silicone, removing excess with a damp cloth.
- Using self-tapping screws, install plinths on the wall and floor.
- Joints are treated with sealant (at high humidity) or with mounting foam.
Stock footage
Using the recommendations on how to fix PVC panels to the wall without lathing with self-tapping screws, you can independently make repairs in your apartment that will meet all your requirements.
- How to choose a vacuum cleaner taking into account the characteristics of the house and coatings?
- What to look for when choosing a water delivery
- How to quickly create comfort at home - tips for housewives
- How to choose the perfect TV - useful tips
- What to look for when choosing blinds
- What should be running shoes?
- What useful things can you buy in a hardware store
- Iphone 11 pro max review
- Than iPhone is better than Android smartphones


