DIY chandelier in the nursery

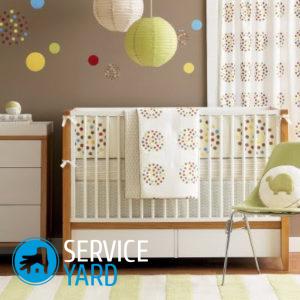
A lamp for a child’s room should be much more interesting than in any other room in the house. If you like to do needlework, then why not do a beautiful and interesting thing? An original chandelier in the nursery with your own hands will become a real decoration of your baby’s room. In this article, we have prepared several simple workshops on the manufacture of interesting lighting fixtures, among which we can choose the most attractive one for ourselves.
to contents ↑Globe chandelier
If your old, unnecessary globe is lying around at home, or your baby likes to travel, then we suggest making a lamp from it. Depending on the state of the globe, a chandelier can be made from both a half and a full-fledged globe.
To make it, you will need the following:
- The globe.
- Old lampshade with cord or lampshade.
- Ribbon for decoration.
- Stationery knife.
- Drill.
- Clay “Moment”.
Manufacturing steps:
- First you need to separate the globe from the stand.
- Next, cut the globe along the equator line. Using a cutter, remove the strip that holds the two hemispheres together, begin to carefully separate them with a metal ruler or any other flat tool.
- Carefully remove the lampshade from the old lamp by first unscrewing the cartridge retaining ring, or prepare a new suspension cord in the same way.
- Attach the half of the globe you are going to use to the base of the lamp and make sure that they match each other in diameter.
Important! If they do not fit, then the hole in the globe must be increased. To do this, you can use a knife or drill (if the globe is too tight).
- If as a result of drilling the hole turned out to be not very neat, then its ends can be processed with sandpaper or decorated somehow. However, the upper part of the lamp will not be visible anyway, so you can leave everything as it is.
- Paint the inside of the chandelier with paint and decorate the resulting edges with a teip tape - this will give the product a more finished look.
- Attach the resulting lamp into the suspension cord and install it on the ceiling.
Done, it remains only to screw in a light bulb and you can admire the finished product!
to contents ↑Butterfly Chandelier
You can romantically decorate a little girl’s room by making a chandelier of butterflies with your own hands. To do this, you will need the following:
- Thin white cardboard.
- Fishing line or thin twine.
- Glue gun.
- Wire for the frame.
- Scissors or clerical knife.
- Round pliers.
Important! Before you start work, you should decide on the dimensions of the lampshade in the finished form. In our case, the diameter is 30 cm, which means we will need a piece of cardboard 90 cm long.
Manufacturing steps:
- We make the frame: cut a piece of wire 96-98 cm long. Roll it into a circle with a diameter of 30 cm, fix the ends with round-nose pliers.
- From twine or fishing line, cut 3 hanging elements. Measure the length of the pieces based on the height at which you plan to hang your lamp. Tie them to the wire in three places, distributing the load evenly.
- Draw butterflies of different sizes on the cardboard, cut them with scissors.
- Fix the upper part to the wire. To do this, use glue and a thin wire.
- Place cuts and joints after cutting decorate with butterflies.
Fringed braid
Another interesting idea to make a chandelier in the nursery with your own hands is connected with braid and fringe. To make such a lamp you will need the following:
- Two metal hoops (you can take the embroidery hoop).
- Fringed braid.
- Fishing line.
- Acrylic paint (the same color as the braid).
- Glue gun.
- Scissors.
Important! Fringed braid can be bought at stores that sell decor for furniture and curtains.
Manufacturing steps:
- Paint hoops or hoops with acrylic paint.
Important! If they are already covered with paint or other paint, it is advisable to sand and peel them.
- Wait until the paint is completely dry, and then make three marks on each ring of the future lampshade, placing them at the same distance from each other.
- Cut three identical pieces of fishing line.
- Tie them to the smaller ring of the lampshade, leaving the upper ends with a margin, then to tie them to the cord of the lamp.
- Measure the length of the fringe, subtract two centimeters from it, tie the fishing line to the second ring on the resulting length. So you can get a cascade.
- Heat the glue gun, carefully glue the braid along the lower ring.
- Do the same with the top ring by pulling it out of the bottom.
to contents ↑Important! It is worth remembering that under the influence of hot glue, the fishing line can melt, so you should try not to apply it directly to the fishing line. It is better to put the glue on the paper, let it cool a little, and then apply it to the fishing line.
Lace napkin lamp
And now we offer to make a very beautiful lamp in the nursery with your own hands from knitted napkins, which will be very appropriate in the room for the girl. Such a chandelier will not only add chic to any interior, but can also decorate the walls with fabric openwork patterns when the light is on.
For manufacturing, stock up as follows:
- A dense bouncy ball that can be bought at a gift shop or sporting goods store.
- Knitted lace napkins.
- Wallpaper glue.
- Newspaper.
- Brush
- A thread.
- Suspension cord.
Manufacturing steps:
- Inflate the balloon.
- Lay the napkins on the newspaper and evenly cover them with wallpaper glue so that they get wet through.
- Hang the inflated ball on a thread and attach overlap-soaked napkins in the glue to it, that is, on top of each other, so that the glue grasps well.
Important! Do not forget to leave a hole on the lampshade, and then hold a cartridge in it.
- When the glue dries a little, apply another layer of glue to fix the result, and leave the structure to dry overnight.
- When the workpiece is completely dry, blow out the balloon and attach the resulting lampshade to the suspension cord.
to contents ↑Important! Since wallpaper glue is used in this master class, it is very important to choose a light bulb that will not get too hot.
Stock footage
Making a beautiful chandelier in the nursery with your own hands is not difficult. There are a lot of ideas for creating such interesting and unusual gizmos. Connect your imagination and invent something of your own, inspired by the above examples.
- How to choose a vacuum cleaner taking into account the characteristics of the house and coatings?
- What to look for when choosing a water delivery
- How to quickly create comfort at home - tips for housewives
- How to choose the perfect TV - useful tips
- What to look for when choosing blinds
- What should be running shoes?
- What useful things can you buy in a hardware store
- Iphone 11 pro max review
- Than iPhone is better than Android smartphones


