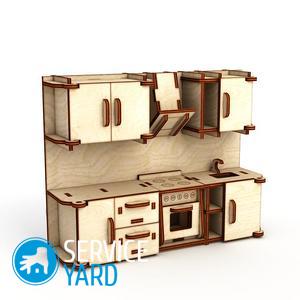
Do-it-yourself plywood doll furniture - drawings

In the dollhouse everything should be the same as in the human apartment, only miniature. Manufacturers of toys offer a great variety of doll sets, but among them there are models that are not much cheaper than real furniture. If you make all these amazing items with your own hands, they will not cost a penny, but they can look much more interesting than factory ones. If you need do-it-yourself plywood doll furniture, you can make drawings yourself or find something suitable on the Internet. And for some items, drawings are not needed at all. Read how to do all this in our article.
to contents ↑What to do?
Before looking for drawings of furniture for dolls, rummage in your cabinets. Maybe there are:
- pieces of plywood;
- matchboxes;
- cardboard;
- shoe or equipment boxes;
- foam pieces;
- aluminum cans;
- plastic cans;
- shampoo and gel bottles.
All this will be an excellent raw material for doll furniture.
to contents ↑Important! The best material, of course, plywood - armchairs and sofas from it are obtained quite like real ones. They are durable, not only the eldest daughter and her friends will be able to play with them, but also the youngest, who is still in the stroller. In addition, you can cut backs and legs of the most bizarre shape, if necessary, paint the set with acrylic paints and varnish it.
DIY furniture from plywood
First, make sure that you have the right tools and materials at hand. In addition to pieces of plywood, you need:
- jigsaw - manual or electric;
- sandpaper with different fractions;
- small nails;
- hammer;
- carpentry or universal glue;
- scissors;
- ruler;
- square;
- pencil;
- graph paper;
- patches of skin or tissue;
- acrylic paints;
- varnish;
- sewing supplies;
- pieces of synthetic winterizer or foam rubber.
to contents ↑Important! If you have never tried to work with a jigsaw, try first to cut something simple out of plywood, at least saw off a piece. With a hand tool, this is even easier. Practice making curly sections - for example, a wavy line. Of course, a doll bed can be with absolutely straight backs, but sometimes you want to give free rein to imagination, make it a masterpiece in the Baroque or Provence style, and for this you need some skills. However, if you are not very confident in holding a jigsaw in your hands, but you can draw a little, you can go the other way - paint the furniture with acrylic paints.
We make drawings
Small items can be made without any schemes, just by eye. But doll furniture made of plywood looks more impressive if you develop something like a project in advance. For drawings, it is best to take graph paper.
Bed drawing
Do-it-yourself bed for a doll from plywood according to the simplest drawing. You need to take the sizes:
- bed length;
- the width of the bed, back;
- the height of the back, combined with the legs.
Important! First you need to measure the doll itself, add 3 cm to its height if the future mistress of the bed is the size of Barbie, and 10 cm if it is large. The width of the bed should be such that the chrysalis was spacious enough. That is, to the width of the shoulders of a small doll we add 2 cm and 10 cm for a large one.The height of the backs and legs is optional, because human beds are both low and high.
The scheme can be done like this:
- Draw a graph on the graph paper for the future bed strictly in size.
- Draw a rectangle for the back.
- Mark where the back will have the top and where the bottom.
- Mark the place of joining the bed, draw a line - it should go parallel to the top and bottom.
- On the bottom line from the corners, set aside the width of the legs: for a small crib, it is 1 cm, for a large one - 5-8 cm, mark the points, for example, A and B.
- Divide the bottom line in half.
- Draw a perpendicular to the middle of the desired height of the legs - it can be very small, and almost to the bed, mark a point, for example, B.
- Connect points A, B and B with an arc.
- Think about what the top edge will be - you can, of course, make it straight, but if you want a figured one, outline a line of the corresponding curvature.
- Cut out the patterns - the scheme is ready.
Other types of furniture
As you can see, there is nothing impossible in making drawings of furniture for dolls from plywood - the schemes are quite simple. Drawing patterns for the sofa is no more difficult. It consists of four parts:
- seats
- backs;
- two armrests.
We take measurements in the same way as for a bed. Further, the procedure will be as follows:
- Draw a rectangle for the seat - this is the main part, all the others are drawn on it.
- Draw a back - its length is the same as that of the seat, and the height is arbitrary. At the same time, calculate so that the seat is attached to the middle of the back, then the sofa will be more stable.
- Draw a rectangle for the armrest - its width is equal to the width of the seat or slightly less, plus the thickness of the plywood. And the height is about two-thirds of the height of the back.
- Then again we give free rein to imagination and decide how the back will look - with a straight top or with a figured one, and draw a profile line.
In the same way, you can make a diagram for a chair. The difference is only in the size of the seat and back.
Important! Do not forget to outline the line along which the seat will adhere to the back and armrests.
Draw a table
That's where there is room for imagination! The table may be:
- round on one leg;
- oval on one leg;
- rectangular or square on four legs.
Furniture for plywood dolls can be extremely simple. For the table, we make a completely straightforward drawing:
- Draw a countertop - the easiest way is in the form of a circle or a rectangle; nobody forbids using compasses.
- Mark the middle - the circle is the intersection of the diameters, the square and the rectangle - the intersection of the diagonals.
- Make room for the legs.
- Make drawings of the legs - for a table that has four legs, it's just a strip, but for a round table you need something more massive like a cross.
- For a table on one support, make a drawing of the stand, which will be below - in the form of a circle or square of a smaller size.
We begin to collect headsets
Toy furniture made of plywood is done quite quickly, however, it goes through the same stages as real sofas and beds.
Make a bed
The simplest and most needed item is definitely a bed. We’ll start with her. You already have patterns. How thick the plywood is depends on the size of the doll: the smaller the future owner of the bed, the thinner the sheet.
Operating procedure:
- Transfer the details of the drawing to plywood, do not forget that you need to draw all the lines that are, including the one along which the bed will be attached to the backs.
- Saw out the details.
- Sand the slices to prevent splintering and chips.
- If necessary, also treat surfaces, especially those that will be visible.
- Nail the bed to the backs with small carnations or glue with wood glue. And if the bed is large - you can use screws and other fasteners.
We decorate the backs
The foundation is ready, now it must be brought to perfection. To get started, we’ll work on the design of the backs. Of course, if you saw some pattern on them, you don’t need anything else, just varnish.In principle, a simple wooden bed without any decor also looks good. But you can decorate it:
- painted;
- scorched pattern.
Option 1
If you have never felt in yourself artistic abilities - this is not a reason to refuse painting. The drawing can be found on the Internet and translated, but in fact its elements are so simple that even the person who last held the brush in distant childhood can cope with them.
You can do the following:
- Circle the contours of the bed on the outside and inside of the headboards, and draw a simple flower in the middle.
- Draw several wavy lines and draw ornament elements on them - circles, leaves, sparks, droplets and so on.
Important! It is best to paint with acrylics, but in principle, gouache is also suitable if you first primed the backs with a water-based emulsion.
Option 2
For burning, select or draw a pattern with a pencil, transfer it to the back and burn it with a special device. The thickness and color of the lines are regulated by a special handle.
to contents ↑Make a sofa
The sofa and armchairs are made in the same order as the bed:
- Saw out all the details from the plywood.
Important! Do not forget that there should be two armrests.
- Trim the back if curly.
- If desired, cut out the contours of the legs.
- Grind sections carefully and remove all irregularities from the planes.
- Glue the back and armrests together or connect them with studs.
Important! Please note that the rear sections of the armrests form a uniform flat plane with the back of the back.
- Attach the seat along the line.
- Decorate the armrests and backrest if you wish.
Soft parts
The armchair and sofa can be soft. If the pupa is small and there is a thick cloth at hand (for example, cloth), you can simply cut out the soft parts of the seat and back and stick it on. Moreover, the details can be of very different shapes, from ordinary circles and rectangles to hearts, flowers, rhombuses.
If the sofa is large, you will need a synthetic winterizer or foam rubber. Soft parts of the seat and backrest are best done separately, and then stick them on the corresponding parts of the sofa. To do this, you need a cardboard frame:
- We cut the frame in the form of the same as the back or seat, but slightly smaller in size.
- Cut a piece of thin foam rubber or sintepon on it.
- Glue the gasket.
- We cut out rectangles from fabric - they are equal in size to cardboard, but with allowances on all sides.
- Cut allowances in the corners.
- We smear the allowances with glue.
- Glue the upholstery on the frame.
- Let it dry.
- Glue the soft parts to the sofa or chair.
Make a table
Compared to what you have already done, making a table will seem extremely simple to you. The order will be the same:
- Cut out the details.
- Grind them.
- Nail the legs.
- Decorate the table with a painting or just cover it with varnish.
Cabinets, shelves and the rest
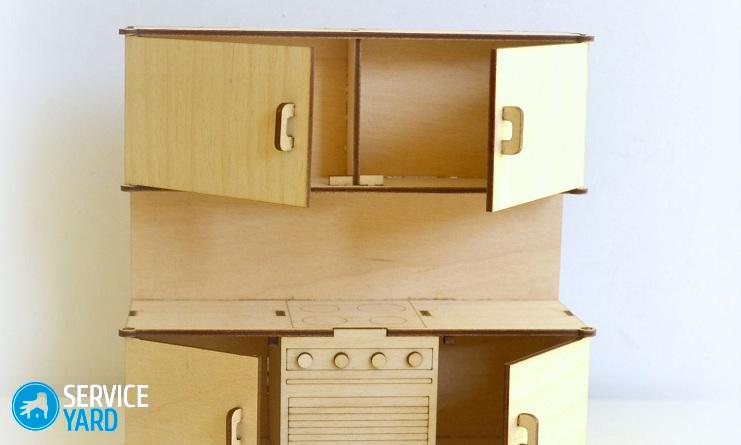
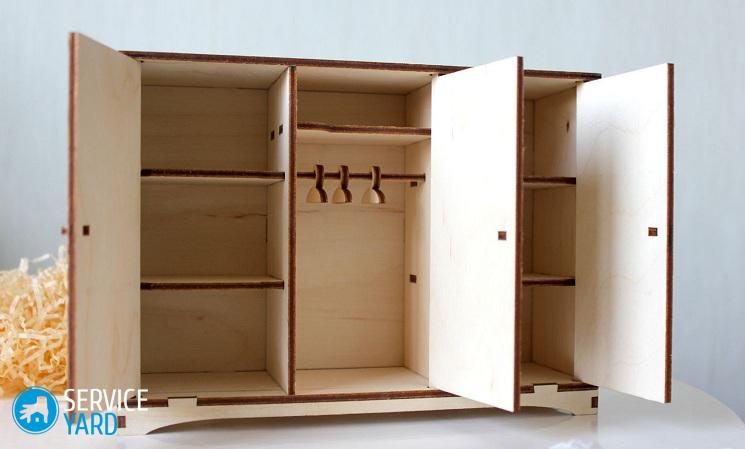
By the same principle, you can make the rest of the furniture. In a dollhouse can stand:
- wardrobe;
- kitchen table;
- shelving with books;
- chest of drawers.
They are also made from the most common plywood. At the same time, you can easily make drawings and schemes yourself if you have already tried to make a sofa. The only difficulty is the doors. But for them you can buy special miniature loops, and for pens, for example, pawns from chess, lost in the whole room, are suitable.
to contents ↑Stock footage
In a word, making doll furniture from plywood is not such a complicated matter as it might seem at first glance. Try it, and your little daughter will consider you a real wizard, able to turn the most ordinary and even unnecessary items into something fabulous.
- How to choose a vacuum cleaner taking into account the characteristics of the house and coatings?
- What to look for when choosing a water delivery
- How to quickly create comfort at home - tips for housewives
- How to choose the perfect TV - useful tips
- What to look for when choosing blinds
- What should be running shoes?
- What useful things can you buy in a hardware store
- Iphone 11 pro max review
- Than iPhone is better than Android smartphones


