Fixing the toilet to the floor

Plumbing should be installed in accordance with certain norms and rules adopted in construction. For some reason, many people believe that fixing the toilet to the floor is a very difficult operation. Specialized companies also play the same role, they are trying their best to attract customers and impose their own, often not very cheap, services.
In fact, installing the toilet on the floor is one of the simplest operations. But to do everything right, you need to know its features. In the article we will consider the most common ways to install a plumbing fixture. If you do everything right, he will stand firmly. The choice of one or another method of fastening largely depends on the type of flooring. And no matter what method you choose, first collect the drain tank, in accordance with the instructions attached to it. The installation of the toilet is also preceded by the arrangement of sewage and water supply. And now we’ll figure out what needs to be done next in order to use the bathroom safely.
to contents ↑Materials and Tools
Before starting installation work, make sure that the entire set of tools and accessories is available. You will need:
- Drill or hammer drill. If you have to mount plumbing on a tile, it is advisable to purchase a special drill.
- Adjustable wrench.
- Sealant and a special gun for its application.
- Flat and Phillips screwdrivers.
- Adapter (if necessary).
- Hammer.
How to fix the toilet on the dowels?
This is the most common way to install a toilet. Using dowels, you can mount the toilet quickly and reliably.
Important! This method is well suited for smooth surfaces. For example, if you have to mount the toilet to the floor on the tile. It is advisable to attach lightweight models of plumbing to the dowels, since the mount can break due to the pressure of a heavy product.
Features of work:
- According to experts, it is advisable to install the toilet on a gasket made of rubber or a piece of old linoleum. To make such a gasket, place the product on top of the material, and then draw a marker around its leg. Now it remains only to cut the gasket along the contour with the help of scissors or an office knife.
- The next stage is the marking of the floor surface. Put the toilet in the right place and gently circle the foot along the contour. Apply sealant without leaving the marking.
Important! The main thing here is not to overdo it, a small amount of sealant will be more than enough.
- Install a gasket over the sealant layer. After the adhesive has dried, the gasket adheres firmly to the surface. This installation method is very reliable, although sometimes they prefer to do without laying.
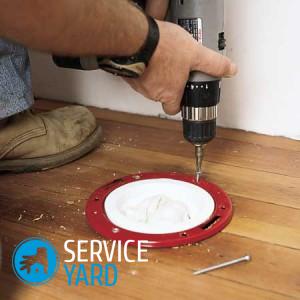
- The most crucial step is drilling holes. Clearly mark and drill holes is very important to use fasteners correctly. A gasket along with a layer of sealant will serve as a kind of buffer between the plumbing fixture and the floor covering.
- The holes for the toilet mounts are drilled directly into the thickness of the gasket.
Important! We must not forget that when tightening fasteners on plumbing, extreme care must be taken. If you neglect this, there is a risk that the toilet bowl foot will be damaged.
- As fasteners, large metal dowels or special fittings for installing plumbing are used. The latter are often sold with plumbing. It is impossible to say which option is better. They are both almost equivalent.
- Insert the dowels into the drilled holes and hammer them.
- Then mount the toilet itself and carefully tighten the fasteners.
- It remains to connect the toilet to the sewer, paying particular attention to the corrugated pipe.
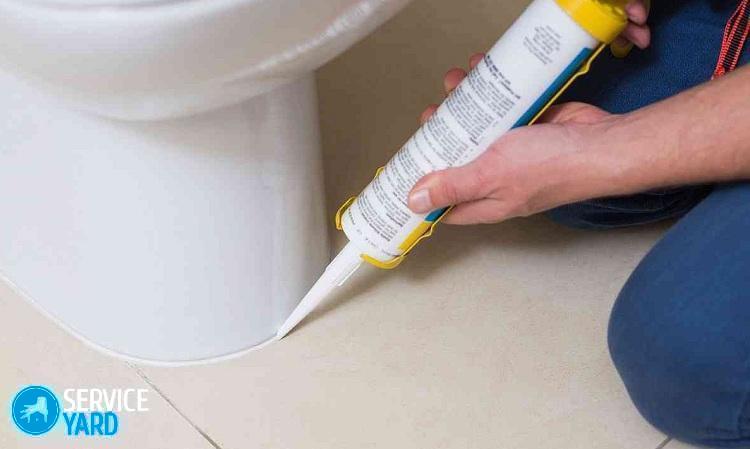
- For tightness of its sides grease with silicone sealant. Put one end on the outlet at the rear of the toilet, and connect the opposite end to the line.
to contents ↑Important! Sometimes in addition to silicone sealant, metallic tape is used. If you did everything right, then the system can be used for its purpose almost instantly.
How to fix a toilet bowl to a tile without drilling - installation on glue
This method is interesting for those who want to mount a plumbing fixture without using bolts and drilling holes. The main advantage of this method is its extreme simplicity. He does not require any special skills from the home master. However, you need to stock up on patience, because the time will be considerable.
Important! It takes about half a day for the epoxy glue used during installation to harden completely. This method is good for even floors, because it provides the best contact surfaces.
The algorithm of actions is extremely simple:
- Clean the contact surface from dust and dirt.
- Sand the surface of the tile as this will improve the adhesion of the materials.
- Using acetone or any other solvent, degrease the contact surface.
Now it is time to prepare the adhesive. You can buy ready-made glue in a hardware store, or you can make it yourself, good, it's not at all difficult. The composition of the glue includes:
- Epoxy resin ED-6 - 100 parts.
- Cement - 200 parts.
- Solvent - 20 parts.
- Hardener - 35 parts.
Heat the epoxy to 50 degrees, pour the solvent into it. The following is the addition of hardener and finally cement. When adding ingredients to the mixture, mix it continuously until a plastic homogeneous mass is formed. To make the structure stronger, experienced builders advise first to grease the contact area with glue, and only then apply epoxy.
Important! When installing the toilet, excess composition that protrudes to the surface must be removed immediately.
The fastening for the toilet to the floor, made in this way, must be used for 1.5 hours, until it is seized and has not lost plasticity. The thickness of the adhesive layer applied to the foot of the device is about 4 mm.
Now it remains to mount the toilet and connect it to the sewer using a corrugated pipe. As in the case of mounting on dowels, you must use silicone sealant. Press the toilet to the floor as tightly as possible and leave it for 14 hours until the composition hardens completely.
to contents ↑Important! For as long as the solution hardens, you cannot even touch the toilet. There is a risk that you will displace it, and then you have to do all the work again.
Taffeta Mount
This method is used mainly when you need to install plumbing on a wooden base. Taffeta is a solid wood base:
- For the manufacture of taffeta, a piece of board with a thickness of 30 mm is used.
- Taffeta is cut in the same way as a pad of soft material.
- Then the tree is impregnated with drying oil to increase moisture resistance.
- Before starting installation, a niche for its installation is concreted, then a gasket is installed, on which the toilet is installed. In this case, you must wait until the solution completely hardens. This will take 12-14 hours.
- Fastening the product to taffeta is carried out with screws using rubber washers.This is done in order to prevent damage to the toilet while tightening the fasteners.
to contents ↑Important! To make mounting easier to remove if necessary, it is recommended to process them with grease or graphite.
As a taffeta, you can use a rubber gasket with a thickness of 15 mm.
Stock footage
If the described manipulations seem to you too complicated, it is better not to take up this work, but consult a specialist. In this case, you will have to spend a certain amount of money, but you will be sure of good quality installation. For example, fixing the toilet to the floor with corner brackets, used for luxury plumbing, it is better to entrust specialists.
- How to choose a vacuum cleaner taking into account the characteristics of the house and coatings?
- What to look for when choosing a water delivery
- How to quickly create comfort at home - tips for housewives
- How to choose the perfect TV - useful tips
- What to look for when choosing blinds
- What should be running shoes?
- What useful things can you buy in a hardware store
- Iphone 11 pro max review
- Than iPhone is better than Android smartphones


