Mounting the faucet in the bathroom to the wall

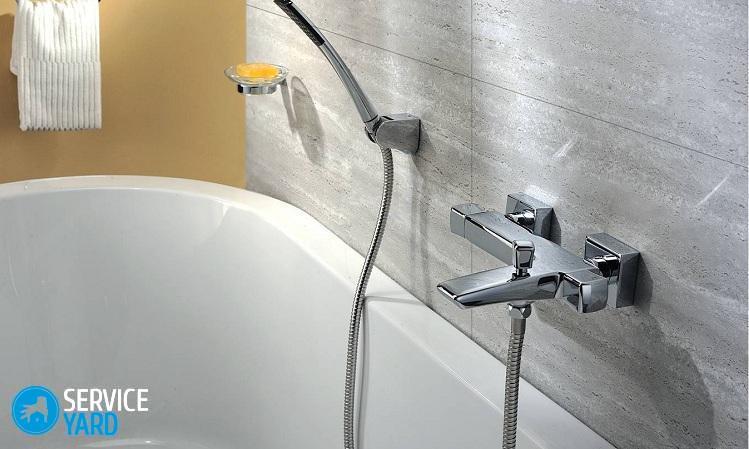
You can fix the mixer in the bathroom in two ways - on the edge of the bathtub or directly on the wall. Of course, the tap on the edge of the bathtub is more convenient and beautiful, but it’s far from always possible to drill holes in the font. Especially when it comes to massive cast iron structures. Today we will talk about how the faucet is mounted in the bathroom to the wall. We will deal with this issue in detail so that you can save your family budget by doing this work yourself.
to contents ↑Requirements for a good mixer:
- Weight. A long-life model, by definition, cannot be lightweight. The thicker the metal, the better the tap.
- The material of manufacture. Most of the mixers are made of brass and silumin. Brass products are more expensive and attractive in appearance. Silumin faucets are cheaper, but handles and clamping nuts are their weak point. In addition, silumin structures have a lower mass and quickly deform during operation. Brass is a more viscous alloy, so the reliability of the clamping nuts is higher. In addition, brass is not so susceptible to corrosion.
- Compliance with the installation site. Be sure to pay attention to what type of installation this or that model is intended for. Faucets designed for wall and bathtub mounting are not interchangeable.
- Sizes. Pay attention to the length of the nozzle and hose. If the dimensions do not match the installation location, such a crane will not only not look quite beautiful, but will break quickly enough.
Necessary tools
Before you fix the mixer on the wall in the bathroom, get this set of tools:
- A set of screwdrivers (flat and Phillips).
- Adjustable wrench.
- Insulating tape and FUM tape (it can be replaced with sanitary flax).
Dismantling an old crane
An old crane that has worked out its life is removed according to this algorithm:
- Turn off the water in the bathroom.
- Using an adjustable wrench, drain the remaining fluid in the tap.
- Carefully unscrew the old mixer and clean the threads from winding on the stationary pipes.
to contents ↑Important! Care must be taken to ensure that the thread on the stationary pipes is not damaged.
Crane installation
When buying a new mixer, pay attention to the completeness of the instrument. Must be in the set:
- Shower hose with a watering can. Here, as they say, fantasy is where to roam. Shower heads can be very different - from simple watering cans to “sophisticated” designs with several modes of supplying a water stream.
- Block crane.
- Gander.
- Eccentrics. These are elongated adapters, one end of which is fixed to the pipe, and the other goes directly to the mixer. The parameters of the eccentrics are different, it all depends on the model.
- Gaskets. They can be rubber or silicone.
- Decor (reflectors).
Important! Each of the elements must have a separate packaging. Detailed assembly instructions are also required.
The installation process takes place according to this algorithm:
- Connect the faucet body to the shower hose, watering can and gander. This is a fairly simple manipulation that can be done without the use of tools yourself.
- Mount the cam. The quality of fixing the tap to the wall depends on how firmly the fittings are fixed.To mount the crane over the drywall structure, use special adapters for frame-type structures.
Important! For waterproofing, it is best to use sanitary flax or FUM tape. Check the correct screwing of the eccentrics using the building level.
- After you have made sure that the fittings are equally distant from the wall plane, mount the decorative reflectors, making sure that they fit the wall in the best possible way.
- Screw the housing. When mounting the case, unlike eccentrics, winding is not needed. The winding function is performed by gaskets, which come in a common kit.
Features of mounting on a tiled wall
Most often, pipes for a mixer are already connected in the bathroom, but sometimes you have to drill holes in the tiles. A drill with a diamond drill is used to drill holes. Only with its help the hole is perfectly smooth, without scratches.
To calculate the fixing point of the mixer, use the following algorithm:
- Measure the height of the bath.
- Add to the resulting figure 100-200 mm. It all depends on how long the mixer spout (160-400 mm).
to contents ↑Important! The faucet must be positioned strictly in the center of the bath, depending on how wide it is. The distance between the corner fittings (press water outlets) is 150 mm.
How to fix the mixer on drywall?
The installation procedure is similar to the usual one, only a special bracket is used. Plasterboard slats are not always on sale, but you can successfully use those that are used for capital walls. Consider how to fix the mixer bar to the wall:
- Fix the strip to the back of the plywood sheet.
- Attach a sheet of drywall with screws.
After installing the strip under the mixer made of polypropylene, the installation procedure is the same as usual, like a main wall.
to contents ↑Stock footage
If the work seems too complicated for you, then consult a specialist. Of course, this is associated with additional costs, but there is no doubt about the result.
- How to choose a vacuum cleaner taking into account the characteristics of the house and coatings?
- What to look for when choosing a water delivery
- How to quickly create comfort at home - tips for housewives
- How to choose the perfect TV - useful tips
- What to look for when choosing blinds
- What should be running shoes?
- What useful things can you buy in a hardware store
- Iphone 11 pro max review
- Than iPhone is better than Android smartphones


