DIY bookcase

Large libraries in apartments are now rarely seen. Therefore, the choice of bookcases in furniture stores, frankly, is small. And even if you are lucky enough to find a suitable model, there is no guarantee that the shelves will stand idle for at least a few years. Making a bookcase with your own hands is not so difficult, and such a design can be very durable. Our article will discuss types of furniture for books and the features of its manufacture.
to contents ↑Which cabinet do you need?
Before you make a bookcase with your own hands, it is very important to determine its type. You may find it suitable:
- classical;
- angular;
- built-in;
- rack.
Classics of the genre
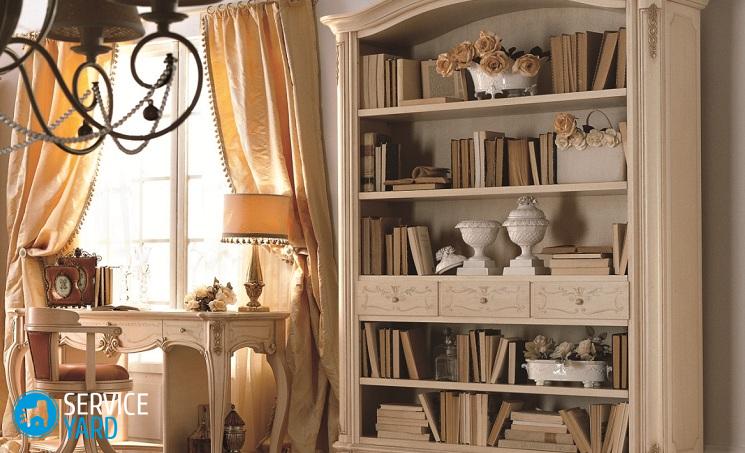
This is the most common rectangular cabinet. It can be both with glazed doors, and without them.
Important! Before choosing a model, try to soberly assess your strengths. A model with open shelves is much easier to make than with glazing.
The classic cabinet is suitable for both large and small rooms. It can be made from one section or from several. The multi-sectional design occupies a solid space. But in a large living room, study or even home library, such furniture looks simply luxurious.
Angular
The main advantage of corner furniture is that it allows you to use all the free corners, thereby freeing up space along the walls and in the center.
Important! This is a very convenient and practical option, but if you do not yet have experience in the manufacture of furniture, it is better to abandon it. This is the most complex construction.
Built in
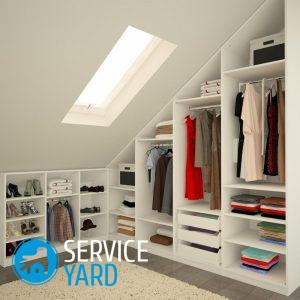
Built-in wardrobes are very different both in design and in manufacturing complexity. Its main feature is that all the elements are attached to the supporting structures of the house itself - floor, ceiling and walls. So the furniture holds securely, shelves almost never collapse.
Important! The main drawback is that in a room where there is no niche, such a cabinet takes up a lot of space. But, if there is a niche, it’s better not to come up with an option.
Rack
If this is your first time making furniture, it is best to start with shelving. The easiest option for a bookcase with your own hands, and any other, because you can store in it not only books, but also dishes, winter blanks, clothes and much more. It all depends on the room in which he stands.
to contents ↑Important! You can choose a model that generally assembles in fifteen minutes, and lasts for decades.
A few words about tools
To make a bookcase with your own hands, you will need the usual set of carpentry tools:
- jigsaw - electric or manual;
- wood files;
- drill;
- a set of drills, including confirmation;
- bits for confirmations;
- bits for self-tapping screws;
- roulette;
- pencil;
- skin with large and small grains;
- stain.
You need to take care of what you will connect the elements of the rack with each other and attach them to the walls:
- confirmations;
- self-tapping screws;
- thrust bearings.
to contents ↑Important! Some elements can be glued together. For this, of course, you will need a special composition - carpentry glue, which can be bought at any hardware store.
The easiest rack
If you are lucky enough to get some old-style bookshelves, half of the work is done. They are long rectangular boxes that have:
- top part;
- Bottom part;
- 2 sidewalls;
- back wall.
Important! Sometimes such shelves were made glazed, and you can leave it that way. But if this option does not suit you, remove the glass and plastic strips into the grooves of which they were inserted.
Putting together a rack
A rack of such boxes is assembled in about ten minutes:
- He has no back wall.
- The design is supported on four long slats 20x45x2000 mm.
- Shelves will need only three, but you can be satisfied with two, if you make several shelves just from boards.
- Drawings for this design are not needed.
Important! The advantage of this cabinet is not only the ease of manufacture. If you correctly mark all the details, the baseboard will not interfere, that is, the structure can be placed close to the wall.
Here is a step-by-step procedure for assembling such a bookcase with your own hands:
- Choose a place near the wall, make markings - the width of the rack is equal to the length of the bookshelf, plus 4 cm (doubled thickness of the rail).
- Measure the width of the baseboard.
- Sand the slats first with a large, then fine sandpaper.
- Saturate the slats with stain - this will give them a beautiful color, and in addition, protect them from excessive moisture.
- Mark the sidewall of the shelf - set the skirting board wide from the back wall and draw a line parallel to the border between the back and side walls.
- 5-7 cm back from the front edge and draw a line parallel to the first.
- Mark the second sidewall and then the other shelves in the same way.
- From the top end of one of the slats, set aside the height of the shelf, then 20-40 cm, again the height of the shelf, another 20-40 cm, and another height of the shelf.
- Do the same with the rest of the rails.
- Place one of the shelves on the sides so that the open edges are parallel to each other.
- Extend the shelves so that the distances between them correspond to the marks on the rails.
- Place one of the rails on this structure (preferably the one that will be closer to the wall).
- Screw the shelf to the rail with two screws.
- Screw the rest of the shelves to the same rail in the same way.
- Put the second rail, also screw.
- Turn over the structure, do the same operations on the other side.
- Screw the thrust bearings on both sides of the top shelf: one side should lie on the top plane of the shelf itself, the other should adjoin the wall.
- Lift the shelf and slide it to the designated place.
- Attach it to the wall in any convenient way (it depends on the material from which the house is built).
to contents ↑Important! Such racks should not be fixed to plasterboard partitions.
Rack of rectangular shelves
This design can be done both on rails and on boards. You need boards or chipboard 16 mm thick:
- 2 long boards for sidewalls measuring 400x2000 mm;
- top board 400x800 mm;
- 5 shelves 400x768 mm;
- 2 vertical linings 5x2000;
- 2 horizontal overlays of 100х700 mm;
- 3 mm fiberboard sheet for the back wall - 800x2000 mm.
Training
Before you make a bookcase, prepare the elements, then the assembly will take not so much time:
- Start by processing the boards - cut them to size.
- Remove any bumps.
- Sand the surfaces.
Important! Grind sections especially carefully where shelves and parts of a box will connect to each other.
- If necessary, soak the parts with stain or varnish.
- Mark the sidewalls under the shelves, which should be placed strictly horizontally.
- Using the corners, attach the top board to the upper parts.
- Cut the back wall from the fiberboard and attach it to the sides and the top board, for example, with nails or self-tapping screws, but you can also glue it.
- According to the layout, attach the second shelf from above, and then all the subsequent ones.
- Put the cabinet in the space provided for it.
- If necessary, cut out the notches for the baseboard.
- Glue horizontal and vertical overlays.
Classic wardrobe
To make a bookcase with your own hands, drawings are not necessary if the design is simple enough, like with racks.But if you want a classic or built-in closet, and even more so angular, it is better to find suitable circuits or make them yourself, for which there is such a program as AutoCad.
It is not difficult to deal with it, but all novice masters usually forget one simple thing - to take into account the width of the baseboard. In addition to the method that is indicated in the case of a rack of racks, there are two more ways to deal with skirting boards:
- clean in the place where the cabinet will stand;
- make bevels of vertical ribs.
Determine the size
The wardrobe is a large item, it needs a lot of space. Therefore, it is very important to determine what kind of space it will occupy. You need to know:
- height of the whole structure;
- width
- depth of shelves;
- distance between shelves.
The dimensions of the cabinet itself depend on the place that you can allocate for it, and the number of books. As for the depth, it will be as follows:
- for standard books - 20 cm;
- for large format books -30 cm.
It is necessary to take into account the weight of books, on which the thickness of the shelves depends. They should not bend. Therefore, for a meter-wide cabinet, it is best to take boards 2.5 cm thick. As for the rocks, in construction stores there is a fairly large selection of boards of very different quality. Classic furniture breeds are suitable:
- oak;
- beech;
- ebony;
- alder;
- conifers.
Important! You can take chipboard - it will be much cheaper, and you can finish it for any breed, even the most exotic.

We prepare the details
So, you have found or made drawings. It's time to get to work. Do-it-yourself bookcase made of wood is an occupation that requires a certain place, so take care of your furniture workshop in advance, even if it is temporary.
Important! The first question that arises: is it possible to cut the details yourself? Of course, you can, but there are simpler options - order in the workshop or choose the right ones in the hardware store. If you still decide to do it yourself, try to cut so that there are no chips. This is especially important if you are working with chipboard.
Working process:
- Remove any bumps.
- Sand boards for the box
- If you are not satisfied with the rectangular ends, cover them with veneer.
- Fit the boards to the size - this is best done according to the template, which fits under the board.
- Grind the rails on which the shelves will be placed. They must be even, and when installed in a cabinet - parallel to each other.
- Mark the sides under the shelves.
- Glue or screw the rails so that they go strictly horizontally.
Finish assembly
You need to do it on the most even surface:
- Attach the top to the sides so that the corners are strictly straight.
- Drill holes for fasteners - the drill should be slightly smaller than the diameter of the fasteners (it is best to use confirmations).
- Connect the parts with fasteners and tighten.
- Attach the lower part in the same way.
- Mount the shelves by attaching them with confirmations to the already installed rails.
- Lastly, install the back wall - with nails, screws or even a stapler.
Stock footage
There are many designs of bookcases. If you wish, you can come up with your own. But it is important to remember that books have a lot of weight, and a do-it-yourself cabinet should not only be beautiful, but first and foremost strong and safe!
- How to choose a vacuum cleaner taking into account the characteristics of the house and coatings?
- What to look for when choosing a water delivery
- How to quickly create comfort at home - tips for housewives
- How to choose the perfect TV - useful tips
- What to look for when choosing blinds
- What should be running shoes?
- What useful things can you buy in a hardware store
- Iphone 11 pro max review
- Than iPhone is better than Android smartphones


