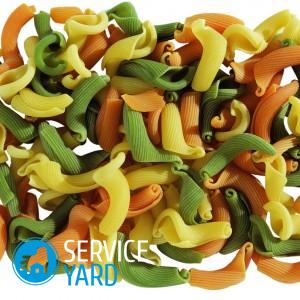
DIY pasta paintings

The fantasies of needlewomen have no boundaries - from which you will not find crafts in the creative world. Pasta products have not been surprising for a long time, however, their diversity can be admired. DIY pasta paintings can be a wonderful decoration for your home. You can do it yourself or use your children - they will certainly enjoy working with this material.
This type of needlework does not require special costs, and consumables are very easy to find at any grocery store. On the shelves you can find products of any size and shape. In addition, various cereals or peas can be added to the crafts - this will give the craft even more originality and beauty. Let's look at some interesting ideas on how to combine all this.
to contents ↑Panel of pasta “My house”
To create a very interesting picture you will need the following:
- Pasta of different shapes and sizes: snail, horns, spirals.
- Various cereals: buckwheat, rice, chopped peas.
- PVA glue.
- Paint brush and glue.
- Simple pencil, marker.
- Basis for the application (you can take the cover from the shoe box).
- Gouache.
- Polish for hair.
Sequencing:
- Start with the basics. Draw the base of your panel on the inside of the lid: a house, clouds and the sun with rays.
- After the sketch is ready, carefully examine your cereals and pasta, determine which material you will fill this or that part of the sketch with.
- Now you can go directly to the creation of the picture. To do this, take the glue and apply it with a brush to separate sections of the sketch. Glue the desired type of pasta or cereal immediately after application.
Important! First, it is desirable to decorate the sun with the help of peas and one horns, which define a smile. You can do this in two ways: simply pour it onto the base with PVA or glue each individual pea in turn.
- Next, make buckwheat out of buckwheat.
- From the horns, draw the line between the sun and the rays, and from the thin spirals, draw the rays.
- When the rays are ready, go to the clouds, which can also be laid out of the horns, so that they seem fluffy and airy.
- After the clouds, apply glue to the upper part of the base, around the sun and clouds and decorate with rice - this will be the sky.
- Now you can start laying out the house - for this, use large spirals.
- Glue the horns on the roof - they will act as tiles.
- When the house is ready, you can "plant" a tree next to it. To do this, make a trunk from thin spirals, and a crown from snails.
- When the walls of the house are dry, you can make a door - for this, use rice.
- To the left of the house, place a bush of one horns and three snails.
- Decorate the lower part of your picture with buckwheat - it will be the earth.
- The picture is ready, but so far it looks somewhat faded. To fix this, you can color it a little. To do this, highlight with gouache the sky, clouds, a house, a smile from the sun, a tree and a bush.
Important! You need to paint the picture carefully - try not to take a lot of water on the brush, since pasta can swell from this.
- After the panel has completely dried up, spray hairspray on it - this will give the crafts a brightness.
Pasta Basket
Another great option is a DIY pasta basket. To make it, you will need the following:
- Scallop pasta.
- Thermal gun.
- A mug from an old thermos or some other container of a similar shape.
- Masking tape.
- Nippers.
- Enamel in aerosols of several colors.
Sequencing:
- Pour pasta onto a dish or onto paper.
- Lubricate the bottom edge of the thermos flask with glue and glue the first row of “scallops” to it with a wavy edge out. After the bottom of the basket is framed, create the first and all subsequent rows.
- Attach the “scallops” from above with a silicone gun, make a basket handle. To do this, first draw it on a paper sheet.
Important! The width of the handle should correspond to the diameter of the basket.
- Now lay out the pasta by pasting the next “comb” to the previous one. When the resulting construction dries, attach the handle to the basket, wetting excess glue with adhesive tape.
- A DIY pasta basket is almost ready. To make it look even more beautiful, you can make pretty flowers from the same pasta and stick them to the craft.
- Finally, cover the product with brown or gold enamel.
Stock footage
Thus, making a picture of pasta with your own hands is not at all difficult. Moreover, for this you will need materials that can be found in any kitchen. Imagine, and your masterpiece can become a wonderful decoration in any room.
- How to choose a vacuum cleaner taking into account the characteristics of the house and coatings?
- What to look for when choosing a water delivery
- How to quickly create comfort at home - tips for housewives
- How to choose the perfect TV - useful tips
- What to look for when choosing blinds
- What should be running shoes?
- What useful things can you buy in a hardware store
- Iphone 11 pro max review
- Than iPhone is better than Android smartphones


