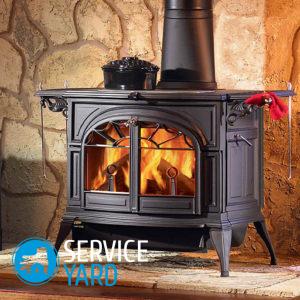
Do-it-yourself wood-burning fireplaces - drawings
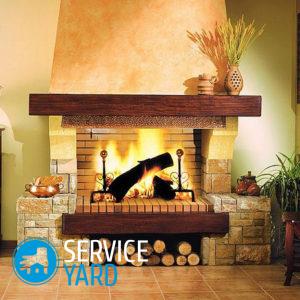
A wood-burning fireplace is an open firebox construction. It performs two main functions: decorative and heating. It is advisable to build fireplaces on wood in cottages or in private houses. In a high-rise apartment, this is almost impossible to do, since the construction of a fireplace takes a lot of time and requires significant financial investments. Today we’ll talk about how to make do-it-yourself wood-burning fireplaces for the house — drawings for them can be selected as standard. It is quite possible for anyone to build such a design, the main thing is to observe the sequence of work stages and follow our useful recommendations. Let's begin to deal with the construction of such a wonderful wood-burning stove.
to contents ↑Calculations and schemes of a brick fireplace
Let's take a closer look at what parts this structure consists of, how to correctly make calculations for its construction.
Fireplace components
Before starting all work on the construction of this design, we recommend that you familiarize yourself with the design of the wood-burning stove, which consists of the following elements:
- Firebox.
- Chimney.
- Smoke chamber.
Each of the above constructions performs its specific function. So, for example, in a firebox - firewood burns out, the chimney serves as a tunnel for removing gaseous products of combustion, which are collected in a smoke chamber.
Important! The dimensions of all these components must correspond to the area of the heated room. The larger your room, the larger you need to build a fireplace, and vice versa.
Calculations and drawings
Below we list the main recommendations that should be followed when calculating a wood-burning fireplace with your own hands:
- In order to correctly calculate the size of the hearth, it is necessary to know, first of all, that the area of the hole for the furnace in relation to the dimensions of the heated room is 1:50, the ratio of width and height is 2: 3, and the comparison of height to depth of the furnace is within standard limits - 1: 2 or 2: 3.
- The size of the smoke hole directly depends on the intended furnace room. In order to achieve the desired level of smoke draft, the area of the chimney should be less than 8-15 times the area of the furnace.
Important! If you decide to install a round pipe, then make sure that its cross-sectional area is several times smaller than square or rectangular chimney options.
- After studying the dimensions of the above parts of the furnace, it is necessary to draw drawings of the facade and the front section of the fireplace. These details will show you the appearance of this design.
- Do not forget to make a diagram of each row of masonry wood burning fireplace. In orders, you will need to number absolutely every row, using certain symbols for each element. In constructing the calculation scheme, consider not only the whole material, but also its individual parts. For work, you need halves, quarters and bricks with diagonal sawing.
to contents ↑Important! Build wood stoves in compliance with all norms and rules of fire and technical safety.
Do-it-yourself wood-burning fireplaces with chimneys
The whole process of making a wood-burning fireplace consists of certain steps that must be carried out in strict order.Let's get to know them in more detail.
Preparation of materials for masonry fireplace
The action algorithm occurs in the following order:
- We prepare a clay solution a few days before the construction of the foundation. To do this, soak the previously prepared clay for 2 days, filter it through a special metal mesh and mix everything with dry sifted sand, gradually adding water. 8 parts of sandy material, 4 parts of lean or oily clay are used for one part of water. As a result, the consistency of thick sour cream should be obtained.
Important! The quality of the resulting mass is checked as follows: if the composition easily leaves hands and holds its shape well, then everything was done correctly.
- We put each brick for 2 minutes in water so that air bubbles come out of the material. If this work is not done, then the brick will absorb liquid from the clay solution, which will lead to fragile and short-lived masonry.
Selection of building materials
Anyone will not build a metal wood fireplace with their own hands without the necessary building materials. For work you will need the following:
- Solid bricks red. Carefully select and inspect each brick. Its color should be thick and evenly distributed throughout the material, and the corners should not have chips and cracks.
Important! When struck with a hammer, a quality brick will make a clear, clear sound. Pay attention to the brick break - poor-quality bricks will be mixed in color and have a heterogeneous structure.
- Sand. Its granularity should be no more than 1.5 mm. In order to remove dirt and debris from sand, it must be sieved through a fine sieve and washed with water.
- Clay. For the erection of a wood fireplace, it is better to take Cambrian clay. If you do not have such an opportunity, then use a brown or dark red clay composition.
- Rubble. Its fraction should be 3-6 mm, the binder should be Portland cement, and the brand number 300.
- Fireplace screen.
- Smoke damper.
- Grate.
We start to build a fireplace for a summer house with our own hands
We begin the construction of a home wood hearth with the process of laying a separate located foundation:
- We dig a pit with a depth of approximately 60 cm, the length and width of which should be 10 cm more than the future foundation.
- We add crushed stone to the bottom of the recess, ramming it to create a horizontal surface.
- We knock down formwork from wooden large pieces. For waterproofing, we process it with resin or sheathe roofing material.
- We install the formwork in the pit and fill the structure with broken brick, stones and rubble.
- Fill everything previously made with cement mortar. For its manufacture, we take three parts of sand and one part of cement.
- We align the top of our foundation and check its horizontality.
- We cover the wet surface with oilcloth and leave it alone for a week.
- We make the foundation level 6 cm below the floor level.
The list of actions after solidification of the foundation:
- We lay waterproofing on the foundation with two layers of roofing material.
- We begin to lay out bricks. We make laying from the corners, checking the constantly correctly located level.
- We lay on the edge the bottom row of cap bricks, spreading the spaces with cement mortar. We put all subsequent rows in the usual way - flat on an ordinary clay solution.
- To lay out the outer continuous rows we use a special tool - a trowel or a trowel.
- We manually lay the chimney to detect pebbles and other large inclusions in the prepared solution. We should get thin seams within 5 mm so that in the future the frozen solution does not crack or crumble.
- We spread the clay solution in the middle of the brick, trying not to go beyond the edges of this material.
- We carry out the dressing of the seams on half a brick in each row completed.
- We do not connect the lining of our hearth with the outer wall, so as not to disturb the masonry from temperature extremes.
- We mount a circle (temporary formwork) for an attractive appearance of the masonry vault.
- We check each laid brick row with the previously made sequence diagram, marking all the notes with chalk or pencil.
- The bulk of the work to build a wood-burning fireplace for the home with their own hands has come to a conclusion. We only need to build a chimney, which we will consider a little further.
Important! Spread the chimney and firebox with extreme care, removing excess clay with a damp cloth. Do not forget that the inner walls of these structures are not plastered.
In order for you not to get confused, do the work in strict sequence. Start laying out the next row only after finishing laying the previous one.
Chimney construction
The chimney in the fireplace serves as a vertical channel for the exit of combustion products and carbon dioxide. A good chimney must meet the following basic requirements:
- Have strong cravings to exclude the possibility of harmful smoke entering the room.
- Consist only of heat resistant elements.
- Its materials must be resistant to temperature extremes.
Important! To build a chimney, use a heat-resistant ceramic pipe, which will serve as the main outlet channel.
Step-by-step steps for arranging a thermal chimney:
- We sheathe the ceramic pipe on top with mineral wool. We lay on it a brick layer, stone or concrete. It all depends on what you're building your wood burning fireplace.
- We carefully monitor the verticality of this design. The more evenly and efficiently you do the work, the better the fireplace will pull the smoke, and the less carbon monoxide will enter the room.
Important! Most often perform a curved chimney at an angle of 90 degrees. So you protect your fireplace from rain.
- We wipe the internal walls of the structure with a rag, wetting it in a liquid clay solution - this way you will achieve a perfectly smooth and smooth surface without cracks.
- We make the laying of the chimney above the roof level using a thick cement mortar.
- We protect from the influence of high temperatures the passage of the chimney through the ceiling. To do this, we place the expanded pipes in the ceiling itself and cover them on all sides with felt or asbestos moistened in a clay solution.
- We make a small inlet from the outside of the roof to protect the structure from possible leaks.
General recommendations for arranging a wood stove:
- Start the construction of the heating structure with a thorough development of all the processes of this project. Make at least one drawing with the noted dimensions and quantity of the necessary building and finishing material.
- Decide on the location of the furnace in the room. It is advisable to place it along the front wall in front of the bed, observing a safe distance from the bed to the heat source. It is not recommended to erect a structure in places with a draft or near a staircase.
- Do not make the fireplace too deep. Otherwise, a small amount of heat will enter the room.
- Set the smoke threshold at the junction of the firebox with the chimney. Its main function is to prevent the difference in the air flows entering the stove and to protect it from sparks escaping into the open room. Thanks to this design, smoke and soot will not get into your room.
Important! The width of the threshold should correspond to the width of the chimney and be erected strictly in a horizontal position.
- Wood fireplaces have relatively low draft. That is why we recommend installing a hood over the stove in which smoke will accumulate - after a certain time it will come out.
- Fireplace masonry can be made in completely different shapes using various finishing materials.
- With high-quality masonry and the right choice of bricks, it is not necessary to do the cladding.To finish the work it will be enough to close the joints with building grout. With a great desire, the brickwork can be treated with plaster, and on top put several layers of paint.
- If you decide to make a decorative finish, then you have a large selection of various building materials: plaster, tile, tiles, marble, different types of stone or brick.
to contents ↑Important! Perfectly fit into the picture and concrete imitation of natural textures - like wood or stone. Glass or wooden elements, forged, cast-iron sculptures can be added to the cladding.
Stock footage
Yes, to build such a design is not so easy, but it is quite possible. Observing the above recommendations, you can quickly and most importantly - build a quality fireplace in your home with wood with your own hands. Let it be warm and comfortable not only in the house, but also in your hearts!


