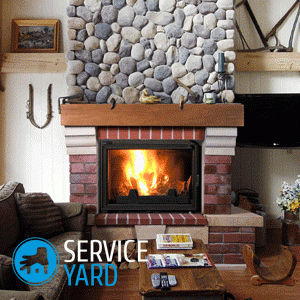
DIY fireplace mantel

The fireplace itself is very attractive, regardless of which room it is located in. However, it looks even prettier if it is equipped with a shelf on which various decor items can be placed. A fireplace mantel with your own hands can be provided even at the stage of building a fireplace. You can also build a structure at the end of construction work. How exactly it is necessary to act in each individual case - we will consider in this article.
to contents ↑Materials of manufacture
The most common materials are:
- Wood.
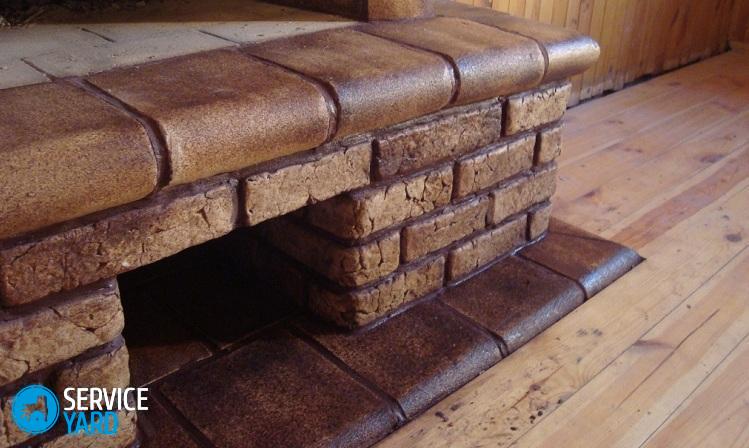
- Fake diamond.
- Natural ornamental stone.
The first 2 options are more accessible. Natural stone costs a lot of money, but it looks absolutely luxurious, emphasizing the refined taste of the owners of the house. The simplest option is a wooden shelf, because this option is best processed.
As for stone products (natural or artificial), they can only be installed. To process these materials, you need to have not only a special tool, but also professional skills. Therefore, we dwell in more detail on a wooden product, which gives more room for creativity.
to contents ↑How to fix the shelf on the fireplace?
There are several installation options:
- Embedding in the overall design. It is best to use this option for shelves made of artificial stone. The reason is that the mass of the shelf is quite large, and it exerts significant pressure on the supports.
Important! This method must be implemented during the construction of the fireplace.
- Attaching supports to the walls, fixing the shelves on them. This option is best for wood. The material is lightweight, you can drive screws or nails into it. The support may be wooden or wrought metal.
Stone product
It is advisable to design the shelf in advance and install it in place at the construction stage. Stone shelves are best suited for open fireplaces, not placed in the wall, but completely in the room. All work consists in installing a pre-purchased shelf on a mortar. No other fixtures are required.
Important! If the fireplace is built into the wall, then a shelf will have to be built in. At the same time, the installation is made so that it protrudes 100-150 mm, and its rear end is mounted in brickwork. Thus, the shelf, one edge of which is securely jammed, will hold firmly.
If the fireplace is made of artificial durable stone, then you can perform the following actions:
- Carry out a stroba with a depth of 50 mm. The width of the stroba corresponds to the width of the shelf.
- Clean the strobes from building fines and dust.
- Insert the shelf into the channel, additionally wedging it. Of course, at the same time, care must be taken to ensure that the wedges are invisible.
- Using putty, seal joints.
There is another installation option - with columns bought in the store:
- You need to place them on both sides of the chimney throat.
- The columns are attached to the walls using special glue. This fixation is needed so that the columns stand motionless. They withstand the load from the shelf, but without additional fixation they will stagger.
- The shelf is mounted on top, secured with mortar or glue.
DIY wood mantelpiece
Now consider the options with wooden shelves.
1 way
The mantelpiece in configuration resembles a voluminous box.For its manufacture such materials are needed:
- For the top panel - 1 board 216x1219 mm.
- For the lower part - 1 board 111x1010 mm.
- For the front part - 1 bar 64х1048 mm.
- 2 side beams - 64x130 mm.
- 1 beam 44x1007 mm - it will simultaneously serve as a support fixed to the wall and the back wall of a wooden shelf.
- Front cornice 89x1270 mm
- 2 side cornices 89x254 mm.
- Screws, dowels.
- Finishing nails (sizes are 64, 51 and 38 mm).
The thickness of the cornices is 17.5 mm, the thickness of the boards is 19 mm.
The steps for making a do-it-yourself fireplace shelf in the form of a box are as follows:
- Arrangement of bevels at the ends of the bars: front and side (at 45 degrees).
- Milling the top panel (arrangement of fillets on the front and side edges of the panel).
Important! Only the lower half of the edge gets the fillet, and the upper one remains unchanged. A milling machine and a 9.5 mm circumferential milling cutter help to complete this work.
- Processing the top panel with sandpaper with a grain size of 120x220 nd.
- Bonding the front and bottom panels to the sides with glue. To make the structure more durable, you can use 1 mm finishing nails.
- Mounting the top panel. First, they are mounted on glue, and then fixed with nails - 4 in front and 2 on the sides.
Important! If strong wood is used to make the shelf, small holes are drilled before using nails.
- Cutting and installation of cornices. They play a decorative role.
- Mounting the support beam. First, drill holes for dowels in the masonry, then insert dowels and fix the supporting beam with screws.
- Fastening the shelf on the beam. The shelf is applied to the beam in such a way that it serves as its back wall. After that, the installation of the main structure is carried out using 64 mm nails. On each end of the beam there are 2 nails.
2 way
This method is much like the previous one, but it is somewhat simpler. Neither the milling of fillets on the top panel, nor the cornices are needed. But it will require bevels of 45 degrees on the longitudinal edges of the panels: top and front. In this case, both boards should be the same in length. The sides and the top panel are joined in the same way.
Important! You can do without bevels. The top panel is hidden behind the front wall. To decorate the sides and mask not very attractive seams, you can glue the linings - plywood or veneer.
A shelf made of artificially aged material looks very nice. The procedure in this case is as follows:
- Take a drill with a brush attached to it, process the boards from the front. In this case, move the drill exclusively along the fibers.
- Paint the wood with stain, then varnish.
3 way
This is a simple option when a mantelpiece is made with your own hands from an old board. The execution algorithm is as follows:
- Remove the bark and process the board with a drill with a brush attached. Treat so that grooves remain between the wood fibers. The surface of the tree is embossed.
- Using a soft brush, cover the material with a stain.
- Work the board with a metal brush (manually). Thus, you partially remove the stain from the most accessible areas. The board is artificially aged.
- Coat the board with varnish.
- Fix the forged metal supports to the masonry. Supports can be replaced with beautifully made corners or metal mounts that are used for drain pipes.
- Fasten the shelf to the supports.
Stock footage
Use one of the above installation methods, and a mantelpiece, made by yourself, will delight you with beauty and functionality.
- How to choose a vacuum cleaner taking into account the characteristics of the house and coatings?
- What to look for when choosing a water delivery
- How to quickly create comfort at home - tips for housewives
- How to choose the perfect TV - useful tips
- What to look for when choosing blinds
- What should be running shoes?
- What useful things can you buy in a hardware store
- Iphone 11 pro max review
- Than iPhone is better than Android smartphones


