How to sew a dress with a train for a doll?

Today at the peak of popularity are chic skirts and dresses with trains. Such outfits, depending on the length of the cut, can be worn both in everyday life and at special occasions. Little ladies also like to wear such dresses themselves and dress up their favorite dolls in them. Actually, that's why many needlewomen are interested in how to sew a dress with a train for a doll. This article will talk about this.
to contents ↑What are the loops?
The first thing I want to note is the variety of loop lengths:
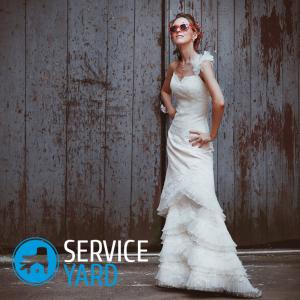
- For graduation, wedding dresses, long trains with a huge number of ruffles or ruffles are characteristic. Due to such processing of the fabric, the clothes become incredibly light and tender, the girls in her look simply luxurious.
- If you plan to skirt for everyday life, it is better not to make the hem too long, because it will not allow you to freely move around the city. For a doll, this rule also applies.
Important! In a casual wardrobe, ruffles are also not entirely appropriate.
There are several ways to sew a train for a dress:
- Separately, cut it like a cloak, and just put it on over the skirt.
- Immediately cut the bottom of the product of different lengths.
- Make it into an insert for the back seam of the skirt. But in this case we should not forget about allowances for seam seams, while the bottom of the loop should be rounded and smooth.
How to sew a train to the dress yourself?
In this section we will give an example of how to make a train for a dress with your own hands.
For sewing you will need the materials listed below:
- A pencil, scissors, a large ruler, a centimeter, a piece of soap or chalk.
- Material for the manufacture of a train, non-woven or corsage tape.
- Drawing paper.
- Sewing accessories in the form of zippers, buttons, ribbons, which will decorate the finished skirt and processed the bottom of the product.
Sew the loop following the step-by-step instructions:
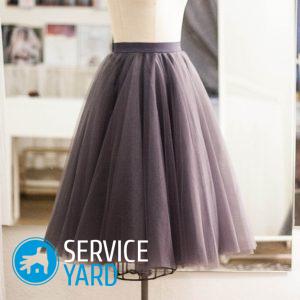
- Take a piece of paper, draw a semicircle on it, the radius of which is equal to half the circumference of the waist, then divide it by the number P (3.14). Draw a line from the center of the semicircle directly through the middle of the semi-arc, set aside the length of the future skirt (60 cm). Draw another semicircle so that its radius is 60 cm greater than the first, that is, you will add the length of the skirt to it.
- Move the center of the skirt, in other words, its upper semicircle to the right by 20 cm. As a result, it turns out that the product will have a length of 40 cm in front and 80 cm in the back. You will get a kind of train.
- Transfer the pattern to the fabric, all the drawings are done in chalk, but do not forget to leave allowances for the seams.
- Sew the loop details, treat the edges with an overlock so that they do not fray.
- Make a belt from the same fabric or in the form of an elastic band.
- Place a corsage tape in the middle of the fabric or glue the non-woven fabric to keep the product in good shape.
- Sew the belt carefully to the skirt. Make a small loop on it, sew a button on the other side. Sew a hidden zipper into it.
- Trim the bottom of the product. Sew a special ribbon or sew it with an overlock.
The train is ready!
to contents ↑Important! If you want to get a more fluffy multilayer skirt, you can make several more of these products of different lengths.
How to sew a doll dress with a train?
Your daughter just loves dolls, but they lack some kind of formal dresses so that she can constantly change them and arrange real fairy balls? Then study this master class, which will describe in detail how to sew a dress with a train for the doll.
Sew a doll outfit with a train according to this pattern:
- For work, you will need an elastic band, which must first be tied with circular knitting needles, or you can dissolve some old thing and use the elastic band from it. It’s even easier to purchase it in a store. That is, the top of the product will serve as a hosiery strip.
- From a white silk fabric with small dark flowers, cut a circle. The radius of the circle will be about 18 cm. The more you make it, the longer your train will turn out. With chalk or soap, draw a diameter through the center of the circle.
- Put the knitted top on the doll, measure the length of the skirt in front from the bottom of the stocking strip to the floor. If we take into account that the model has a height of 30 cm, then the length of the skirt should be equal to 8 cm.
- From the bottom, in a circle, measure the length of the stocking knit - it should be 24 cm. You will get the circumference.
- Draw a circle length on the fabric circle, while the radius of the circle will be 3.8 cm, and it must be transferred to the fabric.
- To make a train, shift the circle from the center so that the distance from its edge to the edge of the fabric is 8 cm, i.e. the length of the skirt. The center of the circle itself should be located directly on the line drawn through the center of the circle.
- Make 0.5 cm allowances for the seams, in other words, draw another circle inside, mark it with a dotted line.
- Cut a small circle along the dotted line.
- Overcast a silk detail inside and out.
- First, sweep the skirt to the top of the dress, then stitch it.
- Sketch lace on the bottom of the product, trying to lay it in small folds.
- Stitch lace.
Important! Decorate the finished dress at your discretion, it is advisable to bring your little princess to this process.
Any mom who has a desire to really please her child will be able to figure out how to sew a skirt with a train with her own hands for a fairy princess.
to contents ↑How to make a chic festive outfit with your own hands?
Holidays are on the way, so it's time to think about what you will attend. Here we will offer you a master class with a pattern that clearly describes how to sew a dress with a train. The outfit will be 100 cm long without a loop, and 150 cm along the back. In principle, to make it more convenient to work, it is better to download the basic patterns of such products from the Internet in advance and print. As for the choice of fabrics and colors, here you can completely and completely be guided by your own taste.
Create a pattern according to this instruction:
- Modeling patterns. We will do this according to the basic pattern of the dress, adding 3 cm to the half-circumference of the chest for free fitting.
- Modeling the back. Draw lines of modeling on a pattern of a back. Cut along half the pattern of the sleeve with one seam. Place the back half of the sleeve at an angle. Draw a strap. Transfer one part of the tuck in the side seam, the second part in the middle seam of the back. Separately, re-trim the backrest to the tracing paper so that its width is 4 cm.
- Loop simulation. Lay 30 cm down from the waistline. Then draw an arc with a radius of 77 cm, while the angle should be 30 degrees. Transfer the cable to the tracing paper.
- Modeling bodice. Transfer to the pattern in front of the modeling line. Cut the barrel detail, cut the upper part of the bodice, continue modeling. Close the chest tuck, at an angle, impose the front of the sleeve. Model then the middle part of the front of the bodice.
- Connect the lateral and middle parts of the bodice, transfer to the tracing paper a one-piece edging of the front part of the product 4 cm wide.Completely re-draw the lower part of the skirt and the front onto the tracing paper, cut along the lines clearly, move it apart into an assembly or pleat, adding a total of 12 cm.
Cut the dress as follows:
- Prepare 3.2 m of the material you like 145 cm wide, 40 cm lace fabric so that it is at least 90 cm wide. You will also need a zipper for the fastener 60 cm long, and be sure to thread in color.
Important! As the main fabric, it is better to choose satin, crepe or viscose.
- Cut out all the details of the dress from the main material, from the lace fabric the shoulder strap and the middle part of the front.
- Add seam allowances of 1.5 cm, bottom about 3 cm.
- Duplicate all trim parts with a gasket.
Sew the product strictly following this technique:
- Place the lace parts on the corresponding elements of the dress (place the paired parts up face up), sweep them.
- Sew the product as a single layer.
- Sweep, then grind relief seams at the front, grind allowances with an oblique trim, iron to the center of the front.
- Stitch the belt to the top of the bodice. Grind and iron allowances.
- Strictly fold between the marks on the front skirt.
- Stitch the dress at the side seams, grind allowances, iron.
- Stitch a train on the back, stitch a secret fastener, grind stocks.
- Stitch back straps along the shoulder seams to the front, iron the allowances.
- Stitch the lining of the straps to the front facing right along the shoulder seams.
- Face the product with a front hem, stitch it along the neckline, then, not reaching a side seam of 3 cm, grind the armhole of the front and the shoulder straps.
- On the front side, bend the facing, clean the seams clean, iron.
- Stitch the back straps to the back of the bodice.
- Fold the hem of the product and stitch.
Stock footage
Your chic enchanting festive outfit is ready! Even if you have never encountered cutting and sewing before, it will not be difficult for you to understand how to sew a skirt with a train, using the given detailed diagrams and useful recommendations.


