How to sew home-made slippers-boots with your own hands - patterns with sizes

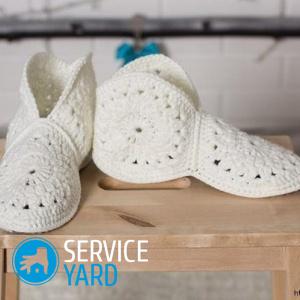
Most often, shoes, even domestic ones, we are used to buying. However, many craftswomen liked to make these wardrobe items on their own. Especially when a child appears, and you want to do something unique, interesting, safe for him. You will be surprised, but boots are comfortable and warm footwear for the house in the winter. But, of course, not their street look, but a cozy and homely option. Shoes like modern ugg boots now look, and by the way are very comfortable to wear, and a dense sole from leather will completely turn them into practical slippers. Next, we will focus on how to sew home slippers, boots or fur boots and slippers with your own hands - it will be easy for you to make patterns with product sizes based on step-by-step instructions.
to contents ↑The first option: graceful boots “Snow White”
To begin with, we note that as a basis we take the parameters corresponding to 37-38 foot size.
Important! Customizing patterns to a different size is not difficult. What you need to pay attention to is disproportionate: resizing affects the length of the product, but the boots are practically unmodified in width.
Basic elements
A pattern of boots made of fabric with your own hands is applied on graph paper. It consists of the following elements:
- Foot sole shoes.
- The toe and heel part.
- Circle as an element of decor for the finished product.
- The bootleg.
To sew life-size slippers of boots with your own hands, patterns should be prepared in such quantities:
- To make the sole, open: from fleece - 4 elements, from synthetic winterizer - 2 elements, from raincoat fabric - 2 elements.
- For the heel-toe portion, prepare: 4 fleece parts, 2 from synthetic winterizer.
- Shaft: 4 fleece elements.
- Circles, which, in essence, will be a decoration in the form of a flower, cut in the amount of six pieces. They are made of fleece.
What materials should be prepared?
For this model of slippers we will use:
- Fleece is white or milky.
- Insulation. Batting or synthetic winterizer.
- Raincoat fabric.
How to sew homemade boots with your own hands - patterns in stages
The operation algorithm will be detailed, therefore easy to execute.
Start from the sole
To determine its length and width, take measurements. To do this, trace an ankle on a piece of paper.
Important! Hold the pencil evenly and perpendicularly; do not push it under the foot. We add about 2 cm in length to the resulting drawing - this stock is due to the stuffing of the product with syntepon.
Another option is to outline your own shoes, for example, autumn shoes without heels. But in this case, there is no need to add additional centimeters. From the resulting sketch we build the pattern of our sole.
Important! The length from the middle of the toe to the center of the heel should be 25-26 cm.
The toe and heel:
- From the middle of the toe to the bootleg, the distance is about 12.5-14.5 cm, moreover, this value is suitable for any size.
- Another important indicator for constructing a pattern is the height between the center of the heel and the shaft, which is 6.5-7 cm.
- The next step is to measure the perimeter of the patterns of the feet. Divide the obtained value by 2, and add 1-1.5 cm. This stock is necessary for the addition of the heel and toe.
Bootleg
The easiest cutting is for this particular element of shoes.It is a rectangle of fleece measuring 18 by 32 cm.
Important! The width of this part of the boots does not change. But the height can be modified depending on your preferences and tastes.
A circle with a diameter of approximately 10 cm.
Important! In the process of constructing parts diagrams, apply labels that will make it extremely convenient to navigate in the future. These points are: the center of the heel and the center of the toe on the sole.
Sewing
Well, the most crucial moment is the assembly of all parts together:
- The upper toe and heel element of the boots is fastened with insulation, and sewed on a typewriter along the edge.
- Then we form the sole, which is a multilayer element. You can do this manually or on a sewing machine. Try to connect the materials evenly. The synthetic winterizer is recommended to be steamed very slightly through a damp clean cloth.
- We attach the toe and heel parts to the leg. The result is four connected elements.
- We sew back seams.
- On the lining it is necessary to leave small unstitched areas through which we later turn our boots on the front side.
- Now we sew the soles into the four parts obtained.
- Turn the top of the product to the right side and the lining to the left.
- Well, now it’s quite simple: we put on the front boot on the hand and insert it into the lining. In this case, carefully combine the heels and socks of both parts.
- We connect the upper edges in the direction from the back seam, fix and sew.
- We turn the product through the un sewn sections of the boots, close them with a line.
- Inside we set the lining, straighten and align the fabric. It is best to put boots on your feet and pull so that everything is straightened out as best as possible.
Important! We advise you to make four neat fastenings of the lining on the inside so that it does not move: two in the forefoot and two in the back.
Do-it-yourself boots are ready! It remains only to decorate them.
Decorative finish
In this regard, you can be guided by your imagination and decorate shoes as you want: beads, flowers, bows, rhinestones, etc.
In this master class, we consider the design in the form of flowers, three for each shoe. They are located in the center.
Flower assembly diagram:
- Armed with a needle and thread, we do the assembly in a circle, then tighten the thread.
- We pass the needle through the center of the circle and pass through the edges again to the center.
- We do this four times, the distances should be equal.
- We pull the thread a little, getting the petals.
- In the center, decorate the flower with a beautiful shiny bead.
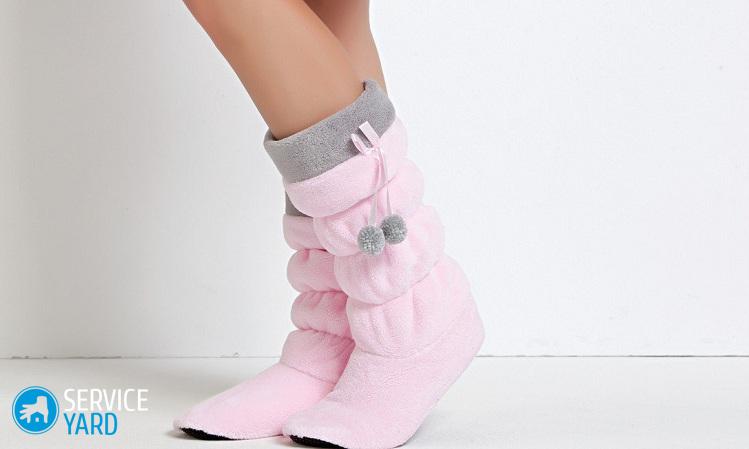
Option two: fitted boots
You can sew home-made boots with your own hands in such a manner. This model is distinguished by a more fitting shoe silhouette. Note that the assembly of elements and sewing do not differ from the previous version. The difference is only in the pattern of the product, namely in the boot:
- Its length increases approximately by 50 cm, and the top expands.
- The top half is approximately 23 cm.
Again, it should be noted that these parameters are conditional, and you can change them at your discretion.
On the shaft form an assembly of four elastic bands - they are sewn in parallel and at an equal distance from each other. There should be a 4 cm gap from the elastic to the edge of the shaft.
to contents ↑Important! The insulation for the toe of this model should be very thin. A suitable material for shoes, we recommend choosing fleece or velor.
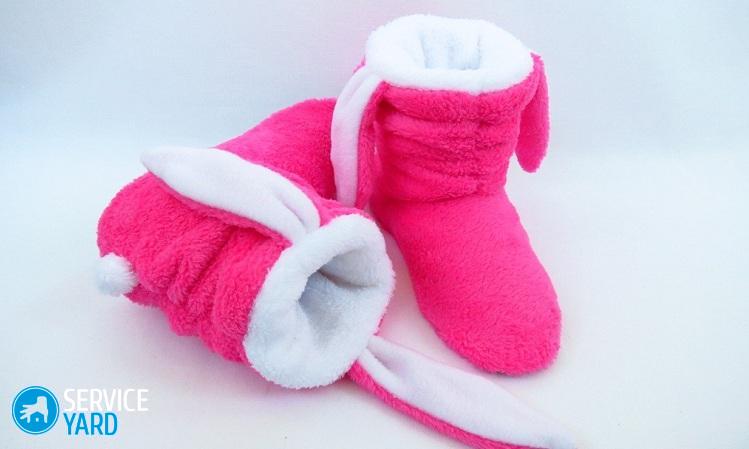
Third option: shoes with ears
How to make boots with funny ears? Such slippers will look very original and cute.
Materials for work
To create it, you will need:
- The cloth. It will be a fleece in two colors - black and red.
- Heater - synthetic winterizer.
- Sharp scissors.
- A cut of skin.
- Patterns - ears, sole, toe and heel part, shaft, bows.
Sequencing:
- Based on the patterns, we cut out the details from fleece and sintepon. And the sole is made of leather.
- We form the ears.To do this, we connect the black and red elements of the pattern and sew together. In this way we create all the ears - 4 parts.
- Turn them to the front side, grind at a distance of half a centimeter from the edge.
- In pairs we connect elements of a synthetic winterizer with details from fleece of black color.
- Sew the base of the boot with the toe.
- Sew the edges of the main pattern so that there remains a small opening through which you can turn the product to the front side.
- We attach the sole.
- We make the same manipulations with details from fleece of red color.
- Sew a leather sole.
- To the red shoe we attach the ears with the black side to the product.
- Sew parts of the red and black color of the product.
- The sole of products of both colors is combined, processed by three fastenings at the back and front.
- We turn the resulting boot out and cover the opening.
to contents ↑Important! As a decor, you can make a bow for each slipper:
- We make a pattern in the form of a rectangle measuring 6 by 10 cm - two such details are needed.
- We sew both elements of the fabric along the edges, leaving a small segment through which we turn the rectangle.
- Then in the middle with a needle and thread we make a beautiful assembly and form a bow, which is attached to the back of the boot.
- Repeat the action and sew a bow on the second boot.
Boots for children
How to sew boots for a child from fabric? The kid can make home slippers in the same ways, the main thing is to correctly outline the pattern. But the assembly principle and manufacturing technique are similar.
Next, we would like to tell you how to make a child’s boots for a matinee or other military-themed event.
Important! Such a product is not suitable for permanent wear, but serves as a props and accessory.
Materials for work
To create soldier's boots you need to prepare:
- Leatherette. If you can’t find the right material, you can use a dense tarp.
- Thick base for the sole.
- Glue.
Important! The peculiarity of these boots is that they are put on over the child’s shoes, i.e. like a stocking.
Sewing technique:
- The base of the boot is in the form of a pipe, which must be installed vertically directly on the boot. On the material, make several cuts in the front, which will simplify the formation of the boot, since the upper part will lie more evenly.
Important! The width of this part should allow the foot to pass freely in the shoe.
- Place the second piece of fabric on the toe of your baby’s shoes. Position this piece so that the incisions are hidden. Cut off excess fabric in an arc.
- Fix the parts with pins, sew them on the machine.
- Now we pass to the sole of our boot.
- According to the shape of the shoes, we make a template, transfer it to the fabric, and cut four such details out of a dense material.
- Set one element of the future sole on the sole of the shoe itself, make several cuts on the fabric to the line of the foot. With a needle and thread, pull the edges to the center. As a result, nothing should stick out.
- Then generously lubricate with glue, impose the next element on top of the sole. Press firmly and leave to dry.
- When the product is completely dry, remove the resulting boot from the child’s shoes. Work the inner edges of the sole with glue, fix and allow to dry.
Important! To fix the elements was easier, turn the boot inside out. A seam zigzag at the junction of parts will only add reliability to the product.
- And at the end, we make out the bootleg, namely its upper edge. Gently bend and make a beautiful line on a typewriter.
Do-it-yourself boots for the young soldier are ready! The material of the product is quite durable for gentle washing and gentle socks.
Important! Using this technique, you can make other models, for example, stylish cowboy boots.
You can not dwell on such decorative products, but sew children's boots from fur with your own hands - patterns can be found on the Internet or you can safely use the above workshops. The main thing is to properly size and buy high-quality beautiful material.
to contents ↑Stock footage
Sewing homemade boots with your own hands is not at all difficult, on the contrary, the process of creating original slippers will give you pleasure. And besides, such hand-made products can be presented to your friends and relatives, and they will definitely appreciate your efforts and invested emotions.
- How to choose a vacuum cleaner taking into account the characteristics of the house and coatings?
- What to look for when choosing a water delivery
- How to quickly create comfort at home - tips for housewives
- How to choose the perfect TV - useful tips
- What to look for when choosing blinds
- What should be running shoes?
- What useful things can you buy in a hardware store
- Iphone 11 pro max review
- Than iPhone is better than Android smartphones


