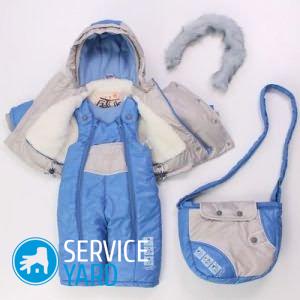
How to sew a jumpsuit?

Clothes from stores are not always perfect for children. Therefore, sometimes you have to make clothes for kids yourself. In addition, the advantages of hand-made tailoring are: the originality of the model, the quality of the material you have chosen, as well as matching your personal taste. In this article we will try to tell you as much as possible about how to sew a jumpsuit so that your child is warm and comfortable in the cold season.
to contents ↑Necessary tools and materials
In order to sew a beautiful and warm jumpsuit for a child, you will need:
- Jacket fabric (trouser length + 10 cm).
- Fleece (trouser length +20 cm).
- Lining material 25 cm.
- Finishing material (cuff width + 2 cm).
- Reflective tape.
- Lightning 40-50 cm.
- Wide elastic, which is equal to the waist circumference.
- Tailor's chalk.
- Sintepon (trouser length + 10 cm).
- Threads in fabric color.
- Sewing machine.
- Gum.
- Overlock.
- Long ruler and curly patterns.
- Tailor's scissors.
- Tape measure.
Beginning of work
Before you sew a jumpsuit, you need to prepare everything for the cutting of the necessary parts. For this:
- Check the material from the front for any scrap.
- Use a flat iron on the back to add steam.
- Place the fabric on the table along the edge, inward with the front sides.
Cutting overalls
The jumpsuit consists of two parts (the top - the bodice and the bottom - pants), so first you need to cut the bottom, and then the top.
Cutting trousers:
- Place the pattern elements on the fabric.
Important! Try to cut as close to the edge as possible - so you can save fabric and get solid shreds for items that you will sew in the future.
- According to the model, there are tucks in the knee area on the front halves of the pants. To do this, extend the front half along the bottom by 2 cm.
- In the area of the knee, horizontal tucks with a length of 8-10 cm should be formed. Add additives at the waist, as well as 5 cm of the hips (if necessary).
- Measure the leg circumference below, taking into account the winter boot, make these changes to the pattern.
- Add allowances for the width of the seams along the step, side, middle seams along the bottom 1 cm, at the waist - 0.5-0.7 cm.
- Next, you need to cut out the details of the trousers, given the allowances for the seams.
Important! Sintepon trousers are also cut according to the details received.
Open the bodice:
- Circle the pattern of the back and the shelf on the fleece, taking into account the pattern or direction of the pile of fabric.
- The bodice length is equal to the measurement: the length of the shelf in front from the waist to the shoulder.
- Deepen the neck and armhole.
- Add allowances on the bottom - 1 cm, shoulder seams 1 cm, side seams - 2 cm, in the center of the shelf - 1-1.5 cm.
Tailoring
Once all the parts are ready for assembly, it’s time to sew the jumpsuit into a single unit. This is where we get started.
Connection with insulation:
- Transfer the tucks to the other half of the trousers, then grind them.
- Connect the synthetic winterizer details with the main fabric elements along all sections, departing from the section by about 0.5-0.7 cm.
- So that there is no thickening in the knee area, cut the darts on the insulation elements along the contour.
- Stitch side seams.
- Suture double stitching on the front side.
Cut lining:
- Lay the fleece on the table along the edge, inward with the front sides.
- Lay out the elements of the trousers on the material, circle them with chalk and cut.
- You should get lining details without tucks and side seams, which reduces the thickening of the trousers at the seams.
- On the bottom edge of the lining, add 6 cm to allowances and freedom of movement.
Cutting cuffs:
- Two rectangles must be cut out of the main fabric: length = girth of the leg on the bottom +2 cm (for allowances), width = 810 cm + 1 cm (for allowance).
- From the finishing fabric and synthetic winterizer, you need to carve out similar rectangles, but with a width of 1.5-2 cm less.
Cuff Processing:
- It is necessary to connect the cuff parts to each other on the front side in length, departing from the cut 0.5-07 cm, it is necessary that the synthetic winterizer was inside.
- Turn off the resulting sections with a reflective tape.
Important! If the tape is too wide, cut it in half.
- Draw a center line from the wrong side along the entire length of the tape.
- Stitch the cuffs to the legs.
- Lay the finishing fastening stitch on the front side, with the allowance facing up.
Suture processing on trousers:
- It is necessary to grind the pants panels along the middle seam between each other, leaving a place for zippers in front.
- Next, grind the step seams in one step: starting from the bottom of one leg, through the middle seam and ending with the bottom of the second leg.
to contents ↑Important! The horizontal seams on the cuffs must be aligned during sewing. Before starting work, fix them with pins.
Sewing a bodice
We are also preparing the upper part separately. To do this, follow this order of work.
Neckline and armhole:
- To process sections of the neck and armholes, you will need a slanting inlay, which can be made from scraps of the main material. To do this, fold the fabric at a 45-degree angle.
Important! It is in this direction that the oblique trim is hidden - this gives it elasticity, which is especially important when processing concave / convex sections.
- Draw strips whose width is 3.5 cm and the length is the same as the length of the neck and armhole.
- Turn over the slices. At the beginning, sew the oblique ribbon on the wrong side, aligning the front side of the ribbon with the wrong side of the product. Pull the tape slightly along the concave lines.
- Now bend around the edge with a slice to the front side, bending its free cut inward, and lay a stitch 0.2 cm along the edge of the fold.
- Treat the side seams as well as the sides of the shelves.
- Using a sewing machine, fasten the side seams along the bottom of the armholes.
Belt processing and bodice connection with trousers:
- Work the belt with elastic.
- Please note that the feature of the overalls belt for the child is the indent from the edge of the 5 cm belt where the elastic is sewn.
- Take and sew the belt to the trousers, stretching the elastic.
- Align the side seams, middle seam of the trousers with the center of the back.
- With a machine line, connect the bodice with trousers.
Stitching Lightning:
- Sweep, and then stitch front zippers.
- The seam of the connection of the trousers and the bodice when fastening must necessarily coincide.
- Remove the basting threads and fasten the belt.
Stock footage


So, tailoring a cute jumpsuit for a child is not an easy task. However, it is still possible to sew a jumpsuit yourself - for this, be patient, with all the necessary materials and tools. We are sure that following our instructions, you will get a beautiful and original thing.
- How to choose a vacuum cleaner taking into account the characteristics of the house and coatings?
- What to look for when choosing a water delivery
- How to quickly create comfort at home - tips for housewives
- How to choose the perfect TV - useful tips
- What to look for when choosing blinds
- What should be running shoes?
- What useful things can you buy in a hardware store
- Iphone 11 pro max review
- Than iPhone is better than Android smartphones


Report typo
Text to be sent to our editors: