How to collect a rubik's cube for dummies?

This puzzle, which caused a real boom in the 70s of the last century, is still very popular to this day. Adults and children are trying to collect it, but even those who succeeded often do not understand how they did it and cannot repeat it because they did not manage to track the algorithm. How to collect a rubik's cube? For dummies, this is also quite affordable. The puzzle device and collection algorithms will be discussed later.
to contents ↑What is he like?
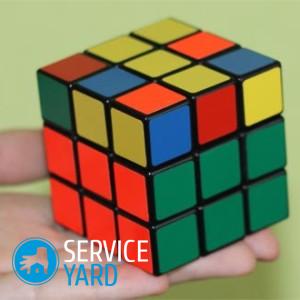
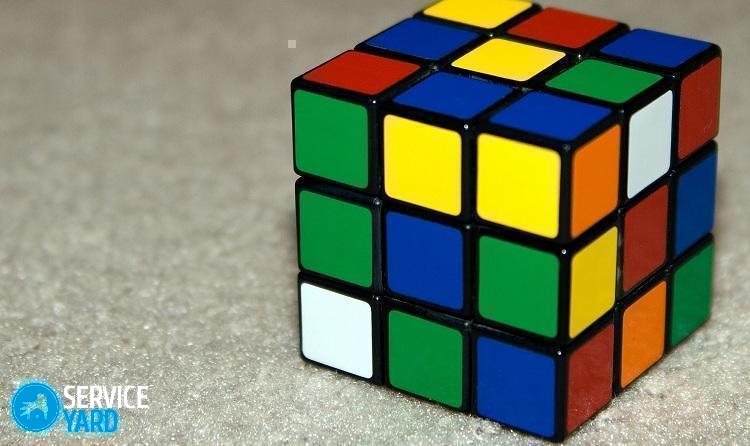
Before you learn how to collect a rubik's cube, it will be useful for dummies to figure out what it is. Actually, the correct name is “Rubik's Cube”, because a Hungarian scientist named Rubik invented this subject. First there was a cube, then other puzzles - Rubik's pyramid and even Rubik's globe.
A large cube appeared, each edge of which did not consist of three elements, but of four and even five. But the principle of the device of all these mysterious toys is one and the same. A classic of the genre is a cube, each face of which consists of nine small squares. The goal is to assemble the toy so that on each side there are squares of only one color.
to contents ↑How is it arranged?
Collecting a rubik's cube step by step for dummies will be much easier if you immediately understand what elements it has. The 3x3x3 puzzle has:
- 6 centers - one on each face;
- 12 ribs, like any other cube;
- 8 angles, like any similar geometric body.
Important! It is worth remembering that an edge is a line connecting two planes, in this case squares, and a face is a plane between the edges of a polygon.
But the Rubik's Cube would not be a puzzle if everything was so simple. Some elements of him move, others - not, and this is what allows him to collect. There are other details:
- The crosspiece inside is precisely its presence and allows the elements to move, it does not participate in the assembly process, but it is necessary to know about its existence.
- Central cubes - they do not move and serve as landmarks, since it is under them that the other elements that are located on the same face are selected.
Features of the elements
The edges of the classic Rubik's cube are painted in strictly defined colors:
- white;
- yellow;
- green;
- blue;
- red;
- Orange.
Modern toy manufacturers make puzzles of other colors, but the original model had these.
Important! The position of the centers relative to each other never changes, blue will always be opposite green, white will be opposite yellow, and orange will be opposite red.
Ribs and Corners
Not all elements of the Rubik's Cube are named as prescribed by classical stereometry. Of course, the corners also remain angles, and the edges remain the edges. But here the word “rib” is understood not so much as the border between the planes, but as an element located on this border and having two stickers of different colors.
At the corner are three stickers. Colors cannot be separated, rotate - do not rotate. No matter where the white-red-blue corner turns, it will not turn into blue-red-green or yellow-red-orange.
to contents ↑How to rotate?
Assembling a rubik's cube for dummies begins with the definition of algorithms, which has another name - the language of rotations. Each face movement is marked in a certain way.Any action can be written in letters - as well as a decision or sequence of moves. This principle is applied in many games and puzzles.
After all, the cube is also sorted out not just, but through a certain sequence of moves. First, let's decide on the letters. From the first days of the existence of the puzzle, English was used to write algorithms. Nothing prevents us from following this rule now. So, the main positions are indicated by the letters:
- F;
- B;
- L;
- R;
- U;
- D.
Anyone who knows at least a little English will understand everything:
- F is front, that is, the front side.
- B, respectively, back, back.
- L, or left is the left side,
- R, she's right - right.
- The letter U means up, that is, the top.
- D - down or bottom.
There are other notations. The letter W in brackets after the main one means that this or that side comes into effect together with the middle layer. That is, Bw is the back side and those elements that form the “belt”. Sometimes you can meet the opposite designation - first there is a letter-name of the side, then w, and after it - a lowercase letter, also meaning the side. Using this formula, you can immediately understand how many layers to rotate and where they should be.
to contents ↑Other designations
Typically, for the assembly of a cube, the notation of the movement of a face or a face with a middle layer is sufficient. However, there are other movements that are made much less frequently, but also have their own notation:
- M. M stands for middle. It denotes a situation when the middle layer moves between the right and left sides.
- S. If you see the letter S in the diagram, this means that the standing step is applied when the middle layer between the front and back faces comes into play.
- E, or equatorial - the middle layer between the top and bottom.
Reposition the cube
A special part of the language is the designation of interceptions when the cube changes position in space. In the schemes you can find the following notation:
- x - means that the cube rotates away from itself in the plane of the right and left layers when the frontal plane becomes upper;
- x ’- you need to turn to yourself so that the frontal plane is at the bottom;
- y - the cube rotates clockwise, and the frontal plane becomes left;
- y ’- counterclockwise rotation, the frontal plane turns to the right;
- z - the cube rotates rotates clockwise so that the upper plane passes to the right;
- z ’- clockwise rotation, the upper plane becomes left.
Rotation Recording Order
To make it easier to figure out which face to rotate, you need to remember a few rules, in what order the actions are written:
- If you see one letter denoting a face– turn it clockwise.
- If after the letter you see a stroke - turn counterclockwise.
- The number 2 after the letter means that you need to rotate twice, that is, not by 90 °, but by 180.
- When there is also a dash in the combination of letters and numbers 2, it is better to twist the indicated face counterclockwise.
Collect the cube
It is best to keep a description of the language of rotations in front of you. But in general, it costs nothing to remember him. The whole process can be divided into several stages. With each action, complexity increases.
Make a cross
This is the easiest step. You need to collect the right cross on either side. The task can be considered completed if the edges are the same color with the central ones - both on the face from which you start assembling and on adjacent ones. Corner elements on the same face so far can be of any color.
How to do it? Elements can still be put one at a time. It’s best to start with a white plane, but in principle you can start with any other:
- Rotate the cube so that the white center is in front of you.
- Find 4 edges with one white side.
- Select any fragment and place it near the white center - there are several options, depending on where the edge turned out before you started to twist it.
Option 1
The white rib is in the middle layer. The face is rotated by moving R, that is, clockwise, but you can also use the L ’option.
Option 2
If the white edge is in the middle layer, but there is already an element with a white sticker on the future white face (for example, you need to turn white-green, but white-blue is in the space allotted for it). We twist in the vertical plane, that is, we use one of the movements U or U2, and then - turn R or L ’.
Option 3
The rib is in the lower or upper layer. Movements F or F ’come into play to transfer it to the middle layer, and then the familiar movements R or L’.
Adjust the position
It’s easy to assemble the cross, but you need the right one — that is, one that not only has the white elements the same color as the face, but the rest — green with a green center, blue with blue, etc. Sometimes you have to swap edges . To do this, rotate the top layer.
Two options are possible:
- adjacent ribs stood correctly, the other two did not;
- two opposite ribs stood correctly, the other two - in foreign places.
In both cases, similar algorithms are used - RUR’U ’, aka“ puff-puff ”or RU2R’U2.
to contents ↑Collect the first layer
The next step is to make one layer so that all the elements fall into place. Do not be afraid that you will have to destroy what you have already created. All the ribs still stand where they are:
- We are looking for any white corner.
- We are looking for a place in the lower layer where this corner will stand.
- Put a corner over this place.
Option 1
The white side is facing you. Repeat five times the familiar bang-bang algorithm five times
Option 2
The white square is turned to the side. It is enough to do “bang-bang” once.
Option 3
The white box is turned down. “Puff-puff” must be done three times.
Option 4
The white element is turned towards you, but is located below. Four already familiar movements.
Option 5
The desired element is below and turned to the right side - two movements.
to contents ↑Collect the second layer
Having mastered the “bang-bang”, you can already collect almost the entire cube. The second layer is no more difficult to do than the first. You need to find 4 edges and correctly place them in the middle. That is, these are the four edges on which there is no yellow - the yellow elements will be in the layer opposite to white:
- Decide which edge you put first.
- Twist the top face in the movement you already know so that this edge snaps into place. That is, so that its second element coincides in color with the center.
There may be several options:
- two adjacent ribs rose correctly, the other two did not;
- two opposite ribs are in place, the other two must be turned over.
Option 1
If you need to swap two adjacent edges, we use the following algorithm: URU’R’FR’F’R.
Option 2
Opposite edges are swapped in the following order U’L’ULF’LFL ’.
Lower cross
Now you need to collect the cross on the bottom. In this case, it is yellow. We begin to act in the same way as during the assembly of other layers, that is, we find the edges and begin to put them in the right places.
You will need two algorithms - one for each of the possible situations:
- FRUR’U’F ’if you need to swap adjacent edges;
- FURU’R’F ’if we change the opposite.
Adjust the ribs
The ribs of the lower layer behave exactly the same as everyone else. They can immediately fall into place and as it should. But this happens infrequently. Much more often you have to turn them over - either swap two adjacent ones or two opposite ones. Accordingly, the following algorithms are used:
- RUR’URU2R ’;
- RU2R’U’RU’R ’.
With the help of these movements you will cope with any task.
to contents ↑Set the corners
Well, that’s almost it. It remains to put in place the last four elements. This is a matter of technology. To get started - choose the angle that should be in its place first. The algorithm is the most elementary, any of the movements of U. Similarly, put the remaining corners. Use the RU’RURURU’R’U’R2 sequence and everything will fall into place very quickly.
to contents ↑Stock footage
The most important thing is not to be afraid of actions. Many are afraid to rotate the layers, because they do not want to collect what has already been done a second time. But there is nothing special about this. Believe that you can do it, and you really succeed.
- How to choose a vacuum cleaner taking into account the characteristics of the house and coatings?
- What to look for when choosing a water delivery
- How to quickly create comfort at home - tips for housewives
- How to choose the perfect TV - useful tips
- What to look for when choosing blinds
- What should be running shoes?
- What useful things can you buy in a hardware store
- Iphone 11 pro max review
- Than iPhone is better than Android smartphones


