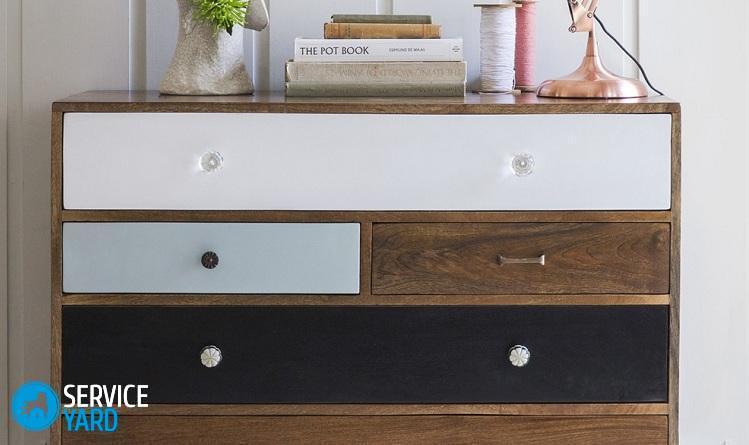
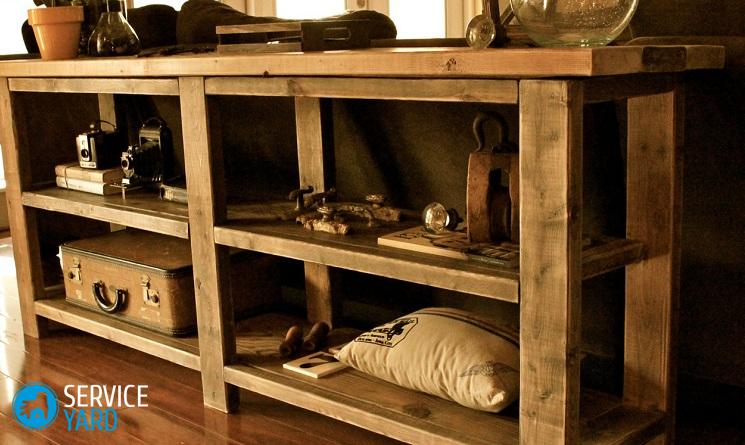
How to make a nightstand with your own hands?

Very often after repair there is a need to purchase a new bedside table. However, you can do without going to the store, where finished products are quite expensive - such a thing can be done with your own hands. Moreover, unlike the purchased furniture, it will be original and correspond exclusively to your preferences. In this article we will talk about how to make a bedside table with your own hands, as a result of which you can save money and gain the necessary skills in working with furniture.
to contents ↑What can be made of?
To make an interesting and original bedside table with your own hands, you can use different, sometimes completely unexpected objects. Let's look at some interesting options:
- From boxes - wooden boxes from fruits, vegetables or postal parcels put on wheels or legs. Fasten the shelf inside. Such a box can be placed both vertically and horizontally. You can also make a nightstand from several drawers by placing them on top of each other.
- From books - a very unusual option for a bedroom or living room. Tighten the stacks of books with straps or band them with tight ribbons. At the same time, place wooden modules, rectangular or square boxes between the stacks.
- From the chest - if you are the owner of an old grandmother's chest, then you can make a wonderful vintage nightstand out of it. And somehow beautifully decorating it, for example, using decoupage technique, you will get a real work of art.
- From suitcases - a bedside table from old suitcases will decorate any interior, as well as provide the room with additional space for storing things. To make a bedside table with your own hands out of suitcases, you can either stack several suitcases on top of each other, or put one on legs, for example, on a table or stool.
- From a barrel - such a bedside table will be very interesting to look in the living room or bedroom. A round wooden barrel is a ready-made cabinet, but it is important to ensure that the barrel is clean and free from any odors.
- From a stepladder - a small step ladder will be a wonderful solution to make a bedside table. You don’t have to do anything extra, but you can paint or age it if you wish.
Wooden nightstand with drawers
To make a wooden nightstand in functional and roomy drawers, you will need the following materials:
- For the frame - 8 pine boards measuring 6.9 by 39.9 cm.
- For the upper, lower and side panels - 4 pine panels with a laminated coating measuring 45.5 by 70 cm.
- For the arrangement of drawers - 4 pine panels with a laminated coating measuring 17 by 43.5 cm.
- Screws 4 and 1.6 cm.
- Joiner's glue.
- Sponge.
- Dowels 1.8 cm long and 2 cm in diameter.
- Stain.
- Acrylic sealant.
- Wooden filler.
In addition to materials, you will also need the following tools:
- Electric drill.
- Face Saw.
- Pencil.
- Roulette.
- Sandpaper.
- Grinding machine.
Step 1. Assembly of the skeleton
We made a wooden nightstand with the help of a Craig conductor. This method makes it possible to assemble any other furniture without visible holes for fasteners. However, you can choose any other way convenient for you to make a bedside table with your own hands.
Important! To begin with, you should draw a drawing of the project, because the scheme of the bedside table you may need at each stage of manufacture.
Operating procedure:
- First of all, armed with a conductor, make holes in all panels and frame supports.
- Next, fasten the side panel and the boards with 4 cm screws.
Important! At this stage, it is necessary to ensure that the support is located on the same line of the product edge.
- Make holes for each drawer. In our case, the height of one is 15 cm.
Important! In order to measure the required height, you should use a pencil and tape measure, mark a point 15 cm below the upper support and 17 cm above the lower panel, given that the cabinet will not stand on the floor, but on the legs.
- Repeat the same procedure for each of the drawers.
- After that, you can continue to add all the necessary supports according to the previously applied markup.
- Cover the resulting structure with a second side panel.
- At this stage, you should check the presence of all the supports, and then screw the side panel with the screws.
- Install the base of the nightstand in the same way.
Step 2. The design of the upper panel:
- Before you make a nightstand with your own hands, you should close it with a wooden panel on top. Here you can turn on the imagination and make a small canopy at the back of the product or above the drawers.
Important! Fasten the top panel using 4-cm screws.
- Now you need to trim the two dowels at a 45-degree angle. The dowels we used were too large in diameter, so we recommend the use of 2-centimeter ones. First of all, you need to cut the back bar, and already starting from it, adjust the size of the protrusions on the sides.
- Glue the processed dowels to the frame using wood glue and wait until it dries completely.
- In order to fill the gaps around the dowels and in places of their contact with the base of the product, it is better to use acrylic sealant.
Now the assembly of the frame can be considered completed.
Important! Also at this stage, you can do the painting of the resulting structure, but we recommend that you do the finishing work at the very end.
Step 3. Installing the rails
Now you need to install the guides for the drawers of your bedside table. To do this, you will need the following:
- 4 sets of guides.
- 4 boards for the back panel with dimensions of 34.3 by 13.5 cm.
- 8 boards for the side panels of drawers measuring 45 by 13.5 cm.
Having prepared everything you need, proceed as follows:
- Make a markup to get started. To do this, use a pencil and a metal ruler.
Important! At this point, mark up all sections for all drawers.
- Now, armed with a screwdriver, fix the guides on the side panel, periodically checking the markings.
- Place a sheet of plywood under the side panels of the drawer, slide them out and install the guides.
- After the guides are fixed on all side walls, make two more connections, after removing the side panels.
- Slide the side walls back into the frame, thereby checking the accuracy of installation and the smooth running of the guides.
Step 4. Joining fragments of boxes and installing facade panels
At this stage, the side panels of the drawers of your bedside table should be completely ready - all that remains is to attach the remaining panels:
- While the drawers are still in the skeleton of the cabinet, the distance between the sides should be measured. In our case, the dimensions of the bedside table are 34.3 cm with a wall thickness of 1.6 cm.
Important! For the manufacture of boxes we used chipboard, however, you can take any other suitable material.
- Sand all the elements of the product well: first with a coarse-grained sandpaper, and then with a finer one.
Important! If you decide to color the fragments of the nightstand, then be careful not to stain the guides.
- To install the front panels, turn over the nightstand and lift the drawers.
- Apply adhesive to the boxes and install the panels. One hour after complete drying, turn the product over and install the plastic components.
Stock footage
As you can see, making a bedside table with your own hands is not at all difficult.Such a piece of furniture can simply be painted, or it can be somehow interestingly designed, for example, using decoupage technique, craquelure, wallpaper or acrylic paints. Imagine and bring to life the most daring ideas!
- How to choose a vacuum cleaner taking into account the characteristics of the house and coatings?
- What to look for when choosing a water delivery
- How to quickly create comfort at home - tips for housewives
- How to choose the perfect TV - useful tips
- What to look for when choosing blinds
- What should be running shoes?
- What useful things can you buy in a hardware store
- Iphone 11 pro max review
- Than iPhone is better than Android smartphones


