How to make a clothes dryer do it yourself?

With the onset of cold weather, the question of drying clothes arises. Especially in small-sized apartments, where with a usable area and so intense. It would be nice to equip an additional place for drying without spreading cobwebs of rope in the kitchen and in the bathroom. The easiest solution in this situation is to purchase a clothes dryer. But quality dryers do not always fit into the family budget. Therefore, we offer you some simple ways how to make a clothes dryer with your own hands. To build such a structure, you do not need to have any special skills, super tools or any expensive materials. First of all, let's see what types of dryers are currently the most popular.
to contents ↑Types of Dryers
Dryers for clothes can be divided into types according to several criteria:
Depending on the location, they are:
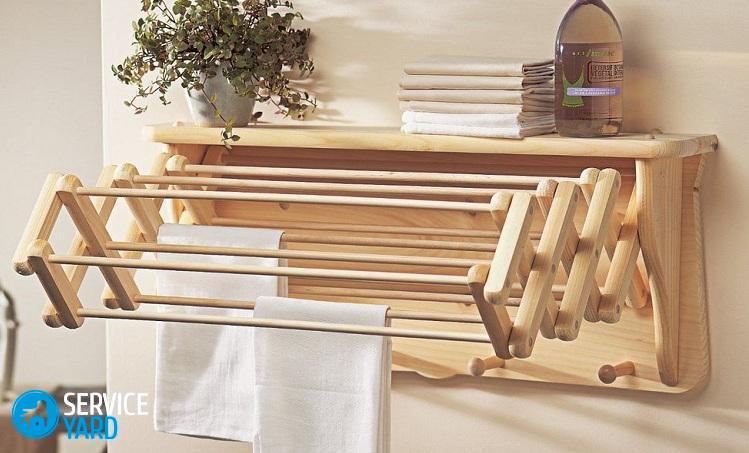
- Wall - are considered the most practical, as they allow you to position the product at any height.
- Ceiling - ideal for placement on the balcony.
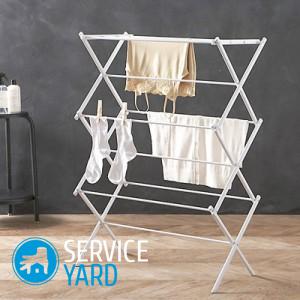
- Floor - used when you need to dry a large amount of linen.
Depending on the fixing method, the following types of dryers are distinguished:
- Stationary - are installed both in the bathroom and on the balcony. There are no unnecessary questions with them, for example, where to put the dryer so that it does not interfere.
- Portable, respectively, can be put in any place convenient for you.
Functionality can be distinguished: folding, retractable and fixed.
to contents ↑Important! You yourself can come up with a system that allows you to unfold or extend the structure when necessary.
DIY wall-mounted dryer
To make a wall-mounted clothes dryer with your own hands, you will need:
- wooden rods and bars;
- MDF or fiberboard;
- loops, lock, transforming mechanism;
- furniture handles, as well as nails, screws and paint.
The procedure is as follows:
- For the frame you need to make 4 parts of the bars, as well as 4 blanks of wooden rods. The side bars must be the same size.
- Drill blind holes in the bars based on the diameter of the rods.
- Point the ends of the rods, insert into the center of the frame. The frame itself is fastened with self-tapping screws.
- A board made of MDF or fiberboard is processed in such a way that its width is equal to the width of the frame, and the length is 15 cm more.
- Connect the board to the grid using the hinges.
- The resulting structure can now be primed and painted.
- Attach a latch on top, and a transforming mechanism on one side.
- On the bottom of the board, make three marks. Drill holes to secure the handles.
- Now it remains only to fix the dryer to the wall.
DIY floor dryer
This dryer is somewhat reminiscent of a table-book. It is quite compact, in the assembled state does not take up much space. To make a floor dryer for your own hands, we need:
- 2 side boards of chipboard or MDF;
- lined with plastic 70 by 20 cm and two boards of size 60 by 20 cm for the top and bottom;
- steel pipes of two sizes - 22 by 2 mm and 18 by 2 mm;
- 12 stainless steel rods for grill;
- 6 steel pipes to support 18 by 2 mm;
- 4 steel pipes 60 cm, 4 pipes 70 cm;
- steel pipe 18 by 2 mm for restrictor ring;
- 4 corners, 4 furniture castors, 4 corners;
- a pair of furniture handles and screws.
The procedure is as follows:
- The boards that form the body of our design must be fixed between themselves. For this we need steel corners and self-tapping screws with countersunk heads. Attach 4 furniture wheels below. This will allow the structure to be easily moved.
- The casing is connected with ties fastened to the top. The nuts must be pressed into the holes of the couplers. They can be fixed by cold welding. This will make the case durable.
- For the outer base, metal pipes with a cross section of 1, 6 cm are used, which we will also need for the hinged support, which will hold the frame.
- For the manufacture of the frame and the body you will need hinges. For this purpose, steel pipes are suitable. The diameter of the pipes for the stand should be equal to 18 mm, and for the lattice - 16 mm.
- For the manufacture of the lattice, stainless steel rods are used, 67 cm long. At the ends of these rods, you need to make a thread, use nuts to connect them to the frame. 6 rods are fixed, the indent from the tubes of the frame must be at least 6 cm.
- Now the design needs to be painted. This will prevent the appearance of rust, because the dryer is constantly in contact with water. First, the surface must be degreased with acetone or solvent, then a primer is applied, and then painted.
Important! Enamel or car paint can be used as paint. Apply at least two layers.
This design can be put anywhere: on the balcony, in the bathroom, kitchen or bedroom, and if necessary - can be folded and removed.
to contents ↑DIY Battery Dryer
Dryers for installing on a heating battery are very popular - they are compact and make it possible to quickly dry clothes in case of urgent need. In order to make a clothes dryer for a battery with your own hands, you will need:
- several pieces of polypropylene pipe;
- four corners;
- three bolts and three nuts.
Operating procedure:
- We cut two pipes of 60 cm and two of 70 cm.
- Using the corners we collect them into a rectangle.
- On one of the long sides you need to drill two holes, insert bolts into them and tighten the nuts.
- In two short sides we make holes for the ropes. A rope can be used as a rope. Just pull it into the holes.
- The emphasis on the battery is made of a pipe and an angle of 45 degrees.
The result is a rectangular clothes dryer that is easy to install on a battery.
to contents ↑DIY ceiling dryer
The simplest solution to the issue of drying clothes is the manufacture and use of ceiling dryers. It is a structure that is mounted on the walls directly under the ceiling. This requires a minimum set of materials and does not steal useful space from the room, which is especially true in small apartments. And the installation does not take much time.
To make a ceiling dryer for clothes with your own hands, you need to perform the following manipulations:
- Take an even number of beautiful hooks on the screws.
- We also need a strong rope or thin cable.
- On opposite walls, almost under the ceiling, make symmetrical marks.
- Drill the walls in the marked areas, insert the hooks into the holes.
- Connect them with ropes that tie securely and pull tightly.
DIY outdoor clothes dryer
Such a dryer is best installed on the balcony. In order to make a do-it-yourself street clothes dryer, you will need:
- two identical cuts of a metal pipe with a diameter of at least 3 cm;
- 4 wooden blocks;
- wooden plank;
- several springs and a rope.
Operating procedure:
- The bars will serve as brackets. They need to be attached to the ends of each pipe blindly.
- Then the structure is fixed at the opposite ends of the balcony.
- We drill holes in one of the pipes, run the ropes through them and bend through the second pipe.
- We attach the free ends to the springs.
- We fix the springs in advance to the bar nailed to the wall.
to contents ↑Important! The design can be decorated with a panel. In this case, make sure that it is removed.
Do-it-yourself dryer for the bathroom
You can make a completely simple mechanism superimposed on the bath. To do this, you will need a wooden beam, with a section of 20 by 20 mm.
How to do the job:
- Fix two pieces parallel to each other at a distance of half a meter - this will be the base.
- Then attach the transverse bars to them, on which the linen will subsequently be laid out.
to contents ↑Important! Calculate the distance between the bars based on the width of your bath.
Stock footage
In this article, we have offered you several options for how to make a clothes dryer with your own hands. Choose a more practical option for yourself, and be sure to use durable, high-quality materials for assembly, then you will be pleased with the result and will no longer be puzzled by where to put mountains of linen after washing.
- How to choose a vacuum cleaner taking into account the characteristics of the house and coatings?
- What to look for when choosing a water delivery
- How to quickly create comfort at home - tips for housewives
- How to choose the perfect TV - useful tips
- What to look for when choosing blinds
- What should be running shoes?
- What useful things can you buy in a hardware store
- Iphone 11 pro max review
- Than iPhone is better than Android smartphones


