How to make shelves in the pantry with your own hands?

Modern developers and designers very often refuse to introduce utility rooms into apartments, but the good old storerooms, despite everything, are also very popular among residents. Most often, these premises store old things or seasonal items, such as skis or sledges. Many tenants store in the pantries a stock of canned food, small construction equipment and sports equipment. Say what you like, and the pantry is a convenient tool for optimizing the living space and storing rarely used things. Today we will tell you how to make shelves in the pantry with your own hands in order to rationally use the space and compactly place many things with good access to them.
to contents ↑Do-it-yourself shelves in the pantry
There is an opinion that it is thanks to the storerooms and loggias that many people try to buy real estate in the secondary market. Although the rooms in the old houses do not differ in large area, in such apartments there are small utility rooms - storage rooms, in which you can remove temporarily unnecessary things from your eyes and store supplies for the winter.
For the rational storage of things in the utility room, there are at least two ways:
- Make a rack in the pantry.
- Attach U-shaped shelves to the walls.
Both that, and another way does not demand special skills and big financial expenses. A wide selection of building materials makes it possible to rationally equip the space of a room on their own, without spending a lot of time and without resorting to the help of professionals. Below we will look at how to make racks in the pantry and shelves according to the required dimensions, for specific things.
Before proceeding with the manufacture of structures for the pantry, it is necessary to carry out preparatory work, purchase the necessary tools and materials, and carry out a detailed layout of the room.
Detailed storage layout and design selection
First of all, decide on the dimensions of the room. Measure the width of the pantry to find out which structure is best to use. In order to make a rack in the pantry with your own hands, you need to have a sufficiently large space. Of course, you can not be puzzled and screw any shelves to the side walls of the utility room. And in this case, the room will be quite comfortable and roomy, but we are not talking about the strength and reliability of this design.
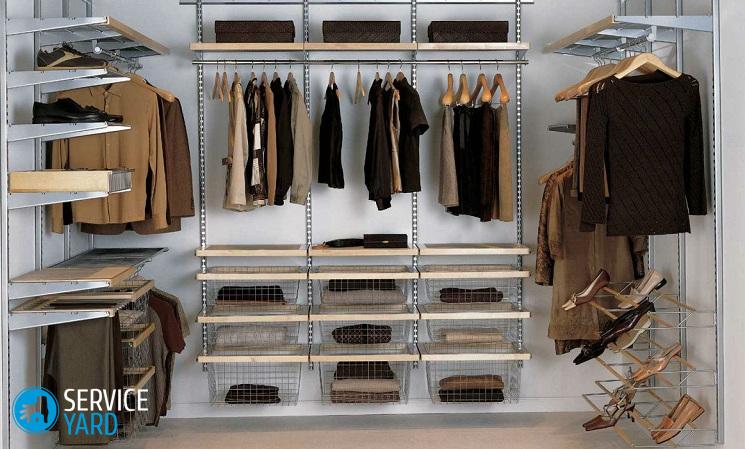
Rack device
Having made the decision to equip the utility room, decide on its purpose. It also depends on which shelves and racks you need to make. Here are just a few recommendations:
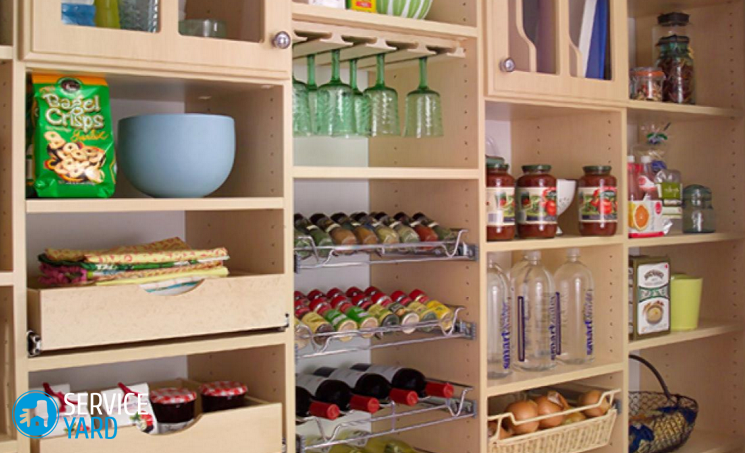
- If you are engaged in home preservation and the room is intended for its storage, then make wide, strong and stable shelves on metal supports, so that the structure can withstand heavy loads.
- If you plan to place books and any collections in the pantry, give preference to hanging shelves with glazing to reliably protect rare items from dust.
- If you plan to store boxes in the room, then make volumetric shelves with sufficient depth.
Important! After you have decided on the number and type of shelving, make a marking on paper with the designation of the width, height and depth of the structure.Be sure to consider the dimensions of the items that will be placed on the shelves in order to choose the appropriate thickness and material of the shelf.

Materials for work
As for the material of the rack structure, this question is for you to decide. Many people prefer drywall or metal and plastic products. When choosing, it is necessary to take into account the specifics of the material, for example, metal and plastic require special processing, so it is better to purchase such products ready-made.
We advise you to pay attention to wood:
- firstly, wooden shelves are durable and durable;
- secondly - working with such material does not take much time and effort;
- thirdly - it is possible to decorate the structure according to your preference, for example, to paint on a tree, to make the design colorful and beautiful.
Important! If you still have dilapidated furniture, then you can disassemble it and use the material to make shelves.
Advice:
- If you do not know what to make shelves in the pantry from, then the most acceptable solution is pressed wood. Remember: the heavier the items, the thicker the shelf should be.
Important! The best option is a thickness of 3 cm. You can make partitions between sections from plywood.
- Do not forget about the fixtures of the structure. Shelves can be attached to the walls using wooden blocks or metal fasteners. The most high-quality fastening of the shelf to the wall occurs with the help of metal brackets.
Important! Remember: the longer the shelves, the more fasteners will be required.
Preparatory work
Before starting the arrangement of the premises, the following work must be carried out:
- Clean the pantry from unnecessary things.
- Perform a general cleaning of the room.
- Perform the necessary cosmetic repairs in the back room. Treat the surface of the walls, ceiling and floor with an antifungal, antibacterial composition. You can tile the floor, and paint the walls in light color.
- Solve the problem with the ventilation of the utility room.
- Spend lighting in the room. It is better to equip the utility room with fluorescent lamps.
Cooking Tools
Before making shelves in the pantry (prefabricated or conventional), we recommend that you arm yourself with the necessary materials and tools. So, for work you will need:
- Edged planed boards 25-30 mm thick.
- Bars measuring 20x30 mm (for stationary shelves).
- Metal pipe for furniture (to strengthen the structure).
- Flanges for mounting.
- Decorative laminated wood of any species. When choosing a material, focus on the style and design of the room.
- Plywood.
- Joiner's glue.
- Hacksaw or jigsaw.
- Plane.
- Sandpaper.
- Building level.
- Roulette, pencil.
- Confirmats.
- Metal brackets.
- Hammer drill.
- "Liquid Nails".
- Metal screws.
- Accessories for lockers (if planned).
- Household tools, suitable for repair.
- Stain (choose color to taste).
to contents ↑Important! Before starting work, mark the proposed shelves on the wall of the pantry.
The sequence of manufacture and installation
Shelves in the pantry can be located as follows:
- At the end of the back room.
- In the form of the letter G. This placement allows the use of wide shelves.
- In the form of the letter P. The width of the shelves should leave a sufficient passage in the middle.
Select the depth of the shelves, depending on their purpose and the area of the room.
Step-by-step algorithm for manufacturing stationary shelves:
- Mark the locations of the shelves on the wall using the building level.
- Cut the bars into segments equal to the depth of the shelf.
- Fix the bars on the end and side walls of the utility room using self-tapping screws.
- Prepare boards for shelves. Cut the boards of the required length, sandpaper and cover with stain.
- Lay the prepared boards on top of the bars.
- Fasten the shelves using wood screws (length 35-40 mm).
Important! To strengthen the structure and protect the shelves from deformation, when placing cargo on them, cut a metal pipe into segments: the first is the height from the floor to the lower shelf, and the second is set between the shelves. Install pipe sections and secure with flanges. Install pipes vertically to ensure maximum stability.
Step-by-step algorithm for manufacturing hinged shelves
For the manufacture and installation of hinged shelves, you will need the same tools, with only one difference - the board can be 1.5-2 cm thick.
Proceed as follows:
- Saw the board into pieces. For one shelf, you need 2 pieces of 80 cm and 2 pieces of 25 cm.
- Slices process with sandpaper.
- Connect all parts at right angles.
- Twist the details with confirmations.
- Cover the back of the products with plywood, cutting them to the size of the shelves.
- Screw the hinges on the back with self-tapping screws.
- Treat the shelves with a stain, after drying, varnish.
- Drill holes in the wall (2 for each shelf) under the anchors (dowels).
- After drying, hang the shelves on the wall.
Advice:
- If the walls in the utility room are drywall, then use special fasteners - butterfly type anchors. Such fasteners can withstand up to 15 kg. If the structure must support more weight, then strengthen it with a supporting frame made of wooden timber.
- Before drilling holes, be sure to check the horizontality of the shelf fasteners using the building level. Mark the necessary places for drilling with a pencil.
- If you want to install two- and three-tier shelves, then for mounting and fixing the structure on the wall, use metal furniture brackets that can withstand a large load and distribute it evenly over the entire surface of the wall.
- Shelves can be made of drywall and fasten them in the guide profile. The profile frame can be made of metal and assembled using nuts and bolts. After the frame is ready, cut the plasterboard shelves with a construction knife and install them in the structure.
to contents ↑Important! If desired, drywall can be pasted over with the wallpaper remaining after the repair, or with a self-adhesive film. Such a design will look very modern and neat.
How to make a rack in the pantry with your own hands?
For the manufacture of floor racks, consisting of many shelves, you will need:
- Bar with a section of 50x50 mm.
- Metal fasteners.
- Hammer drill.
- Self-tapping screws.
- Dowels for fixing.
- Plywood.
- Building level.
- Furniture flanges.
Step-by-step instructions for the manufacture and installation of the structure:
- First, measure the pantry. Make markings for future shelves on one wall. The optimum distance between the shelves is 30 cm. In this case, you can place 3 liter cans or shoe boxes in the rack.
- Using the construction level, draw horizontal lines on all three walls.
- Cut the bar into pieces of the required length. It will be necessary to fix 2 bars to the wall. Bridges are placed between the bars, the number of which depends on the number of shelves. On the opposite wall, it is also necessary to install 2 beams and jumpers. On the ceiling - 2 bars should also be installed.
- Drill holes in the wall with a puncher to attach the beam with a self-tapping screw.
- On the marked lines, attach the bars to the wall for 2-3 screws.
- Cut the boards for the shelves into pieces of the required length using a jigsaw or a hacksaw.
- Grind the slices.
- Process shelves with sandpaper or a plane.
- Paint wood panels with stain and then varnish.
- Lay the shelves on the bars and fix them with wood screws (40 mm).
- Screw the plywood down - this will be the lowest shelf.
- In the ceiling area, fasten 2 beams.
- To prevent the shelves from bending under the load, secure them with a metal pipe and flanges, as is the case with stationary shelves.
- Install LED strip or small overhead spotlights on the rack for convenience.
Helpful hints:
- Place the widest shelves at the bottom, and those that are smaller in size, at the top of the structure. Large items are more convenient to store at the bottom, and small items at the top.
- If preservation is stored in the back room, then the thickness of the boards for the shelves should be 30 mm, and if you plan to store small and not heavy things, then 10 mm thick shelves are enough.
Stock footage
Use the utility room, maximally placing in it suitable for purpose and area of the structure. We hope that our advice and recommendations have helped you determine the method of manufacture and installation. It will be a rack or shelves (stationary or hanging), the main thing is that all the items that you decide to hide away from your eyes are placed in the back room.
- How to choose a vacuum cleaner taking into account the characteristics of the house and coatings?
- What to look for when choosing a water delivery
- How to quickly create comfort at home - tips for housewives
- How to choose the perfect TV - useful tips
- What to look for when choosing blinds
- What should be running shoes?
- What useful things can you buy in a hardware store
- Iphone 11 pro max review
- Than iPhone is better than Android smartphones


