How to make a swan from paper?

If you decide to master with your child a new modular origami technique that allows you to make beautiful voluminous figures out of paper, then the original swan crafts will be very interesting not only to you, but also to your baby. In addition, the swan is a symbol of beauty, purity, fidelity, wisdom, nobility and perfection. These noble birds are often photographed, painted and sculpted. Today we will tell you how to make a swan out of paper. Since any colors and shades of this simple and easy material for creativity are on sale, it will not be difficult to realize any idea.
to contents ↑How to make a swan out of paper? Simple origami
When you were folding a paper airplane in your childhood that cut through the airspace of a room, you did not even imagine that this was an origami technique. A small sheet of paper can come to life in the hands of the master and turn into any figure - a flower, bird, animal.
Today we will tell you how to make a swan out of paper in stages, using one sheet of material, and offer a way to create a beautiful bird from many paper parts.
Important! A swan made of triangular modules will certainly become a wonderful decoration of the house, it can be used as a decorative element for table setting, for decorating a flower arrangement or as a gift.
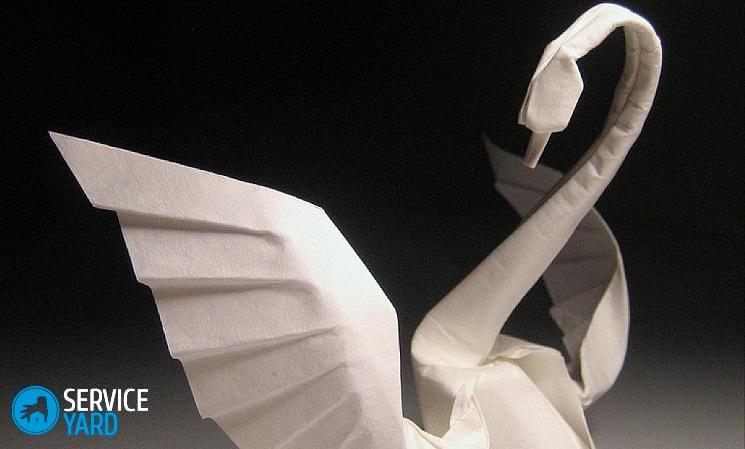
To make a swan out of paper, you need a square sheet of paper and very little time. The process step by step is as follows:
- Fold a square sheet of white paper measuring 10x10 cm (you can take a larger size) diagonally.
- Flatten the sheet (the diagonal line should be visible).
- Wrap the lower edges parallel to the diagonal.
- Turn over the workpiece, do the same manipulations.
- Divide the resulting workpiece in half horizontally, bringing the bottom corner to the top.
- Bend the smaller angle down (at random). This corner will become the head of a swan.
- Bend the figure in half (away from you).
- Lift the bird's neck up, and slightly extend its head forward.
- Spread all folds so that the swan becomes stable.
- Make a small step fold for the beak.
Craft is ready!
to contents ↑Important! If you want to make a whole flock of swans, you can use not only white paper, but also colored paper.
Paper Swan - Modular Origami
Modular origami is a technique that allows you to make voluminous crafts from several sheets of paper. The swan from such modules turns out to be very colorful and beautiful. All parts of the craft are attached manually without the use of glue and paper clips. However, this is a very painstaking and laborious work. Depending on the size of the bird, you have to make a huge number of paper elements, and then fasten them together, guided by a specific pattern. The figure of a swan is performed in layers, so the number of elements in the layer and their color sequence are usually indicated in the scheme.
Manufacturing Modules
A separate module is created from a rectangular sheet of paper, and the finished parts are connected together by nesting each other. To make triangular modules, you need sheets of xerox paper (white). And if you want the figure to be bright and original, then use coated color paper.
Important! Thin paper is not suitable for making a modular swan.
Step-by-step instructions for manufacturing modules:
- Fold a sheet of A4 paper in half in width, then again in half and one more time. Fold lines should be well marked, so slide your finger or ruler over them.
- Unfold and flip the paper so that the fold lines are vertical.
- Fold the sheet in half, now in a completely different direction, and then again in half.
- Expand the workpiece, cut it into bends. You should get 32 small rectangles.
- Take one small rectangle and bend it in half, then across the fold line.
- Expand the workpiece, fold the bottom corners inward towards each other.
- Turn the workpiece over, bend the remaining corners below so that there is a gap between them and the upper triangle.
- Lift the edges up, fold the blank in half to make a triangle.
- Fold the resulting triangle in half. A self-made module will have 2 pockets and 2 corners.
- Repeat for other paper rectangles.
- You should get triangular modules with pockets.
Important! From paper using the origami technique you can create many interesting crafts. Here are some other ideas we offer you:
How to make a swan out of paper? Step-by-step instruction
To fold a volume swan, you need to:
- For a white bird figure: 459 finished modules (1 red for beak and 458 white).
- For multi-colored: 90 orange (for three layers), 136 pink, 39 blue, 78 green, 60 yellow (30 in each layer), 36 blue and 19 purple (for the neck and wing tips).
Important! Each row of a three-dimensional figure consists of 30 elements that are assembled in a chain and closed in a finished ring. Two rows are attached at the same time: first 3 elements are assembled, and then one more module is attached to them from above and from below. The last detail closes the ring. During assembly, the structure must be held by hands.
We will consider the phased creation of a rainbow swan, since a white paper figure is assembled according to the same algorithm, but without color matching.
Step-by-step instruction:
- Position the 3 pink elements so that 2 of them are in front and the third is just below.
- Insert one side of each of the two modules into the pockets of the third.
- Attach the two paper triangles in the same way to the structure. Insert the third pair of triangles into the end modules.
- Repeat the same steps until a circle forms. The ring will consist of an inner and outer row. In the inner row, the parts should be on the short side, in the outer row - on the long.
- Collect the next row (third) in a checkerboard pattern. Use orange parts for a number of parts. Using the same technology, assemble the 4th and 5th row from orange elements (30 rows in each row).
- Click on the structure in the middle, carefully turn it inside out. The form obtained as a result of manipulations should resemble a “stadium” from above.
- Put on top of the resulting design 30 yellow modules.
- Choose the side of the structure where the bird’s head will be located. Remove the two modules (neck), on either side of them, make two rows of 12 yellow modules. It will be the wings of a bird. As a result of the manipulations, the seventh row will consist of 24 modules, divided into two sectors.
- Add each next row of green modules, reducing their number by one part in each sector: 8 row will consist of 22 elements, 9 of 20, 10 of 18. Thus, the wings of the bird will be formed.
- For row 11 and 12 use blue details. The 11th row will consist of 16 parts, and 12th of 14 modules, divided into two sectors.
- Reduce each subsequent row into two elements using blue modules: 13 row - 12 parts, 14 - 10 elements, 15 - 8 pieces.
- The next 16-18 rows form of purple modules. 18 row will consist of 2 parts.After fixing the last purple element, the wings can be considered complete. Give the wings a beautiful concave shape, proceed to the formation of the tail.
- Reducing each row (5 rows: 12 green modules and 3 blue) by one piece, make a tail. It is made like wings.
- Using 32 pieces (along with the red beak), form the neck. Elements should be connected in another way: each subsequent module is inserted into two pockets of the previous one. Attach 7 violet to the red element, and then sequentially: 6 blue, 6 blue, 6 green and 6 yellow. Try to immediately give the neck the desired bend.
- Attach the neck between the wings with two needles.
- Separately, glue the eyes of the original bird and decorate its neck with a bow.
Advice:
- If you want the swan to not have a beak, then glue the corners of the red module in advance.
- To make the bird stand steady, make a stand consisting of two rings. On the first row of the stand, use 40 parts, and on the second - 36. Connect the parts in the same way as the neck. Glue the rings together, and then glue the bright, rainbow and beautiful swan onto the stand.
to contents ↑Important! Paper is a universal material. From it you can craft not only decorative crafts, but also various practical things. For example, we suggest you keep a note of such options:
Stock footage


If you get used to and practice, then modular origami can become a real hobby, because from triangular modules you can make an original gift, decorate the interior by making a vase with flowers or please a child with a new original toy in the form of a hare or a snowman. Imagine and bring creative ideas to life!


