How to glue the ceiling with wallpaper?
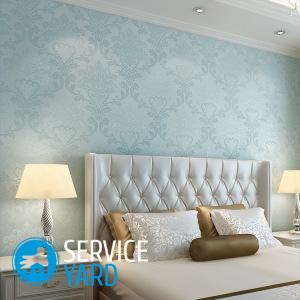
If you decide to update the repair, then perhaps you are wondering how to glue the ceiling with wallpaper. Previously, the ceiling was glued with wallpaper in most apartments, after a while it was considered a relic of the Soviet era. But now, designers again began to use wallpaper as an option for decorating the ceiling. Sometimes the interior requires something more than a boring whitewash, and a stretch ceiling does not fit into the budget. Modern wallpaper will help to make the ceiling interesting. Although it is worth noting right away that, according to the complexity of the work, sticking the ceiling is not the same as sticking the walls. If you are not confident in your abilities, it is better to invite masters, or at least an assistant. It will be difficult to cope with this task most qualitatively. In this article you will find all the necessary information on decorating the ceiling with wallpaper.
to contents ↑Types of wallpaper, their advantages and disadvantages
Wallpapering on the ceiling consists of several stages. Therefore, before you run to the store for rolls, familiarize yourself with what you need to prepare and buy. First, let's decide on the types of wallpaper. There are several of them in the modern market.
Paper wallpaper
This kind is gradually coming out of use, but is still used:
- Paper wallpapers are the cheapest, they are light and breathable. But, having a very thin foundation, they will reveal to the eye all the irregularities and imperfections of the ceiling.
- Such finishing materials are short-lived, can fade in the sun, turn yellow, they can not be washed.
Vinyl wallpapers:
- Relate to the middle price segment.
- They are strong, flexible, not afraid of sunlight, durable, they can be washed.
- But the material is not breathable, and also does not hide the irregularities of the ceiling.
Non-woven wallpaper:
- Such trellises are more expensive, but their quality fully justifies its price.
- Wallpaper has a dense structure, textured, due to this, they can conceal small irregularities in the ceiling.
- Absorbs noise perfectly.
- The material has a long service life, can be painted several times.
Photowall-paper:
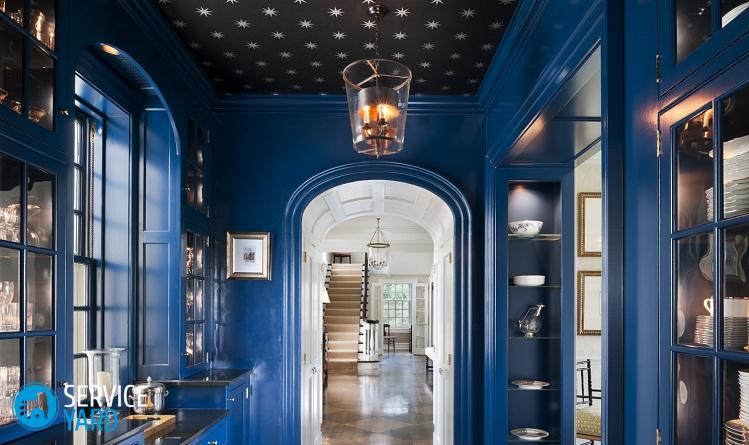
- Not the cheapest pleasure, but with such a finish, the look of the room changes tremendously. The sight of blue in the clouds or starry sky will not leave anyone indifferent.
- Wallpaper can be on a different basis, the characteristics of the finishing material depend on this.
Liquid wallpaper, as well as cullet:
- Probably the most expensive species.
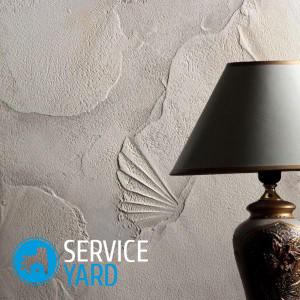
- They are eco-friendly, textured, breathable, have no joints, mask some irregularities in the ceiling, but they are difficult to apply, especially for beginners in the repair business.
to contents ↑Important! Most often, paper (budget option) or non-woven wallpaper (more expensive and high-quality option) is used to decorate the ceiling.
We count and buy the necessary materials
Once you have decided on the type of wallpaper, you can begin to calculate the required number of rolls and glue. Do not forget about the primer.
Primer
Soil is necessary. It improves the adhesion of the surface, and the wallpaper will hold more reliably. The primer must be deep penetrated.
Pre-measure the area of the ceiling and, based on this, buy the necessary amount of soil.
Important! The bank always writes on what area the proposed volume is designed.
Wallpaper
After choosing a wallpaper, look at the width and length of the roll:
- They can be 50 cm by 8-10 m;
- 60 cm at 8-10 m;
- Have a width of 1 meter.
Based on the parameters of the selected wallpaper, calculate the desired number of rolls. Consider the following nuances:
- Wallpaper is glued parallel to the window. Thus, the joints will be almost invisible. This rule is very important when you measure the length of the strip.
- If there is a picture on the wallpaper and you need to pick it up, buy wallpaper with a margin. There may be a lot of waste.
- The tone of the wallpaper must be selected for the general color scheme of the room, they must also be combined with the walls:
- If you have a standard room height - it is advisable to select the ceiling wallpaper in a light tone.
- If you have high ceilings - on the contrary, you can buy dark wallpapers.
Important! Using different shades of ceiling wallpaper, you can zone the room.
Glue:
- Buy wallpaper glue according to the type of wallpaper - for each his own.
- The amount of glue should correspond to the area of the pasted surface.
Important! It is worth considering that for the ceiling glue is bred a little thicker than for walls.
Ceiling baguettes:
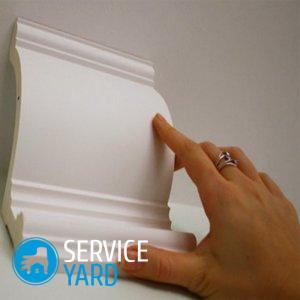
- If necessary - buy ceiling plinths (baguettes). They will decorate the room and hide the flaws.
- To purchase them you need to know the perimeters of the room.
Equipment necessary for gluing the ceiling
Check if you have all the necessary materials and tools. For this kind of work, you may need:
- Step-ladder (goats, table, woods).
- A basin or bucket (for breeding soil, glue).
- Construction mixer (drill with a nozzle or just a stick).
- Roulette, pencil, large ruler.
- Stationery knife.
- Roller with a long or telescopic handle and a fleecy nozzle.
- Rubber roller for rolling wallpaper to remove air bubbles from under the paintings.
- Paint bath.
- Flute brush.
- Plastic spatula (for trimming excess).
- Clean soft rags.
How to glue the ceiling?
The whole process of pasting the ceiling consists of several stages. The following are detailed instructions for action.
Stage 1. Prepare the surface for wallpapering:
- To get started, free the room from all that is unnecessary, which will prevent you from reaching all parts of the ceiling. What can not be taken out, cover with a protective film, rags, newspapers, including windows, doors, cover the floor so that then you do not wash them for hours on the glue and primer.
- Remove the lights from the ceiling and turn off the electricity.
- Now you can start cleaning the ceiling from the old coating: tear off the old wallpaper, rinse off the old glue, soak the whitewash and remove it.
Important! It is convenient to peel off water-based paint with a spatula.
- After cleaning, the ceiling must be perfectly aligned:
- If you have large differences and irregularities, use drywall. He, of course, “steals” the height, but then immediately leveled a large area.
- If the irregularities are small, remove them with the finishing putty.
- After leveling the surface, carefully ground it. And only after the soil has dried, you can proceed directly to wallpapering.
Important! The time for complete drying of the soil is indicated by the manufacturer on the packaging of the goods.
Stage 2. Wallpapering
Getting to this stage, you need to close all windows and doors so that there are no drafts.
Important! Streams of air, especially cold from the street, will cause wet wallpapers to dry unevenly. They can go in bubbles, skew, can lag behind the surface at the edges. It is also not recommended to use fans and heaters in the room.
The room should have a constant temperature, and not only on the day of gluing, but even until the wallpaper completely dries.
Important! The drying time of thick non-woven wallpaper is up to three days.
Procedure for sticking:
- Pre-dilute according to the instructions the glue in the right amount so that there are no lumps.
Important! It is convenient to do this in a deep basin or bucket using a construction mixer, drill.
- When the glue is ready for use, pour part of it into the paint tray.
- First, unwind the first strip on a clean floor, face down.
- After you measure the desired length with a tape measure, add a couple more centimeters in reserve.Mark with a pencil, make a bend and gently iron it with your fingers, and then cut it with a clerical knife along this bend.
- If the wallpaper is with a pattern, then after cutting the first strip, immediately fit the pattern of the second strip to the first, and only then glue it. Similarly, you need to do with subsequent bands.
- Pre-mark on the ceiling for the first strip of wallpaper.
Important! In order to keep the line straight, use the laser level on the building or hammer in 2 nails, pull the strong thread between them tightly, grease it with chalk and twitch it like a string. She, having hit the ceiling, will leave an even strip on it.
- When everything is ready, apply glue:
- For paper wallpapers - glue is applied both on the wallpaper and on the wall.
- For non-woven and vinyl - glue is applied only to the ceiling.
Important! It is convenient to lubricate the ceiling with a wide roller with a nozzle in the form of a fur coat. Hard-to-reach spots should be brushed with a brush. Try not to leave dry areas.
- How to glue the ceiling with wallpaper alone? If you glue alone, roll the strip with an accordion and start gluing from the corner.
Important! To support the strip, you can make a “stick-holder” in the form of the letter T.
- If you glue with a partner, one - glues the wallpaper, and the second - holds the end of the strip and helps to align and remove air bubbles.
- The first strip should be aligned according to the markings especially carefully, otherwise the remaining bands will obliquely lie.
- When the strip is glued, you need to get rid of air bubbles along the entire length. To do this, swipe the wallpaper from the center to the edges with a rubber roller or a soft, clean cloth.
- Press the end of the strip to the corner with a spatula, cut off the excess with a knife.
Important! Excess pieces of paintings can be cut off even after drying - so the wallpaper is cut smoothly, without tears.
- Similarly glue the second and subsequent strips. It is advisable to glue the joint in the joint.
Important! If you glue the overlap, then the seams on the ceiling will be very striking.
- In the center - in the place where the lamp will be placed, make a cross-shaped incision in the strip through which the electric wire will pass.
Important! Regarding this cut, you should not worry, it will be covered with a glass of a chandelier.
- The last bar can add a little difficulty, because it will probably need to be adjusted not only in length, but also in width. When all the strips are glued, glue the ceiling skirting boards. They not only give the ceiling a finished look, but also fix the edges of the wallpaper so that they do not lag behind the surface.
- At the end of the work, let the wallpaper dry thoroughly.
Important! The denser and thicker the canvas, the more time it will take to dry. On average, the process takes from 1 to 3 days.
- While the ceiling dries, do not open the windows, do not open the doors sharply, do not turn on the fan, air conditioning, heater. In general, leave the room alone so as not to spoil your titanic work.
- When the wallpaper is dry, bring in the furniture, remove the films and newspapers, and then lie down on the bed and admire the beautiful ceiling created by your own hands.
Stock footage
The ceiling, decorated with wallpaper, is not a relic of the old and something not fashionable. On the contrary, modern wallpaper canvases look so harmonious at the top of the room and are capable of zoning and transforming the room so vividly that almost all designers return to this idea. Of course, the stretch ceiling performs the same functions and is much more practical than wallpaper, but its price is far from suitable for everyone, and many people want the beauty of the house. In this case, the wallpaper will fit perfectly. Following the instructions and using the useful recommendations from the article, you can independently realize your ideas and ideas in your apartment.


