How to clean your computer?

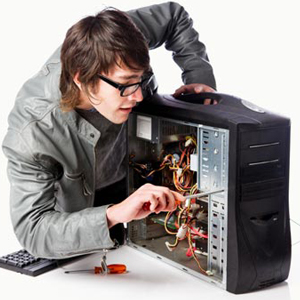
Every computer owner sooner or later asks how to clean the computer, because this technique, like the car, requires regular maintenance. Cleaning the device is, of course, not an urgent task, but very important. Often, users remember about maintenance only when the “iron friend” begins to work unstably, make a noticeable noise, slow down and reboot. This is especially unpleasant and at the wrong time when you play your favorite game or do difficult work. Usually, with the help of various programs, you start to “gut” your computer, look for viruses, clean the registry, optimize the system, delete unnecessary programs, and more. But it was enough just to clean the computer from dust.
to contents ↑Why do I need a computer cleaning?
Computer cleaning is necessary in the same way as regular medical examination of a person in order to prevent a serious illness and get off with only a slight fright. It is better to look inside the device once a year than to carry out major repairs after 1 or 2 years.
 During the operation of the device, dust accumulates almost everywhere:
- settles on hard drives;
- motherboard;
- video card;
- inside the system unit.
Dust envelops loops, radiators and fans, thereby interfering with their cooling. The normal processor temperature varies between 30-60 C, depending on the model, and dust can raise the temperature to 90 C. As a result, the noise emitted by the cooling system increases. And if on one fine hot summer day the temperature rises above the permissible limit, then the computer will start to slow down and turn off, because your processor will not work at full capacity. But this is far from all that threatens untimely cleaning of the computer.
to contents ↑Important! The processor has a protection system, but other components do not have it. For example, the spindle of a hard disk cannot reduce the speed in order to lower the temperature. Therefore, increased temperature is equivalent to increased wear of components, and as a result, the chance will soon increase for a major overhaul of the device. In order not to go to extremes, periodically (1 time per year) open the computer case and clean it of dust.
Cleaning your computer from dust at home
To clean your computer, you will need:
- crosshead screwdriver;
- a vacuum cleaner;
- eraser;
- brush (preferably with soft bristles or a toothbrush);
- rubber gloves (optional);
- a simple pencil;
- accuracy.
We carry out the work in stages. If you act carefully and consistently, you will not have any problems in the process of solving the problem of how to clean your computer.
Stage number 1. Computer disassembly
- Unplug your computer.
- Disconnect accessories from the system unit: printer, external modem, mouse, sound system, etc.
Important! To avoid problems with the reverse connection, mark the wires or take a picture of how everything was originally connected.
- Remove the bolts from the back and remove the side wall of the system unit.
Important! Do not confuse the covers, since if you remove the one on the side of which the motherboard is located, then you will not be able to clean anything. Look at the system unit in front and unscrew the left side of the system unit.
- Be sure to put the bolts in a jar or any other place so that they are not lost.If you have a snap-on housing, skip this step.
- Put the system unit on the right side so that the motherboard is facing you (you can clean the computer while standing, but lying much more convenient).
- Take out the video card (it is usually fastened with a bolt screwed to the back wall and a latch on the motherboard, the connector on the monitor in the form of a trapezoid with rounded corners). First unscrew the bolt and remove the latch.
- Get the sound card, modem, etc., located under the video card, if you have any.
- Disconnect the hard drive and drive. Some recommend removing the hard drives and optical drives, but it’s better not to do this, because you can wipe the dust off with a cloth and clean inaccessible places with a brush.
- Lay out everything that you removed neatly on a hard surface in the order in which you took them out. So it will be more convenient for you to install them back one by one in the reverse order.
Stage number 2. Computer cleaning
 If you are cleaning accessories and the power supply outdoors, use a toothbrush. When blowing air from your lungs, remove dust and other debris with a brush. A vacuum cleaner in this case is not needed.
If you decide to do all the work at home, then the answer to the question whether it is possible to clean the computer with a vacuum cleaner will be “Yes”. Do this by following this sequence:
- Plug in the vacuum cleaner.
- Remove the tube and nozzle to hold only the hose with a handle in your hands (if the vacuum cleaner has special small plastic nozzles, use them).
- In the second hand, take the cooked brush.
- Turn on the vacuum cleaner and thoroughly brush the motherboard and system unit. Keep the vacuum cleaner tube 5 cm away from the place where you are cleaning. All dust raised by the brush will be sucked into the vacuum cleaner.
- Carefully clean the fan from dust and dirt, as the main dust settles there. Keep the vacuum cleaner tube no closer than 5 cm from the protective cover of the cooler. It will start spinning and all dust will be removed from there.
- When cleaning the system boards, be very careful: hold the vacuum cleaner tube very carefully so as not to touch the small components of the motherboard. Do not bring the vacuum cleaner tube too close. The components will not suck in the components, but a slight blow may occur.
- Clean the chips from dust on your computer using the precautions mentioned.
It is necessary not only to clean the cooler on the computer from dust, but also the contacts - these are the parts of the boards that are in contact with the motherboard. To do this, you need a simple pencil and an eraser:
- Pick up the board and carefully draw the contacts on both sides with a simple pencil. Perform the procedure gently and accurately, as if restoring a very expensive engraving of some famous artist. With this procedure, you will get rid of oxide on the contacts.
- Take an eraser and gently and accurately erase the drawing (do not press hard so that there is no rubber on the contacts).
- If the rubber still remains on the contacts, clean it with clean hands.
Stage number 3. Computer assembly
After cleaning, assemble a clean system unit into a single unit. Carry out the same procedures as in stage 1, but in reverse order. Connect all disconnected connectors to the power supply and connectors on the rear panel. Keep your hands clean or gloves on. Turn on the computer by clicking the “Start” button.
Important! If the system does not work, then check all the connections again. Perhaps something is not connected or not fully stuck.
How to clean a cooler in a computer?
A cooler (fan) is a small device that is located inside the system unit. He is responsible for the temperature of the processor, hard drive. There is also such cooling in modern video cards and inside the power supply. If household dust gets inside the fan, it can damage it and cause a lot of noise and malfunction of the entire system. Therefore, cleaning the computer cooler should be carried out regularly, at the same time as lubrication.
If the computer is more than a year old and you have no guarantee, then clean it yourself, as this process is not too complicated. You will need:
- a vacuum cleaner;
- Phillips screwdriver
- brush;
- water;
- alcohol;
- soft, lint-free cloth;
- grease.
 If you want to clean the cooler separately from the system unit, first turn on the computer with the cover open and listen to which of the fans is the noisiest. Most often, the cooler is clogged on the video card. Follow this sequence:
- Turn off the computer.
- Remove the left side panel by unscrewing the screws with a screwdriver.
- Turn the system unit to the right side.
- Wipe all accessible surfaces of the radiator with a soft cloth dampened with alcohol.
- Disconnect the monitor video card and separate it from the motherboard.
- Remove large particles on the cooler with a vacuum cleaner.
- Remove the cooler from the video card to remove fine dust and grease:
- Unscrew the 4 screws on the corners of the frame (since they are tiny, take them with tweezers and unscrew them with a screwdriver or the tip of a knife).
- Disconnect the cooler from the power by bending the latches and pulling out the connector.
- Vacuum the radiator and cooler blades.
- Wipe the items with a cloth dampened in alcohol.
- Wipe the contacts on the video card with alcohol.
- Remove the sticker from the back of the fan, and the cooler axis and bearing will open.
- Place the lubricating oil in the recess and return the sticker to its original place.
- Reassemble all parts in reverse order.
- Clean other fans located in the system unit in the same way, if possible.
Important! It is difficult to remove the fan from the motherboard. This will require thermal grease, so clean without removing the cooler with a vacuum cleaner, brush and cloth. Blowing dust from coolers, make sure that it does not settle on the connectors of the motherboard again. Remove immediately with a damp cloth.
If thermal grease is present, clean the processor fan more thoroughly:
- Process the radiator walls, cooler blades and processor surface with a cloth dampened in alcohol.
- Remove the remnants of the old thermal grease from the radiator.
- Apply a layer of thermal grease to the heat sink and processor.
- Reinstall the accessories.
- Attach the side panel of the system enclosure.
Helpful hints:
Follow some recommendations so that you rarely have to take a vacuum cleaner in your hands, and cleaning your PC from dust does not take much time:
- We recommend putting the system unit against the wall itself. Enough 5 cm from the wall. This is necessary so that ventilation occurs normally and the processor does not allow overheating.
- When wet cleaning the room, be sure to wipe behind the system unit, where a lot of dust is collected. With systematic wet cleaning of the system unit, the accumulation of dust inside it will decrease.
- Clean at least once every 6 months.
- Thin operation to clean laptop coolers is best entrusted to experienced professionals.
Stock footage
We hope that our recommendations and tips will help you clean your computer from obtrusive dust quickly, efficiently and efficiently, and thanks to proper care, your favorite equipment will serve you for many years and never let you down at the most inopportune moment.
- How to choose a vacuum cleaner taking into account the characteristics of the house and coatings?
- What to look for when choosing a water delivery
- How to quickly create comfort at home - tips for housewives
- How to choose the perfect TV - useful tips
- What to look for when choosing blinds
- What should be running shoes?
- What useful things can you buy in a hardware store
- Iphone 11 pro max review
- Than iPhone is better than Android smartphones


