DIY shoes
The leather jacket was seamed, pretty rubbed, and there is no way to put it in order? Do not rush to part with it. It is possible that some of its fragments will still serve you for more than one year - in the form of a handbag, wallet, jewelry, or even sandals. Do you think that do-it-yourself shoes are troublesome and time-consuming? Not so scary. With simple models you are sure to cope. Or maybe you will have an interesting design idea that can conquer the world? About what shoes can be sewn, if there is not enough experience, we will tell in the article.
to contents ↑What is the skin like?
Before making shoes, it’s very useful to figure out what material you may encounter. There are several types of skin. Its quality is influenced by so many circumstances. For example, according to the age of the animal, the following types are distinguished:
- residue;
- intoxication;
- outgrowth;
- puke;
- half cutter;
- skin full weight.
Important! The residue is the skin of an animal in the womb. The skin of a newborn lamb or calf is called the litter box, three months old, and the one fed with plant food is a sprout. Neblyuy is the skin of a six-month-old animal; Finally, a full-weight hide is made from the skin of an adult cattle.
Quality of manufacture
As you know, leather shoes and clothes are made from the skins of various animals - goats, cows, sheep, buffalos. You may come across such names:
- morocco;
- marko;
- shagreen;
- parchment;
- yuft.
Important! Morocco, marquee and shagreen leather are made from goatskin, with a low fat content. However, shagreen leather is also sheep. Calfskin is parchment; in ancient times, it was not only sewn clothes and shoes with it, but also made books that have survived to our time. It is now used in bookbinding.
Yuft is made from horse, pig or deer skin with a good fat content. This material is tanned by willow bark. It happens in different thicknesses. For thick yuft you can do, for example, engraving.
Differences in type of raw materials and manufacturing method
In the leather industry, different processing methods are used. Sometimes different grades are obtained from the same skins, depending on the technology. These are the following types:
- Like
- Chevro
- Chevret
- goat
- velours;
- suede;
- split
Here is what sets them apart:
- Laika is a very thin material. They make it from the skin of animals that have not yet been born or from the litter.
- Goat skins go to the goat and chevro, but the chevret, despite the similarity of the names, is obtained from sheep's skins.
- Chrome is used for velor tanning. The upper side is polished.
- To obtain suede, fat tanning is used. To make suede, take elk or deer skins, but maybe the skin of a wild goat. Very high quality material, soft and light, but capable of stretching greatly.
- If you separate the layer from suede, you get a split.
What skin is what for?
Before stitching shoes, you need to choose the right material:
- For the manufacture of gloves, a like is usually used, since it is extremely elastic and perfectly conveys all the bends.
- Everything is suitable for jewelry, yuft or morocco is suitable for bags, but for shoes?
One kind of skin you are unlikely to be satisfied.The sole should be resistant to abrasion, so the material for it should be chosen thicker and harder. For example, yuft. And what to make the best of? The best material is morocco, but a lot depends on what exactly you are going to sew.
to contents ↑Important! In ancient times, both men and women wore morocco boots, this material is beautiful and durable. Yuft was also used for men's boots, especially if a person had to walk on rough roads in any weather. But for elegant female legs, for example, suede is suitable.
Instruments
Perplexed with how to sew shoes yourself, think about tools. Leather shoes or boots will have to be made manually - it is unlikely that you have a machine at home that can work with similar materials. Although the old household machines “Singer” or “Podolsk” perfectly stitched even the toughest skin. But in any case, part of the work remains to be done without a typewriter.
It will take tools and accessories to sew shoes with their own hands. At home you can find:
- screwdrivers of different sizes;
- nails
- pliers;
- metal tubes;
- elements of a children's metal constructor.
The most important thing is knives, especially if you are not going to be limited to one product. They will need a few:
- crooked;
- several direct;
- shoe knife with one-sided sharpening, without a handle;
- knife with a crescent-shaped blade.
Important! All are designed for different lines. For example:
- Straight knives make straight cuts, as well as blanks for belts, laces.
- A curved knife allows you to make curved lines, a boot knife allows you to cut thick skin, and it is convenient to grind with a crescent knife.
In addition, scissors will be needed:
- tailor's;
- profiled;
- "zigzag".
Important! Profiled scissors for working with leather are more convenient than conventional tailors, as they have small cloves that allow you to make a very accurate and accurate cut.
Awl, whetstone, sandpaper
In addition to knives and scissors, you need other accessories and tools to sew shoes with your own hands:
- wooden blocks;
- sandpaper with different grains;
- bone;
- round awl;
- cross awl;
- round awl;
- compass;
- metal ruler;
- scalpel;
- tweezers;
- metal hammer;
- wooden hammer;
- metal ruler;
- ball pen.
All the instruments are pretty ordinary, except for the bone - you have to do it yourself. It is not difficult, it is a small polished block. In addition, you will need punches - these are specific tools for punching holes, they can be of different diameters. A useful thing - gear knurling. They can be bought in the store for goods for artists or for needlework.
Important! Make sure that you have a manicure set on hand - almost everything that is there is useful.
Glues
Part of the parts you fasten with seams. But for shoes with your own hands you need a good glue. Several fit:
- "Moment";
- "Mars";
- “Unique”;
- Plantar.
Other means
To make the shoes look like brand new with your own hands, take care of dyes and care products in advance - creams, castor oil, as well as dyes. In addition, it is useful to prepare the bark of some trees, which can be both dyes and tanning agents.
Important! Such trifles as ordinary household bleach and tooth powder are also useful.
Cooking threads
Experienced shoemakers making custom-made shoes sew the details together. Prepare her like that.
- Cotton threads are folded in four strands.
- Rubbed with var.
- Wax.
to contents ↑Important! Dratwa-stitched shoes are stronger and less susceptible to adverse climatic influences. You can use nylon threads, but they can cut through thin skin.
Take measurements
How to make shoes, shoes or just slippers so that they fit and do not rub anywhere? First you need to take measurements, for which you will need the most ordinary centimeter tape:
- Measure the widest part of the foot - for this you need to wrap a centimeter around the base of the fingers, so that it does not twist.
- Measure your foot circumference where the highest lifting point is.
- Determine the height of the lift by wrapping a centimeter from the highest point through the heel.
- Find and measure the bottleneck.
- Measure the length of the foot (you can stand on a sheet of cardboard or paper and circle the foot - only the handle should stand strictly upright).
- Determine the width of the foot (you can follow the track in the widest part).
- Calculate the distance from your fingers to the lift.
- Measure the protrusion of the heel.
- Determine the maximum heel height.
to contents ↑Important! If you are going to sew shoes with your own hands in the future, it is best to make a wooden block on your foot - you need to carefully plan and sand the board, and cut the line according to your standards.
Slippers
If you want to sew home-made shoes with your own hands, the master class will not take much time. To begin with, it is better to try to make slippers without soles. You don’t need to stitch anything - the top is formed thanks to the folds. To do this, you need a whole piece of leather, quite soft, but strong. The pattern for this model is also not needed:
- Spread the skin upside down.
- Put your foot and circle your foot.
- Divide the contour into approximately equal segments.
- From each point, draw a perpendicular towards the edges of the piece.
- Lay on each line segments of equal lengths - from 7 to 12 cm.
- Connect the marks with a smooth line - you have a double foot.
- Cut the workpiece along the outer contour.
- From the back, make a cut from the most prominent heel point to the top edge.
- Try on what you have and fold it up.
- If there are a lot of folds, make wedge-shaped cuts and sew the edges.
- Connect the back with a strap.
- Braid the free edge.
- At a distance of 0.5 cm from the upper cut, punch holes and pass a leather cord through them.
- Separately cut the insole - it is better to glue or stitch it.
Important! Folds should be located no more than 1-1.5 cm apart.
So simple enough you were able to sew shoes with your own hands.
to contents ↑Sole slippers
From what and how to make a sole for shoes with your own hands? From even thick skin. The option is simple - you can cut it on the patterns, you can draw an insole directly on the skin. As for the top, it is better for him to choose soft skin, but you can use other materials - cloth or any other dense fabric:
- Cut out the sole.
- From the skin or dense fabric, cut out the top.
- Sew manually the top to the sole.
In this case, the question inevitably arises: how can one find the upper hand? It is a trapezoid. It needs measurements:
- girth of the foot at the level of rise;
- girth of fingers;
- distance from the highest lifting point to the base of the fingers.
Now consider how to sew shoes with your own hands step by step:
- Draw a straight line - this will be the top cut.
- Put your girth on it.
- Divide the line in half.
- Draw a perpendicular to the middle.
- Set aside the distance from the lift to the base of the fingers.
- Draw a line parallel to the first through this point.
- Put on it the girth of the foot at the level of the lift.
- After that, you just have to assemble the product - sew the top to the sole.
- You can lay a braid along the stitching line.
These slippers-pantolets are excellent summer shoes with your own hands, you can already conduct a master class yourself.
to contents ↑Important! The top can be cut out and simply in the form of a strip, trying it already on the leg, and then cutting off the excess.
Closed Toe Slippers
Sew almost the same as the previous ones. If you don’t really want to build a pattern yourself, sprinkle some old slippers of a similar style and circle the top over them. They can be with a seam in the middle or without it.
The sequence of work will be the same as in the previous case. True, you can decorate a product in a variety of ways - from application to embossing.
to contents ↑DIY sneakers
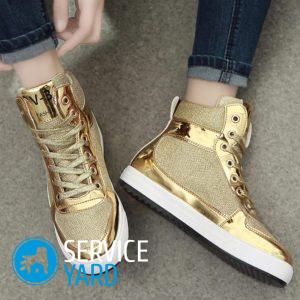
Sneakers are more sophisticated shoes. But there is nothing impossible to do it yourself. Lightweight sneakers consist of 8 parts:
- soles;
- insoles
- 2 symmetrical sidewalls;
- 2 front parts;
- 2 reeds.
The sole and insole are made in the same way as for any other shoe. You only need a small heel - for sneakers it is glued inside, for shoes - outside. The heel is cut on the sole, and its edge is ground. Cut out the tongue approximately, and then adjust it to the desired size - this can be done already after everything else is ready.
Important! Along the edge of the sole make an allowance of 0.5 cm.
Top part
In order to make a pattern of the upper part and sew such shoes with your own hands, you need measurements:
- lifting height;
- distance from the highest part of the lift to the end of the thumb:
- distance from the sole to the highest portion of the lift on the outside of the foot;
- distance from the sole to the highest lifting point on the inside of the foot.
Important! The upper part can also be composite, then the pattern must be cut into several parts and cut out individual elements, and then sew them together.
Drawing a pattern
To build a pattern of the outer part, draw a straight line - this will be the front seam:
- Set aside the distance from the highest point of lifting to the end of the thumb on this line and put point A.
- Draw a perpendicular to the opposite end of the midline.
- Set aside half the height of the lift.
- Connect this point to point A with an arc, the convex part of which is directed from the middle seam.
- Similarly, cut out the second part of the front, using appropriate measurements.
- Mark on the sole the alignment points on the outer and inner sides of the foot - they are located where the forefoots begin and end.
Sidewalls
The sides are the same and are strips. The length of each is equal to the distance from the alignment point to the middle of the heel, the width is 7-8 cm. Perhaps, when fitting, you will need those sections that will be sewn to the front parts, aligned diagonally.
Important! If you want to sew the warmed shoes with your own hands, you can glue the leather parts, for example, with fleece. On the bottom you need to leave an allowance.
Assembly
To make shoes with your own hands, first punch holes on the front parts for lacing. They should be located strictly opposite each other and end with centimeters 5-6 before the toe:
- Sew the front seam.
- Sew the sidewalls together.
- You can strengthen the heel with a soft pad - it is made in the form of an oval or rhombus.
- Sew the sidewalls to the front parts.
- Sew the top to the sole by connecting the alignment points.
- Level the allowances.
- Trim and sew the tongue 1-2 cm below the lacing.
to contents ↑Important! Sneakers will look good even without decoration, but there is nothing stopping the application from sticking and even attaching luminous elements.
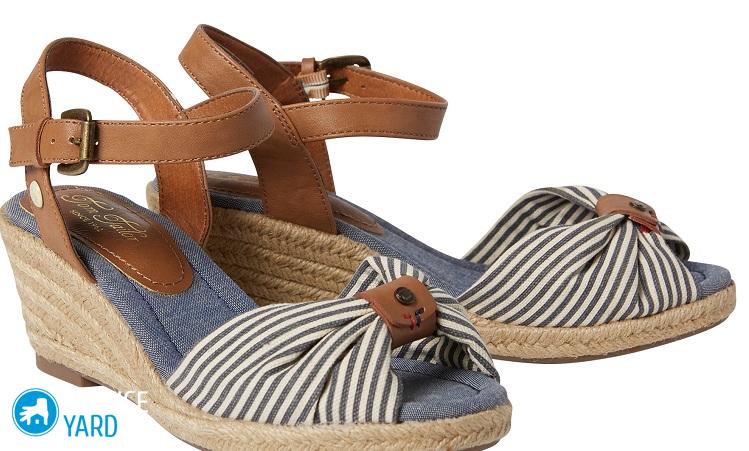
Sandals
Summer leather shoes should be with a heel. Cut it according to the pattern of the sole, circling only the back, and glue it well:
- Cut a long paper strip.
- Wrap it around your leg and see which arrangement of straps you like best.
- Identify the places where the straps will be attached to the sole.
- Make holes in the appropriate places.
- Cut the right amount of straps.
- Glue their ends into the holes.
- Try on the model on the leg and lay the straps in patterns, one of them should wrap around the ankle, while attaching to the rest.
- Sew a buckle to the strap that goes around the ankle and make holes at the other end.
to contents ↑Important! Sandals do not have to be made of leather - for this, for example, a wide elastic band is suitable. In this case, you can do without a fastener.
Stock footage
Now handmade products are in great fashion. This applies not only to clothes and jewelry, but also to shoes. The simplest models are available even to a not very experienced person.It’s better to start with simple but effective models, and then move on to more complex ones that require additional tools and good skin skills.
- How to choose a vacuum cleaner taking into account the characteristics of the house and coatings?
- What to look for when choosing a water delivery
- How to quickly create comfort at home - tips for housewives
- How to choose the perfect TV - useful tips
- What to look for when choosing blinds
- What should be running shoes?
- What useful things can you buy in a hardware store
- Iphone 11 pro max review
- Than iPhone is better than Android smartphones


