How to sew a leather skirt?

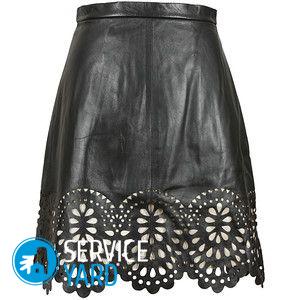
For many years, leather skirts are in great demand and are the most favorite thing in the wardrobe of many fashionistas. They come in a variety of styles, colors and are suitable for any look. It does not matter who you are - a romantic coquette or a business lady, such a skirt is guaranteed to suit you. Such clothes go well with blouses, shirts, t-shirts and even T-shirts. In terms of shoes, there are also no restrictions - these can be classic boats, sneakers, boots or charming shoes. Today you will learn how to sew a leather skirt on your own.
to contents ↑Sewing a leather pencil skirt
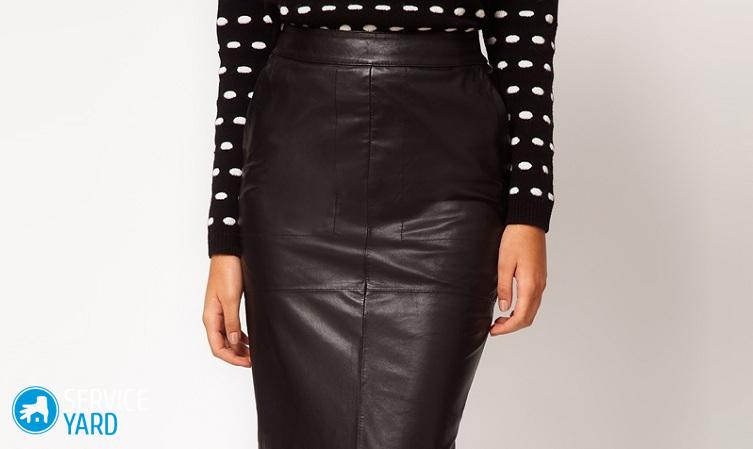
A pencil skirt is considered the most elegant style, because all women in such clothes look simply unsurpassed, regardless of age.
Important! High-waisted models look incredibly stylish, so you don’t need to invent anything to complement them. Here you can confine yourself to the usual plain blouse or shirt. This is ideal for office style. In such a skirt will not be ashamed to also go on a date.
To sew a leather skirt, prepare everything you need:
- Sewing machine.
- 50 cm of skin.
- 50 cm of lining material.
- 70 cm wide elastic.
- Secret lightning.
- Scissors.
- Needles for the skin.
- Chalk.
We will build a pattern on the basis of such sizes: waist circumference 67 cm, hip circumference 92 cm, product length 45 cm, after all, many women have these parameters. If you wish, you can adjust them a little.
Perform the work according to this instruction:
- Under the scheme, cut out all the necessary details from leather and lining fabric. To do this, first pin the fabric to the paper pattern, circle with chalk, cut along the lines, leaving allowances of 1-1.5 cm.
- Sweep all the elements together - separately the main fabric, separately the lining.
- Sew with a sewing machine. Do not stitch only the middle seam along the back of the product.
- Carefully iron out all seam allowances through a cotton cloth or tap it with a hammer, spreading seams in opposite directions.
- Sweep the bottom of the skirt and lining, then grind.
- Sew a hidden zipper into the middle seam of the product.
- Then sweep and stitch this seam, combining the cuts below the fastener.
- Start sewing from the top of the lining, backing off the distance corresponding to the length of the zipper, since it is at the lower cut that the skirt connects to the lining.
- Stitch a belt made of decorative elastic.
- Sew all finished parts on a typewriter.
Making a leather skirt-sun
Such a skirt looks quite spectacular, which is why the top for it should be chosen more carefully so that in general the outfit does not look too defiant.
Important! The real taboo for the “sun” style is a deep neckline, leopard coloring, blouses in sequins. Accessories should also be concise, neutral, strict.
Before you sew a leatherette skirt with your own hands, check if you have everything that can come in handy in your work:
- Sewing machine.
- 1.5 m of leather or leatherette.
- Secret lightning.
- Scissors.
- Threads.
- Needles for working with leather.
- A piece of soap.
Sew the sun skirt according to the pattern:
- First, make a drawing of the product itself and the belt, so that later it is easier to calculate the material. The skirt will be sewn from two main parts, plus a sash. Calculate the radius of the waist circumference as follows: divide the waist circumference by the number of PI times two. Increase the build around the waist.
- Cut the fabric.
- Gather the skirt slightly, evenly distributing the formed folds along the waist.
- Sew one edge of the belt to the waistline.
- Sew a zipper.
- Stitch the second edge of the belt.
- Hem the hem of the product.
Remaking an old leather skirt
In principle, a chic leatherette skirt with your own hands can even turn out from an old skirt, which for some reason lies idle in the closet. For example, you have recovered, and it does not converge on you, because this happens quite often.
Prepare for work:
- Old skirt.
- Rubber mallet for tapping seams.
- A needle for the skin.
- Lace braid.
- Glue for working with skin.
- Lining fabric.
Restore an old product using this technique:
- Unlock from your old skirt with eight wedges on a lining that does not converge on you at the waist, lining and belt.
- Measure the volume of your waist, then the skirt belt. Grind the resulting difference, divide by the number of seams, because it is in them that lace will be inserted. In our case, we will insert lace into 7 seams, which is why the resulting figure must be divided by 7, since the seam with a zipper will remain intact. Remember this number, the insert width will correspond to it - in our case it is 1.5 cm.
- Spread the skirt on the wedges sequentially, that is, one at a time, as the lace is sewn into them, so that the wedges are not mixed up. Measure the length of each wedge. Measure the lace of the required length. Sew lace on one side of the wedge, guided by the drawing, the main thing is to get into the old seam. Sew lace to the other wedge in the same way. Lay the skirt on a hard surface in one layer. Beat all seams with a mallet to make them flat. Postpone the seams evenly and gently.
- Now make a new lining. Fold the lining in half, and the skirt four times, attach it to the fold of the lining, circle the side and top sections. Lay down the length of the lining down from the upper cut, it is important that it is 2-3 cm shorter than the product, add an allowance for the hem. Add 1.5 cm to the sideline for the seam allowance. Cut the part to get a lining for the front. Cut out the backrest lining in the same way, only there will be a back seam on it.
- Work overlock or zigzag side seams, grind. On the middle seam on the back, grind the lining 2 cm to the mark just below the beginning of the zipper. Separate the edges of each part separately so that you can normally iron the seam allowances. Stitch the smoothed allowances at the location of the zipper, backing 5 mm from the edge. Bottom double hem with closed cut.
- Align the center of the front of the lining with the center of the front of the product. Sew the lining backing 5 mm from the edge.
- Cut out a new belt of the necessary length from leather of suitable color and texture. That is, add 3 cm to the waist, and another 2 cm to the seam allowances. Stitch the belt details. Coat the allowances with glue, smooth them in different directions, press and beat with a mallet. Glue the corsage tape inside the belt so that it does not stretch. Or wash the lace on top. Align the middle of the belt with the middle of the front of the skirt, grind them along the edge.
- Glue seam allowances. Spread, beat off with a mallet. Obliquely cut the corner of the seam allowance, then bend all the allowances in a short cut inward, beat off with a mallet. Glue the center of the belt with adhesive, being careful not to touch the allowances. Bend the belt along the fold line, align it, beat it off so that everything turns out beautifully and evenly. Sew the entire belt along the contour.
- Align the bottom of the product, glue the hem with glue, and beat it off with the same mallet.
In this way, you can breathe new life into an old, seemingly completely unfit to wear thing.
to contents ↑Leather skirt from an old cloak
Perhaps at your place there is some other old thing made of leather, for example, a raincoat, so do not rush to say goodbye to it. Now you will learn how to sew a faux leather skirt using the pieces of leather that we get after dismantling the old cloak.
Important! The model is better to choose a straight line.
Prepare for work:
- Old raincoat made of leather or leatherette.
- Ready patterns.
- Transparent glue.
- Sewing machine.
- Threads.
- Scissors.
- Chalk.
- Special needles.
- Secret lightning.
The following must be done to turn the old cloak into a stylish skirt:
- Spread the cloak, then remove the lining.
- Cut out all the details on paper patterns.
- Sew them on the darts.
- Sew along the side seams. Glue stocks, iron.
- Sew a zipper.
- Cut a belt around the waist.
- Sew on a belt.
- Process the hem of the product on a typewriter, having previously glued it.
Stock footage
Now you know how to sew a pencil skirt out of leather, a “sun” model and have familiarized yourself with several more interesting options for self-production of stylish and fashionable leather things. The main thing is to strictly follow the instructions, and everything will work out!
- How to choose a vacuum cleaner taking into account the characteristics of the house and coatings?
- What to look for when choosing a water delivery
- How to quickly create comfort at home - tips for housewives
- How to choose the perfect TV - useful tips
- What to look for when choosing blinds
- What should be running shoes?
- What useful things can you buy in a hardware store
- Iphone 11 pro max review
- Than iPhone is better than Android smartphones


