How to make a coat pattern with a one-piece sleeve?

The idea of stitching a coat appeals to many beginner needlewomen. But more often than not, a dream remains a dream - it scares the laboriousness of the process, as well as the complexity of the pattern. With classic models, this is exactly the case, sewing outerwear is aerobatics, requiring very good training. However, modern fashion is extremely democratic, and clothing designers offer a lot of styles, which even those who have just started to master a sewing machine can do. You will learn about how to make a coat pattern with a one-piece sleeve, as well as the technology for making such clothes, from the article.
to contents ↑Simple but beautiful styles
To build a classic coat pattern with tucks and a set-in sleeve is not an easy task, but even in this case, you can find simple and effective solutions:
- find a pattern in a magazine or on the Internet;
- order her at the studio;
- make patterns on an old robe.
But there are models that can be sewn without a pattern or with extremely simple patterns. These, for example, are such styles:
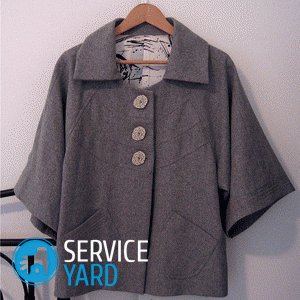
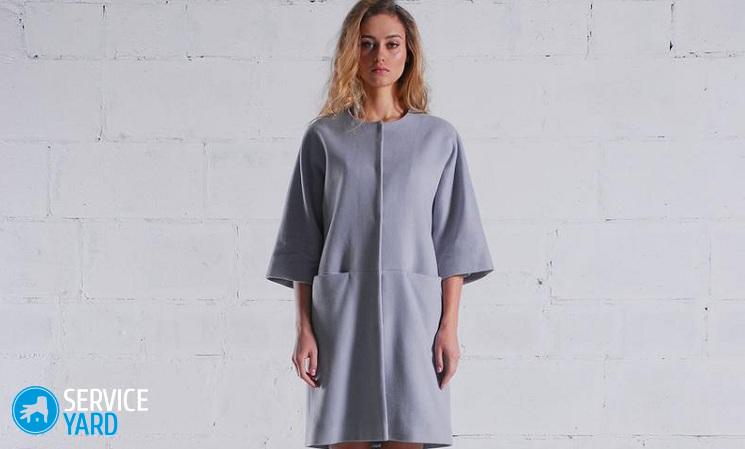
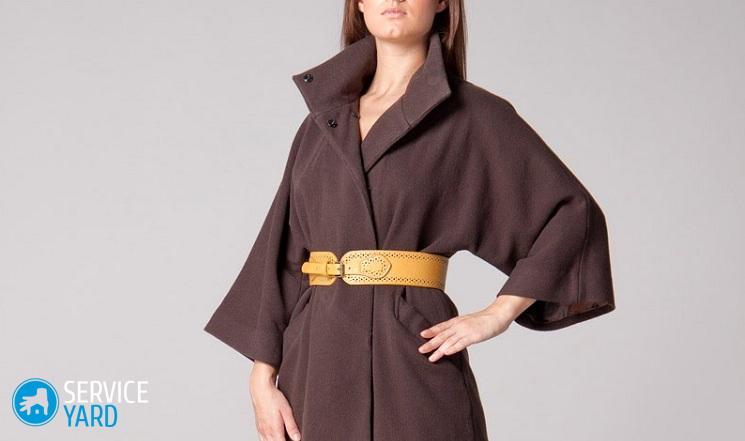
- coat with one-piece sleeve;
- cape coat;
- poncho coat;
- coat coat.
All three options can be cut directly onto the fabric. If you are not very confident in your abilities and your hands are trembling for now from an excessive sense of responsibility, it is better to make templates out of paper. Fit:
- graph paper;
- old wallpaper;
- whatman.
to contents ↑Important! The advantage of such models is also that it is not scary to make a mistake in size. All of them have a free cut, so that on the same pattern you can sew the product in 44, and 48, and 52 sizes. The main thing is that the fabric is wide enough.
Fabrics
If your future coat has a one-piece sleeve, do-it-yourself sewing starts with the choice of material. As, however, in any other case. But there is one subtlety: if you do not want to mess with the lining, choose a double-sided coat. As a rule, it has a large width, and even does not crumble. This greatly simplifies the process, because the most difficult thing in sewing a classic coat is the competent processing of details.
Important! The use of double-sided fabrics has another advantage - nothing prevents to sew a coat that can be worn on either side. So your wardrobe will actually replenish not with one, but with two stylish products.
This is not so true for styles with one-piece sleeve, because you have to come up with unusual options for processing sleeves and fasteners. But for a cape or poncho, this option will be very good.
to contents ↑Take measurements
To sew a coat with a one-piece sleeve with your own hands, you will need some measurements. As with any other garment, they are removed with the most common tailor's centimeter.
You need to measure:
- product length;
- neck circumference;
- chest girth;
- hip girth;
- shoulder length;
- sleeve length.
Length of the product
In this case, it is better to work with an assistant, because it is more convenient to measure the length of the future coat from the cervical vertebra to the bottom, that is, along the back. Ask the assistant to attach a zero mark to the cervical vertebra. The tape should be lowered vertically.
Important! The length can be any, but the floor models are not very comfortable, it is better to make the coat shorter - to the middle of the calf, to the knee or even a little higher. It all depends on what you are going to wear it with.
Neck circumference and shoulder length
Neck circumference is measured in the same way as for any other product:
- Attach a zero mark to the hollow at the base of the neck.
- Circle the tape around the neck.
- The endpoint must match the zero.
To build a pattern, you will need not the neck circumference itself, but its radius. Therefore, divide the resulting measure by 6.28. The shoulder length is measured from the base of the neck to the extreme point of the shoulder.
Important! Make sure that the centimeter does not twist.
Chest and hips
For this model, these measurements do not have to be very accurate, as for the classic. They are needed to choose the right width of the fabric. But if you intend to continue sewing in the future, it is better to remove them immediately correctly. The hips are removed at the most prominent points - the pelvic bones and buttocks.
Chest girth is measured at the most prominent points:
- Attach a zero mark to the armpit.
- Pass a centimeter tape on the most convex parts of the mammary glands and shoulder blades.
- Finish the circle at the same point where you started.
Important! The centimeter tape should be located strictly horizontally.
The length of the sleeve
For a loose coat model, this is a very important measure. Shooting it is also better with an assistant:
- Stand up straight.
- Bend your arm slightly at the elbow.
- Ask the assistant to attach a zero centimeter mark to the extreme point of the shoulder.
- Ask to put a tape measure all over your hand to your wrist.
The sleeve width in this model is taken arbitrarily.
to contents ↑Important! The tape should not be too tight.
We are building a pattern
You can sew a coat with a one-piece sleeve without a pattern, but you need to have a good idea of how it will look. Therefore, a pattern is still better to build. The pattern is a scan of the product, so the sheet should be large:
- Spread the sheet on the floor.
- Around the middle, draw a horizontal line over the entire width.
- Divide the line in half and mark.
- Draw a circle from this point whose radius is equal to the circumference of the neck divided by 6.28.
- From the points of intersection of the line with the circle, lay on both sides first the length of the shoulder, and then the length of the sleeve.
- From the first mark, draw a vertical line in both directions and set aside the length of the product.
- Draw perpendiculars to the ends of these vertical lines over the entire width of the sheet.
- Set the sleeve width on both sides from the end points of the sleeves.
- Connect these points - the lines should run parallel to the first.
- On both lines from the vertical intersection, set aside the hip circumference divided by 4 in both directions.
- Connect these points with the lines of the sleeves.
- The base is ready - it remains to cut it along the lines that you applied last, and the bottom of the sleeves.
- You need to make a fastener in front, respectively - we make a cut from the bottom to the neck.
Modeling the neck
If you look at any blouse, then make sure that the front neckline is slightly larger than the back. The same can be done on the coat:
- On the fastener line on both sides, lay down 2 cm.
- Smooth lines connect these points with the points of the base of the neck.
What you need?
So, you have the fabric, the pattern is ready - it's time to start sewing. But first you need to take care that everything you need is at hand. To assemble the product you need:
- sewing machine;
- set of needles;
- needles for hand sewing;
- threads to the color of the fabric;
- chalk or soap;
- iron;
- adhesive non-woven;
- accessories (for example, buttons or zipper, if you decide to make a fastener).
Cut
If you have enough floor space or a spacious table, spread the fabric in one layer with the wrong side up:
- Overlay the pattern, pin it with tailor pins for convenience.
- Circle the pattern along all contours, including the cut for the fastener.
- Cut, leaving allowances of 2 cm for all sections, 3-5 cm at the bottom of the sleeves and 5 cm at the bottom.
- From the remnants of the fabric, cut a trim for the neck and a belt, if it is supposed to.
Assembly
There are few seams in such a product.To begin with - sweep the side on the wrong side, turn the product and try on. See if it will be necessary to lay folds on the shoulders, or just tighten the entire structure with a belt. After this, grind the seams.
If the coat is without zipper
If your coat is without a fastener at all, the procedure will be as follows:
- Cut out the pick - one piece can be, three can be, it all depends on how much fabric you have left. Their contours follow the contour of the fastener and neck, and the width is 3-4 cm.
- Strengthen the underboard with non-woven fabric.
- Fold the coat and collar with the sides facing each other.
- Stitch the subboard.
- Iron it on the wrong side.
- From the top side, at a distance of 3-4 cm, make a finishing line along the selection.
- From the wrong side, treat the edge of the pick with an overlock - since the fabric does not crumble, this is just for beauty.
- Hem the hem - it is not necessary to bend twice, you can make the edge in one layer.
- Hem the sleeves.
Option with zipper
In this case, a trim trim is made only for the neck. The order will be a little different:
- As in the first case, sweep and sew the side seams together with the seams of the sleeves.
- Process the neck with a trim trim.
- Cut the bottom and sleeves.
- Sew a zipper.
Important! Before you start sewing, find out what temperature the fabric withstands - it depends on how much the iron needs to be heated to iron the parts.
Neck Processing Options
Fiddling with a trim trim is not necessary. Other neck processing options are possible:
- stand collar;
- turndown collar;
- knitted collar.
Collar manufacturing is a separate technology. This requires some experience. But if you know how to knit, you can make a very interesting model. Threads are selected in the tone of fabric or contrasting:
- Sew the neckline with a buttonhole over the edge.
- From the stitches, get the right number of loops - you can pre-make a sample and calculate everything correctly.
- Tie a stand-up collar to a height of 5-8 cm with an elastic band 1x1 or 2x2, you can use a double elastic band.
- In the same way, process the lower parts of the sleeves.
A bit about other styles
Cape coat is made even easier. It is about the same as a sun skirt:
- Measure the length of the product.
- Measure neck circumference.
- Calculate the radius of the notch.
- Fold the fabric in half, aligning the edges.
- Find the middle of the fold.
- Draw a semicircle of the estimated radius from this point.
- From the same point, draw a second semicircle, adding the length of the product to the radius of the notch.
- Mark the edges of the slots for the hands.
- Designate a fastener.
to contents ↑Important! The sewing technology is the same as for a coat with a one-piece sleeve, but instead of the sleeves, you need to process slots - for example, trim parts.
Stock footage
In a word, modern fashion allows even a novice designer to come up with and do something interesting and non-trivial. The main thing is to evaluate the capabilities of the tissues, and they can be very unexpected, and their own capabilities.
- How to choose a vacuum cleaner taking into account the characteristics of the house and coatings?
- What to look for when choosing a water delivery
- How to quickly create comfort at home - tips for housewives
- How to choose the perfect TV - useful tips
- What to look for when choosing blinds
- What should be running shoes?
- What useful things can you buy in a hardware store
- Iphone 11 pro max review
- Than iPhone is better than Android smartphones


